Getting professional-sounding vocal recordings can be challenging, especially if you are new at it and don’t have much experience. You’re giving a good performance and making music that sounds beautiful, but the final recorded result isn’t up to par.
This is frustrating because, after several takes and countless hours, you feel burned out, and you don’t like how it sounds.
Sometimes, it’s easy to believe that getting excellent vocal recordings at home requires expensive equipment and professional-grade plugins to sound right. But you’ll be surprised to realize that correcting a few issues in the way you record can make a huge difference in the final result.
To record professional sounding vocals at home, you need to:
- Set the proper gain staging
- Maintain a healthy distance from the mic
- Avoid plosive sounds
- Be aware of sibilance
- Reduce background noise
This post will expand on these five tips for recording vocals that will make a big difference the next time you record your voice in a home studio setup. Hopefully, these tips will bring your songs up to a higher standard. Let’s take a look.
1. Set the Proper Gain Staging to Avoid Distortion/Clipping
Gain staging sounds like a pretty boring, tedious thing to worry about when you’re recording vocals. You want to just hear the right tone in your monitors before you start recording and go ahead with the take.
That said, a little preparation goes a long way in this case. Gain staging is a very simple tactic and a way to improve your recordings immediately.
The issue is that many people are recording far too loud right off the bat. There’s something in a loud recording that we opt for as amateurs, thinking that it captures more nuance or offers some benefit.
The reality is that you don’t need to record very loud at all. Some people worry about the noise floor being a problem when using digital audio interfaces. But most modern audio interfaces are 24-bit, offering plenty of headroom as they provide a super clean environment with negligible noise, delivering enough clarity for you to record at a lower volume than you might be now.
How to Set the Proper Gain on to Avoid Clipping and Distortion
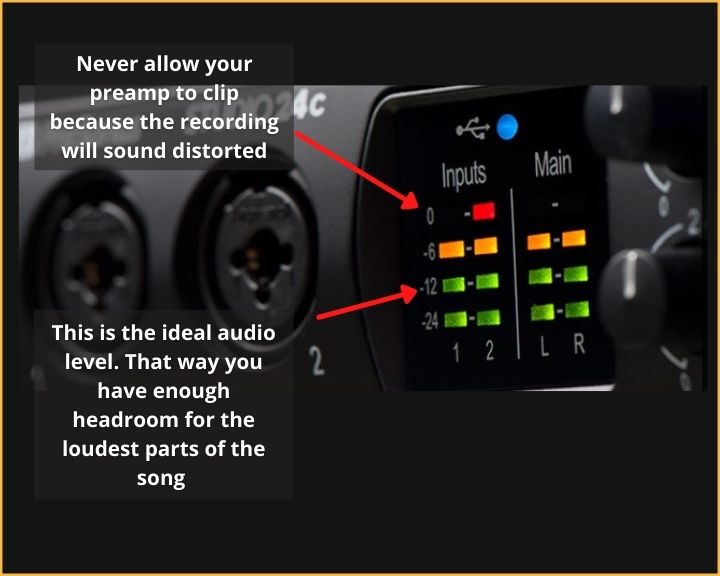
Most of the time, the clipping will happen right where you connect the microphone to the audio interface. In other words, the distortion occurs right at the mic preamp, and this is because the gain at the input of the audio interface is set too high.
Many people make the mistake of monitoring the volume level at the DAW rather than the interface itself. The audio level might seem ok at the DAW, but if it’s set too high at the preamp, your signal will be clipping right at the beginning of the audio chain and you might not even notice it at the DAW.
Just for clarification in case you don’t know, DAW stands for Digital Audio Workstation and it is the software you use for recording on your computer. Some of the most popular are: Logic Pro, Pro Tools, Ableton Live, Cubase, Audacity, GarageBand, etc.
A simple trick is to lower the gain at the interface’s input rather than at the DAW software.
You can make this adjustment while warming up before starting to record. First, look at the settings you’re currently using and run a few tests to see if the audio level is being maxed out.
The way you want to set the gain at the audio interface is to have the singer start singing and increase the gain until you see the clip LED light up. Doing this will give you an idea of the headroom you have before distortion.
At this point, lower the gain a notch and record a few sample takes to see the recorded level on the DAW. Repeat this test as many times as you need until you are confident that it won’t clip even on the loudest parts of the song.
In fact, it shouldn’t get anywhere near that top unless you deliberately want it to for some artistic touch. Make sure to turn the gain down to allow the singer to hit their full range without maxing out the volume meter. Ideally, your preamp won’t max out at all.
You want to keep the gain at no more than 60% so that if there are sudden loud parts in the song, the recorded signal is distortion-free.
This will keep your recording at a comfortable level that captures all of the nuances. It will also capture the vocal to the best of the microphone’s ability. It doesn’t take a great microphone to get a good recording if you can manage the settings well.

2. Maintain a Healthy Distance from the Mic
It feels really “cool” when your lips are up on the mic, you’re singing, and the needles are redlining while you belt out something you wrote yourself. We get it.
That’s kind of the recording session fantasy that we see in movies that inspire us. That said, the things they do in most movies aren’t always the things that will get you the recording sound you want.
In reality, it’s the smart choice to find the optimal distance from the mic and stick to it. Most microphones have a “cardioid” pickup pattern.
This pretty much means that the signal bows out and comes back around to capture the sound at a certain distance away from the mic. The closer you get to the microphone when you’re recording vocals, the more of the low-end you’re going to get.
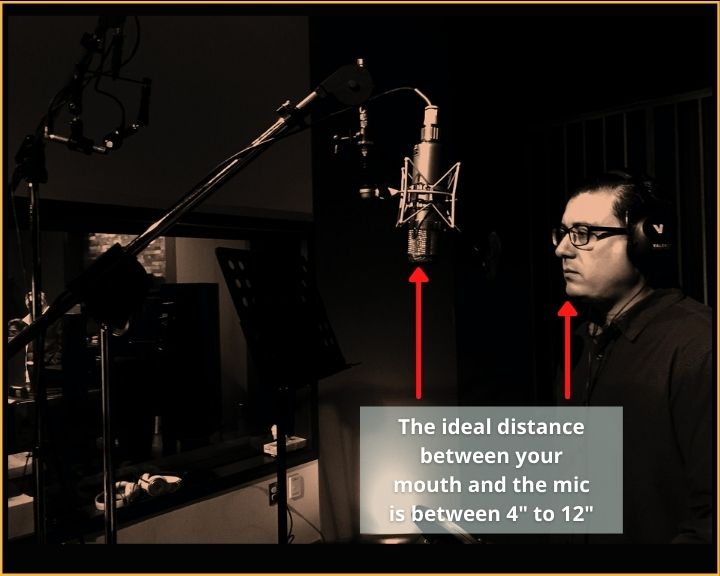
If that’s what you’re going for, then get as close as you want to. That said, a natural vocal tends to come from a person who is about 4 inches to one foot away from the microphone.
Another thing to consider is the impression that variations in distance have when you’re close to the microphone. When your lips are right up against the mic, it’s going to be noticeable when you remove them by an inch or two.
When you are standing farther away, slight variations in your movement won’t have as big of an impact. In fact, they won’t be noticeable. That gives you more range to move around and feel your performance without worrying about keeping your head in a single position.

3. Avoid Popping Sounds and Plosives
Popping sounds and plosives are instant disruptive high-level signals that might smack the needle all the way up and distort for an instant. They tend to happen when we make “P” and “T” sounds but could happen at any time.
They’re easy to let slip when you’re in the moment, but listening back to the recording will make them evident. It’s important to note that you can mix these things down, but it’s a lot easier to get on with the mixing and mastering process when you don’t have to deal with pops.
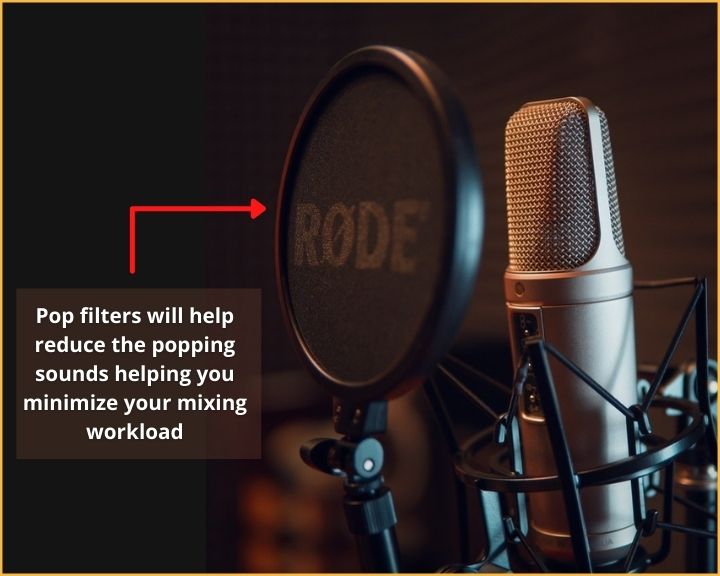
The first step in reducing these issues is by using a microphone pop filter. Pop filters will help reduce the popping sounds helping you minimize your mixing workload.
Once the filter is in place, make sure that it’s between 4 to 6 inches away from the mic. Then, make sure that your head is around 4 to 6” from the filter as well.
You can balance the distance of the filter in the middle of the head-from-mic distance we discussed in the previous section.
Situating yourself at the correct distance from the microphone will offer a balanced vocal tone, as well as the reduction of pops and plosives if you have a filter.
Another thing to note is that some performers utilize these plosives as a part of their art. If this is the case, try angling the microphone up and slightly away from your face.
If the microphone’s diaphragm is faced a little away from the direction of your mouth, those plosives can exist but not cause the track to redline.
This is a great way to try recording vocals if you don’t have a pop filter available.

4. Be Aware of Sibilance
Sibilance is a sort of brightness or excess presence of high frequencies in your vocal take. This is different from using a generally high frequency in the recording, as it’s distinguished by a disproportionate amount in certain parts.
In other words, sibilance exists in little bursts. It tends to come forward when we’re using “S” and “T” sounds. Instead of a plosive that bursts out into the mic, sibilance is more of a high hiss.
Make an “SSSS” sound right now. Do you hear that high frequency that rings over the top? No matter how low your vocal cords can get, the air blowing between your teeth and tongue will produce sibilance.
These sounds are difficult to get out of a recorded track. It’s a tedious thing to fix, and neglecting to do it makes a massive difference in the final result. So, you want to try and cut that out before you get to the mastering stage.
One thing you can do early on is to reduce the high frequencies in the recording session. Adjust those on your interface or DAW before you hit record.
One way to reduce sibilance is to explore head positions in relation to the mic. When warming up, put your headphones on so you can hear what you’re doing and make the corrective changes as needed.
Then, try to produce many sibilances as you speak, moving your head to find a location where the high frequencies aren’t as stark.
Doing this and adjusting the frequencies before you record will help you get a better take that doesn’t need to be edited as much.
Remember that having a clean raw take is what you should strive for when recording vocals. Not doing so will require a lot of tedious editing that can be avoided by just prepping and testing ahead of time.
5. Reduce Background Noise
Our final tip for you is to find ways to reduce background noise. Our small bedrooms are reflective to sound, and there’s a good chance that outside noise might enter your room and the recording.
A car driving by, for example, is a common sore spot for a lot of recording artists. The great thing is, there are plenty of ways to reduce background or reflective noise as much as possible.
The simplest solution is to invest in a small reflection-blocking filter. These tend to wrap halfway around the back area of your microphone and prevent additional sound from hitting the mic.
If you are in a pinch and don’t have that equipment, you can always create a makeshift vocal booth that blocks out sound. Try using fabrics and soft materials that don’t have a hard surface for sound to bounce off. Here is an article that explains how to build acoustic panels to reduce sound reflections.
Think about standing in a large gymnasium. You shout from one end of the room, and your voice echoes around for a moment before drifting away. Now, imagine that all of the walls and floors of the room are made of thick cloth.
It’s as if there are blankets on the walls and ceilings. When you shout, you’ll hear your voice only so far as it travels to the closest wall. After that, it’s muted.
So, create a space that mutes your voice when it reaches its first point of contact. This allows the microphone to pickup only your voice and not all of the reflections of the room.
Need More Tips for Recording Vocals?
Hopefully, our tips for recording vocals were helpful to you as you try to refine your process. There is a lot more that you can dive into if you want, though, and we’re here to help you explore.
Explore our site for more insight into recording, professional audio tips mixing, mastering, and much more.