Live streaming revenue is expected to rake in over $70 billion in the next year. Are you prepared to take your piece of that pie?
It’s expected that the majority of internet traffic will be focused on live streaming. As a musician, this is an amazing opportunity to get more listeners — but only if you know how to take advantage of this moment.
Going live on video isn’t easy. There’s a lot that goes into it to make sure you have the best quality sound, video, and more to ensure your fans, both new and old, can see the best you have to offer.
We’ve got the definitive guide to live streaming your next performance. Keep reading to learn how to rock your next live online performance.
The Best Live Streaming Equipment
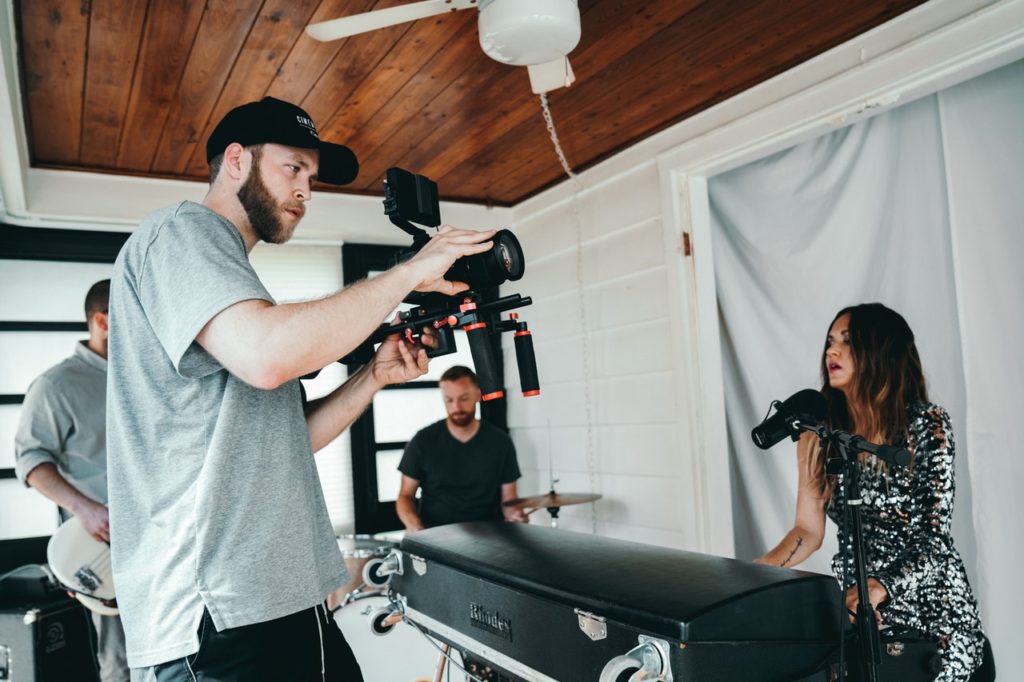
As a musician, you know how essential it is to have the right gear. When live streaming, you’ve got to make sure that what you use to live stream is just as good as what you use for your live gigs.
What will you be using to stream your performance, your phone or a DSLR camera? Both have their pros and cons to consider.
Using Your Phone To Live Stream a Music Performance
Your phone is the easiest to use. You can easily access any live streaming apps from your main screen, and you can set it up with a tripod. The setup is fast and easy.
You won’t have access to as many filters or effects as you would if you use a DSLR. The trade-off is that it’s also easy to interact with your audience immediately.
One of the main disadvantages of using your phone is the low audio quality. The phone’s mic is not designed to pick up all the nuances of the performance.
There are some workarounds on this issue. One way to use an external condenser microphone specifically designed for phones.
Something like the Shure MV88+ is the perfect choice because it is a stereo condenser mic that will deliver an excellent sound, way better than the phone’s standard mic.
Live Streaming a Music Performance Using a DSLR Camera
If you use a DSLR camera, you’ll need to hook it up to your laptop or computer with a USB connection. However, your streaming images will look much better than what you get from your phone’s camera.
Another advantage of using a DSLR camera is that by connecting it to your computer, you have more flexibility to use multiple cameras for different angle shots. It also allows you to use an external audio interface or USB mixer for connecting as many microphones as you need.
To control everything connected to the computer, you can use a free, open-source, cross-platform streaming, and recording program such as OBS Studio.
Suppose you prefer to have a more straightforward setup, and you’d rather only use the DSLR camera. In that case, you can opt for using an external mic that hooks up to the camera for picking up better quality audio from the live performance.
Stereo condenser microphones like the Sennheiser MKE 440 and the Tascam TM-2X are perfect for delivering fantastic audio quality without needing a big setup with several mics connected to a mixer.
Click the link for a complete list of the best microphones to use with an DSLR camera that deliver excellent audio quality for live streaming or video recording.
Using IP PTZ Cameras for Live Streaming your Next Music Performance
Wouldn’t it be nice to have a live streaming system that one person controls and be able to get high-quality video and achieve it by using a handful of equipment?
By utilizing a couple of PTZ IP cameras, a hardware video controller, and a computer with OBS Studio, you can have a live streaming multimedia system that one person can control, delivering excellent video quality.
In case you didn’t know, PTZ stands for Pan, Tilt, and Zoom. Usually, these types of cameras are used in surveillance systems. They can be controlled by a software app or by using hardware controllers. Modern PTZ cameras can deliver 1080p @30fps HD video quality. You can even get higher-end ones that can provide 4k quality video.
The hardware controller has a joystick that you would use to move the camera for pan, tilt, and zoom. I have written a complete guide presenting step-by-step instructions on building a budget live streaming system using IP-based PTZ cameras and joystick controllers. Click the link to check it out.
Your Venue Setup
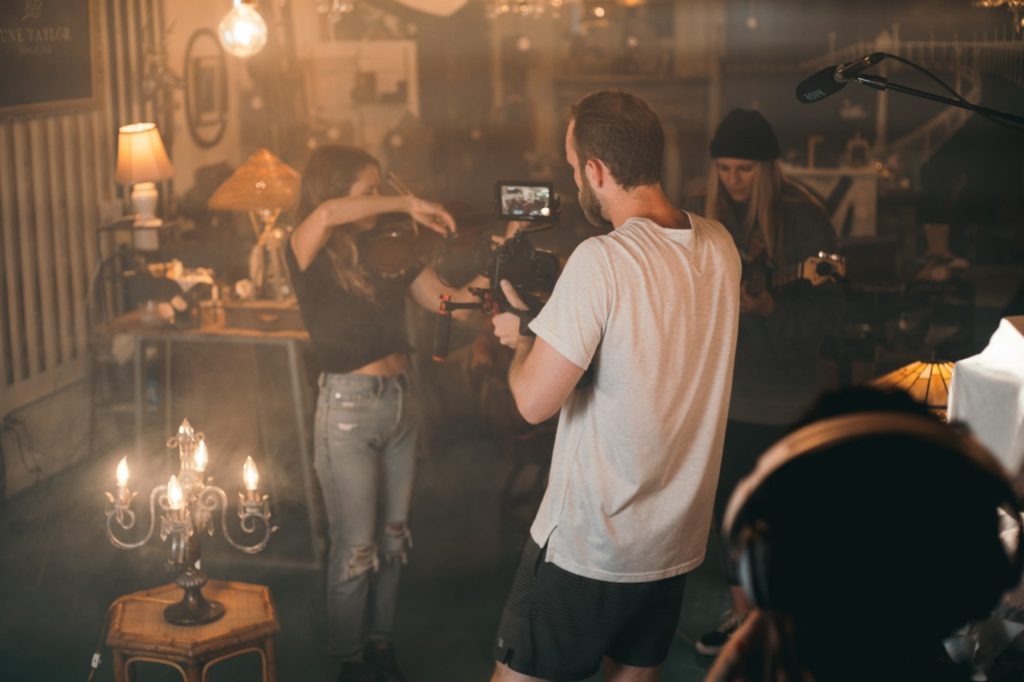
When people tune in to your performance, what will they see? What’s your sound quality like?
Live venues have their unique challenges, but so does live streaming. Not only do you need to sound great, but you also need to look great too.
It doesn’t matter if you are streaming from your bedroom or stage; you have to make sure that it looks pleasant and inviting. This doesn’t mean that you have to spend a lot of money.
You can use what you already have or buy a few inexpensive things that will take your setup to the next level.
We’ve talked about using your phone vs. using a DSLR camera. Once you’ve got your video streaming equipment locked in, it’s time to talk about what your audience will see when they tune in to your online show.
Create Nice Visuals
Setting up a simple lighting rig will help your audience see you clearly. Read up on the three-point lighting to understand the basics of showing up right on camera.
Make sure your background looks nice, too. Hanging up a curtain and using some cheap fake plants to fill in gaps behind you is an affordable and straightforward way to create nice visuals.
To make your performance look more intimate, you can add multicolor LED light strips around the perimeter and choose a color that goes with your performance’s mood. This simple tip also adds personality to your live streaming performance.
If you rather have a stage-like lighting setup, we’ve put an article walking you through some simple, cheap stage lighting tips that can help you get a professional lighting rig that doesn’t break the bank.
Use some blotting paper or even a light dusting of translucent powder if you think you’ll look too shiny on screen. Do a test run of your setup before you go live to make sure you look your best.
Have the Right Sound
As mentioned earlier, your phone or camera’s microphone is not good enough to deliver the best quality sound. As a musician, you can’t afford to ignore how you sound when streaming live.
Remember that sound is 50% of the overall experience when live streaming your performance. If your setting looks fantastic and your video quality is spot on, but the audio quality is low, the listening experience will be affected, and your audience won’t like that.
Multiple Microphones Can Deliver Better Audio
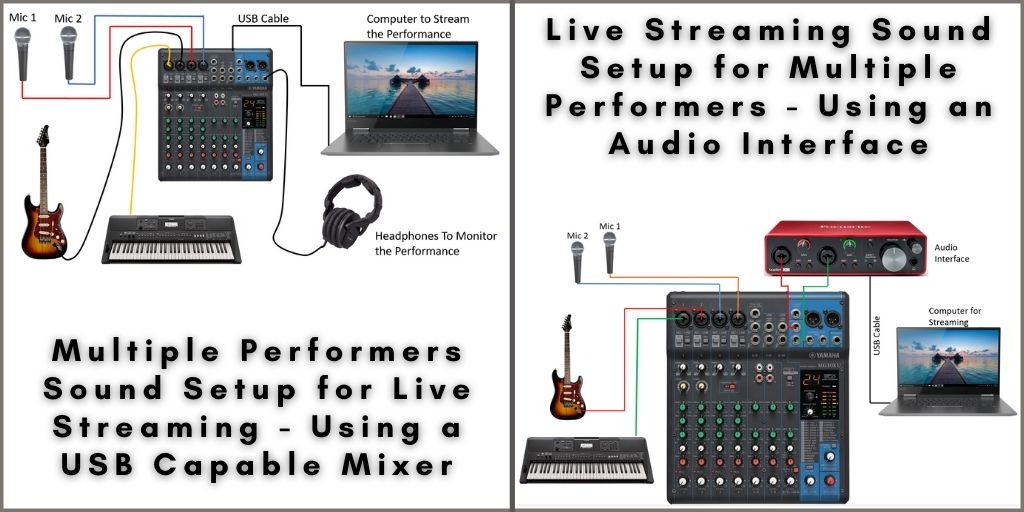
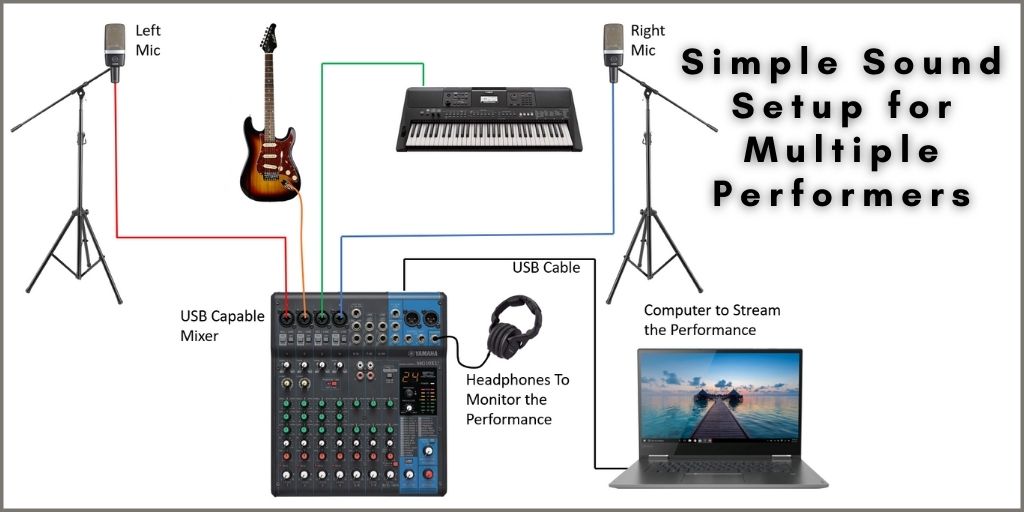
When a band performs for live streaming, it is better to set up several microphones. If possible, use one mic per performer connected to a mixer for better audio quality. Basically, your setup will be similar to the one used when performing on a live gig.
If you decide to go this way, use a mixing board that is USB capable—that way, you can send the audio signal straight to the computer for streaming.
Suppose your audio console doesn’t have a USB output. In that case, you can use an audio interface to connect the mixer to the computer.
We have a full article on how to connect an analog mixer to an audio interface. Click the link to check it out.
Single Performer Sound Setup for Live Streaming
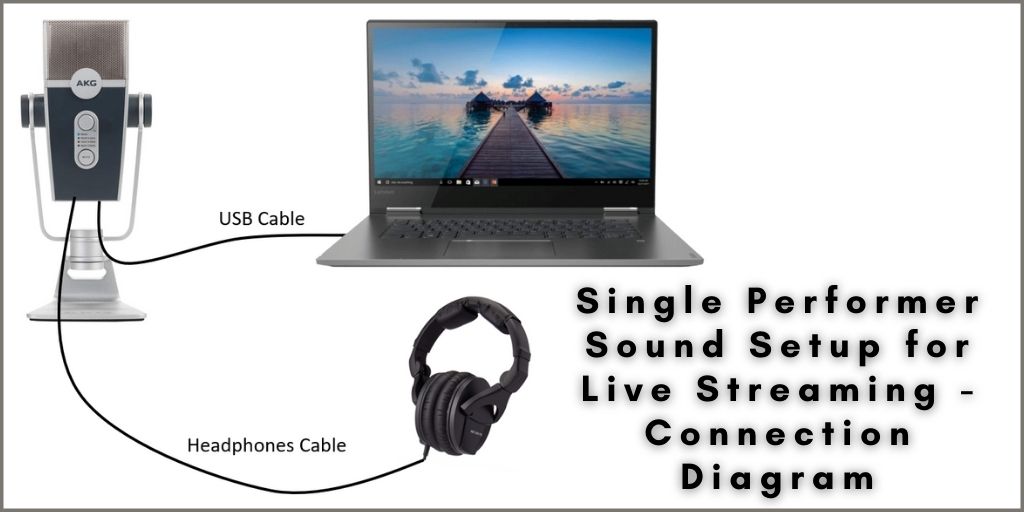
For a more straightforward setup that still delivers good quality audio for your audience, invest in a good external USB microphone. You can find reasonably priced mics that will go a long way towards making you sound more professional.
Suppose you’re a single performer or a small 3-person band and have a tight budget. In that case, you could use a single stereo condenser USB microphone connected to the computer to pick up the sound.
Something like the AKG Lyra Ultra-HD or the Blue Yeti would deliver high definition sound when live streaming your next performance, and both are stereo microphones.
Multiple Performers Sound Setup for Live Streaming
Have a band with four or more performers? To capture all the performance with great detail, you can use two overhead microphones to get better stereo separation while delivering high-quality audio.
For this setup, a couple of matched pair AKG C-214 with mic stands connected to an audio mixer like the Yamaha MG10XU allows you to equalize the sound to fit the situation best.
This setup has the added benefit that the MG10XU comes with an audio compressor to normalize the signal level while maintaining the sound’s dynamics. Plus, it is USB capable for easier integration with your computer. It also has phantom power.
The C-214 is a condenser mic, and as such, it requires phantom power to work. Make sure that the device you are going to use to connect it has phantom power.
If the AKG C-214 is out of your price range, figure out how directional your mic is when picking up sounds. Placing it where you sound best and where other elements of your performance won’t get in the way is crucial.
Simpler Sound Setup for Multiple Performers
Don’t want to use an audio mixer in your setup at all? That’s fine; just make sure to minimize distortion by using a limiter at the end of your audio chain.
Suppose you are using a two-channel audio interface like the Focusrite Scarlett 2i2 to connect a couple of SM-58’s to pick up the performance. Make sure that the signal coming into the computer from the interface is not distorting.
A good rule of thumb to avoid distortion is to check the audio level meter on the streaming platform. Don’t let the audio signal level to go into the yellow or red area. The last thing you want is for distortion or feedback to ruin your live stream.
The limiter doesn’t have to be hardware-based. Platforms such as Zoom have audio limiters embedded in their algorithms to avoid distortion.
As with your video, you need to test your sound before you go live. Keeping surprises and technical difficulty to a minimum is key to putting on an outstanding live stream performance.
Choosing a Streaming Platform
Most social media sites have an option to go live. Choosing the best option comes down to a few different factors.
First of all, where is the majority of your audience? If you have a large following on Facebook or get lots of likes on your YouTube videos, you’ve got your answer.
Second, what’s the easiest platform for you to use? Each one has its pros and cons.
Read up on each one’s specifications to make sure you get the most out of your live stream. Things like audience interactivity, filters, or effects, and more can sway you one way or another.
If you have a large following on several social media platforms, try streaming simultaneously to all of them to reach as much as possible all of your audience.
Before Going Live
You’ve got your set up, your setlist, and you know what you’ll be using to broadcast your live performance. There are still a few more things you should do before going live.
Internet Bandwidth Requirements for Live Streaming your Performance
Ensure that your internet connection has a large enough bandwidth so that the streaming quality is good. If possible, have a backup internet connection just in case the main one fails.
Your upload speed should be at least 10Mbps to deliver 1080p video quality to the streaming platform. If you want to live stream at 4K, my recommendation is to have an upload speed of at least 25Mbps.
Test Your Live Stream Without an Audience First
You should practice live streaming before the big event. Here’s how to do it on Facebook:
- Select “Go Live” on Facebook
- Before you start streaming, click the “To” menu to select your audience
- You’ll see options to make your stream public, only available to friends or a group, or only to yourself
- Live stream your entire setup just to yourself to catch and fix any issues ahead of the main event.
This is your best option to make sure you’ll look exactly how you want to look when you perform. Make sure you have enough backup batteries if using wireless devices to do your entire show.
As you can see, those audience options give you the ability to broadcast to just a small group of people. You can do your performance as a live exclusive or make it available to the public to gain more listeners.
You might be able to monetize your performance as well. Be careful if you’re doing covers, though; you might get shut down for copyright infringement.
Live Streaming Your Next Performance the Right Way
Streaming online is different than performing at a live venue. With our guide, you have the tools you need for live streaming your next performance the right way.
Since you’ll be performing online, don’t forget the work you need to do before and after the performance.
Promote your stream on your social media channels, and don’t forget to interact with your fans and thank them for coming.
If you liked this article, we’ve got plenty more to make your performances shine. Check out our guide on getting the best audio at your next live gig!