There are situations in which an audio interface doesn’t have enough channels for everything you want to mix and record. An example is a band that wants to record the live performance of what’s coming out of the PA system by taking a line out from the mixer to the audio interface and then recording it into a laptop.
Another example could be a DJ that wants to connect the DJ mixer to the audio interface to record the music mix. There are many other cases in which you would want to use an analog audio mixer to record the audio to your computer digitally; and an easy and effective way is by using an audio interface.
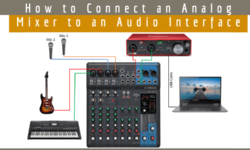
In this post, I explain how to connect an analog mixer to an audio interface for recording, let’s dive in.
Step by Step Guide to Setup an Audio Mixer to the Interface
This is What You Will Need
- An audio mixer with available line-level output.
- Two TRS to TRS cables (Balanced Cables).
- An audio interface with two inputs.
- Laptop for recording the audio coming from the interface.
1. Locate an Available Line-Level Output in the Audio Mixer.
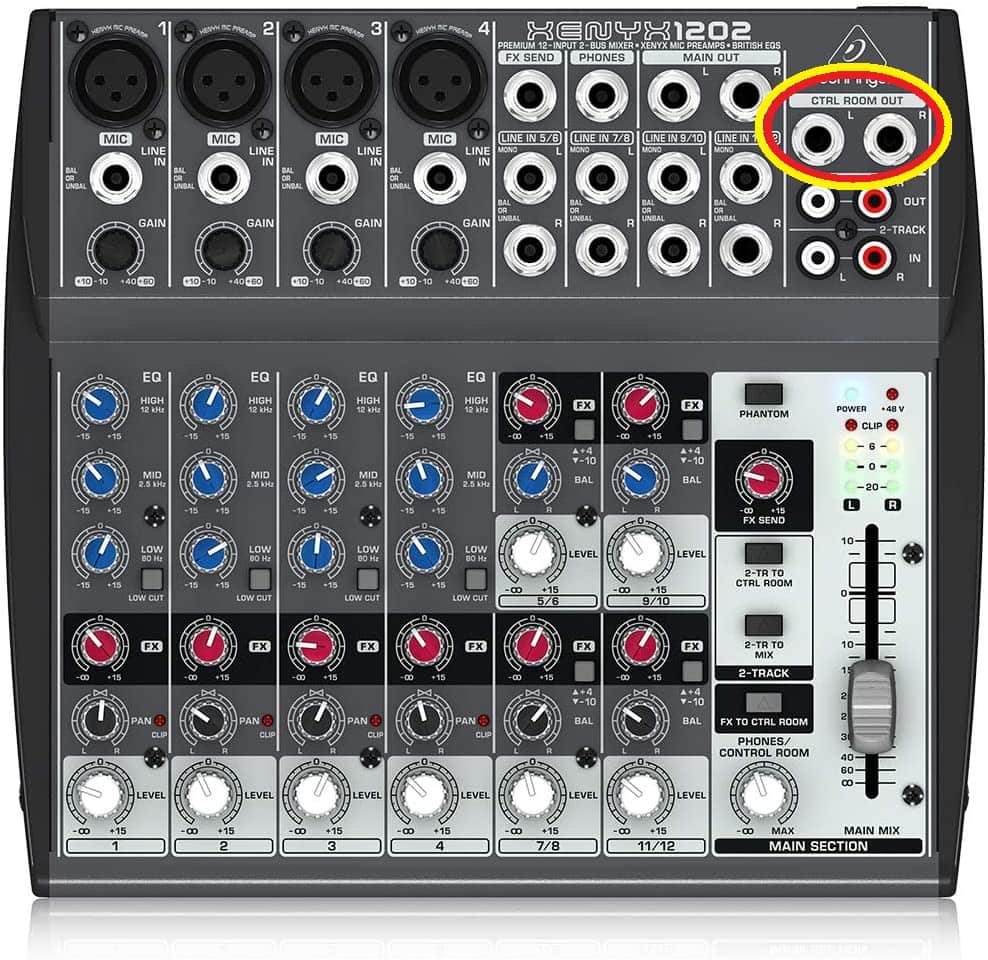
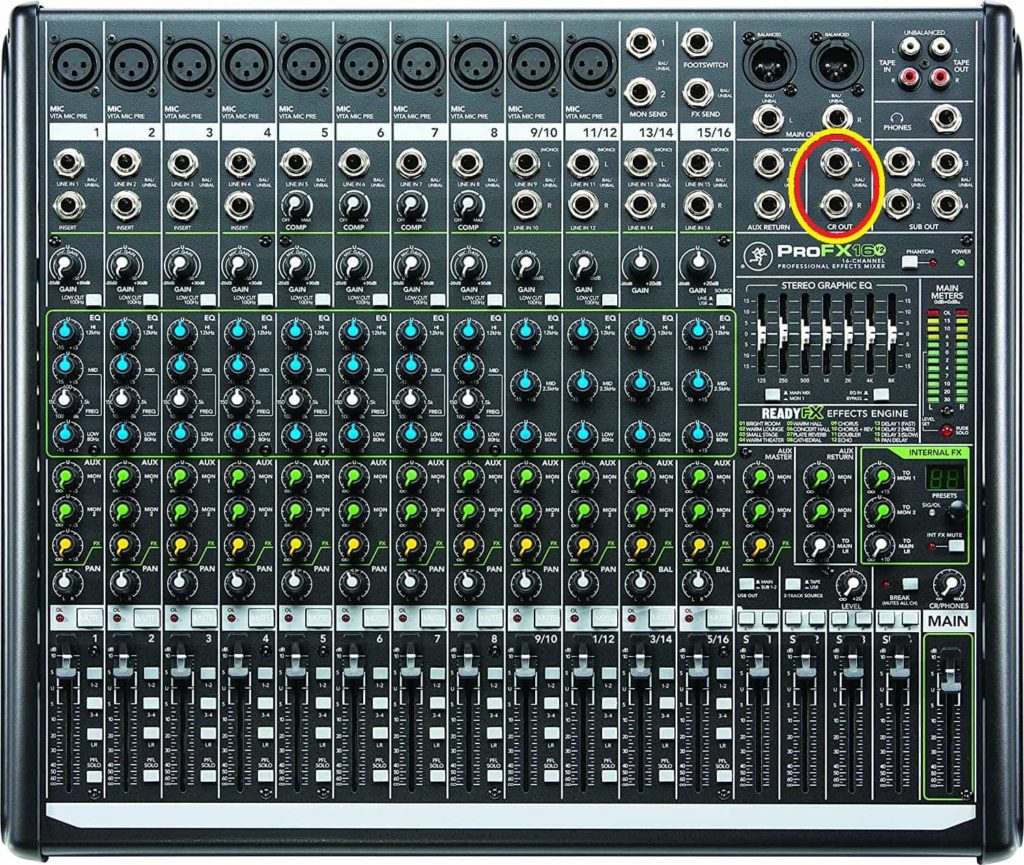
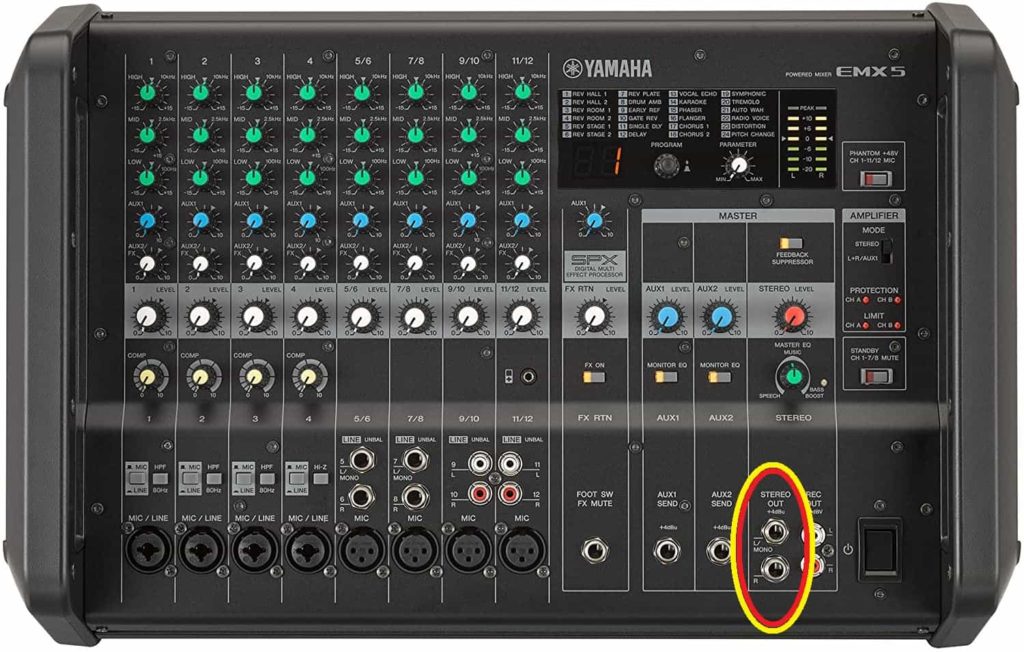
Most mixers provide line-level outputs for connecting monitors or for taking a line for recording purposes. You can use the output labeled “CTRL ROOM,” “CR OUT,” or “STEREO OUT.” Depending on the brand you use, the name could be different, but they do exactly the same. Below I have included some pictures as reference of different brands of audio mixers showing the output connectors you need to locate.
Keep in mind that in most analog mixers, there is a pair of RCA connectors labeled “REC OUT,” “TAPE OUT,” or just “OUT,” which are intended to be used for recording to tape cassettes or tape reel recorders.
Although this connection is intended for recording, I don’t recommend using it to connect the mixer to your interface because this output is not balanced, meaning that the connectors and cables are not shielded. A balanced connection uses shielded twisted-pair cable and three-conductor connectors specially designed to be immune to line noise.
If you decide to use the “REC OUT” anyways, you’ll still get a decent quality audio signal, but you might find some noise in the line.
You could also use the “MAIN OUTPUT” from a line-level mixer to connect it to the audio interface if you don’t intend to connect powered speakers or amplifiers to the mixer.
Note: Never use the main output from a powered mixer. This output is not line-level; it is used to connect Loudspeakers. If you connect your interface to this output, it will be damaged.
2. Setup the Audio Interface to Receive the Signal From the Mixer.
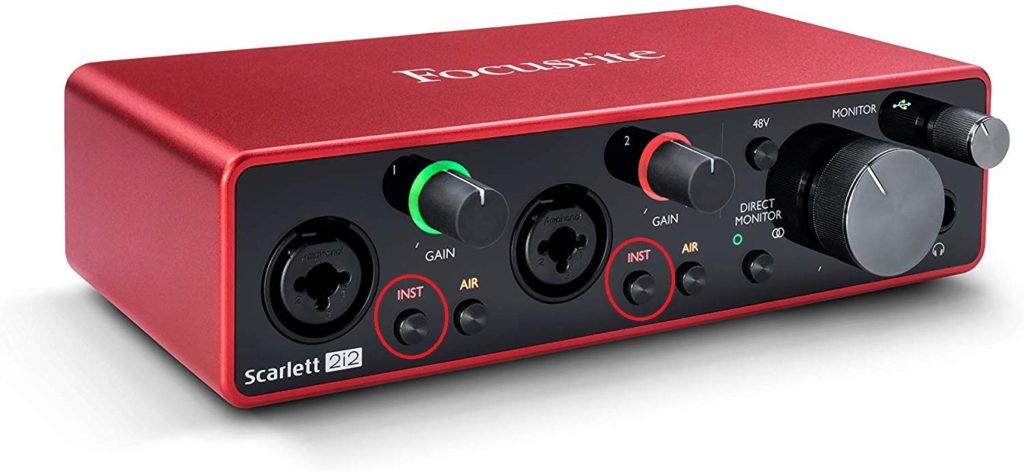
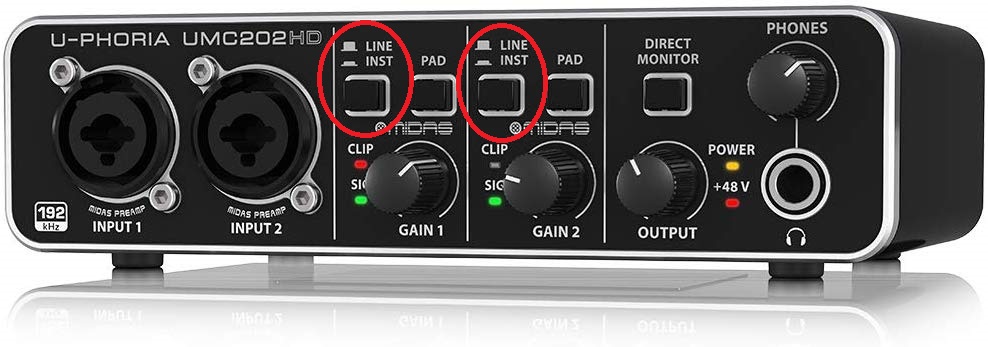
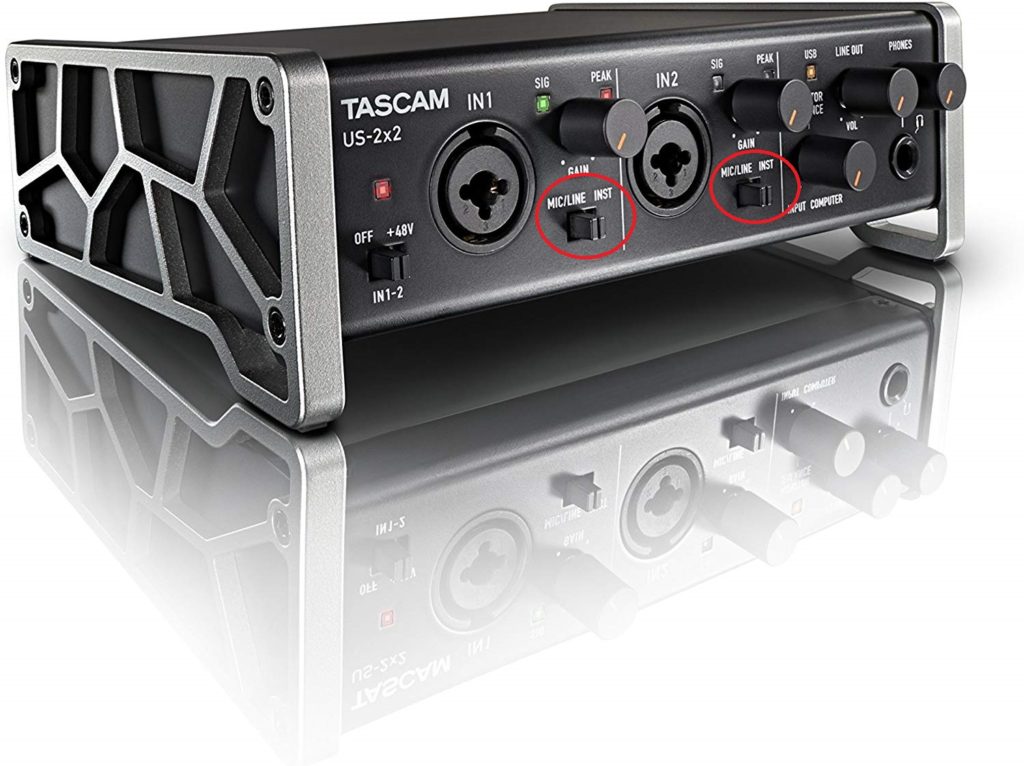
All audio interfaces provide you with the option of connecting a microphone or line-level input/instrument. In our case, we need to select the option that is labeled “Line” or, in some cases, is labeled “Inst.” The reason is that by switching it to “Line,” it decreases the gain internally so that the audio doesn’t distort when recording.
Check your interface and locate the selector and make sure to switch it to LINE/INSTRUMENT.
Here are some pictures for your reference on where the selector for Line/Mic is located on different brands of the most popular audio interfaces. Check out our post of the Best Audio Interface on a Budget.
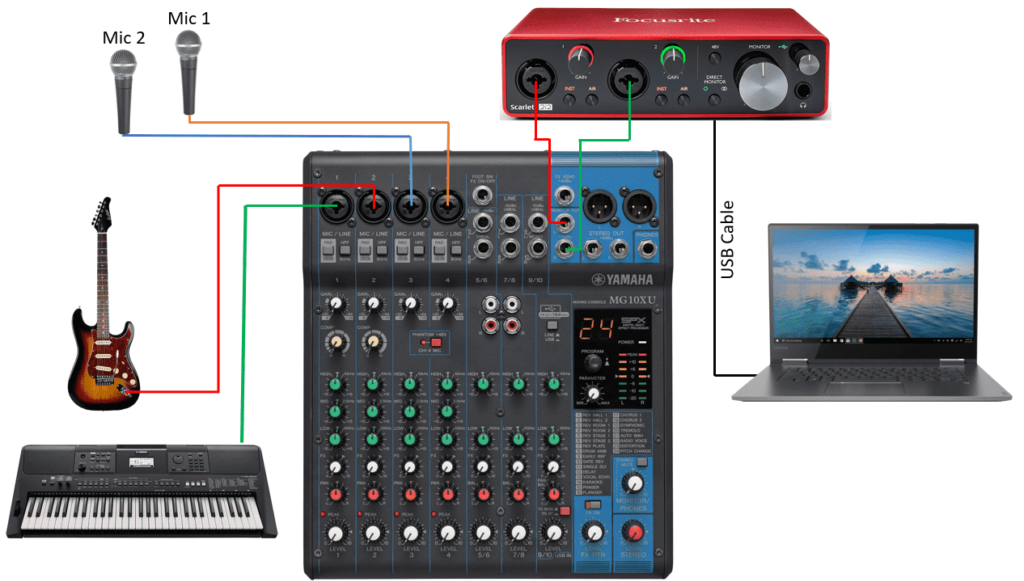
3. Connect The Two TRS Phone Connectors From the Mixer to the Audio Interface.
After you’ve located the line-level output that’s available in the mixer, use the two TRS balanced cables to connect the “L” (left) from the mixer to “Input 1” and “R” (right) to “Input 2” of your audio interface.
Make sure the audio interface is turned off while making the connections. Also, turn the “GAIN” knob all the way down so that there is no signal passing through when you turn the interface back on.
Here is the diagram of the connections you need to do.
4. Set Gains and Levels Correctly to Get a Clean Signal for Recording.
At this point you have everything connected, it’s time to set the gains to the correct levels to get a clean audio signal for recording.
With the interface off, use a microphone connected to the mixer to set the levels.
Start by bringing the gain knob of the mic all the way down; the gain must be set to zero at this point.
Bring the volume slider for that channel to the middle position. Do the same to the “CONTROL ROOM” output knob or if using the “MAIN OUTPUT,” bring the main slider to the middle position.
Start speaking into the mic and slowly increase the gain knob for the mic until the “MAIN METERS” or “VU METERS” start lighting. Check the audiometer while you are speaking and keep increasing the gain until the 0dB LED stays on.
Connect the interface to your computer and turn it on. Slowly increase the gain on both channels at the same time until you see the volume level meters on the recording software at -20dB. This ensures that the signal is clean and not distorted.
You’ll never want to have a volume that turns the clipping Red LED on. I would always keep it in the green area, maybe the first yellow, but never allow the volume to go more than the second yellow LED because the audio will distort.
If you have a band or musical group, my recommendation is to play a song and check the levels in the mixer and audio interface and adjust accordingly, always making sure that the signal is not too loud so that the recording is not distorting.
When ready to record, press the record button in the software and start recording.
Conclusion
In this post, I have explained the correct way of connecting and setting up and analog mixer to an audio interface, I hope it is helpful for you. If you have any questions or comments, please leave them in the comments section below. Thank you for reading my blog.