Setting up a home recording studio used to be an EXPENSIVE affair. It takes a huge amount of planning, research, and budgeting…doesn’t it?
Well, many people think that building a studio at home would cost as much as buying a house.
The reality is…getting started is way CHEAPER than you imagined. Because let’s face it, all you need is a few pieces of gear and software.
If you want a quick answer, here it is… To build a home recording studio, all you need is an audio interface, software (DAW), a microphone, a pair of headphones, XLR cable, a mic stand, pop filter, and acoustic treatment.
And the good news is that the prices are a fraction of what they once were.
In today’s article, we’ll tell you exactly what you need. So, let’s get started, shall we?
Why You Need to Keep it Simple and Basic
For beginners on a budget, deciding on the ideal home recording studio essentials for one’s needs can be challenging and time-consuming.
For most, it usually means experimenting by trial and error, and the “error” part often inflates the final cost.
The truth is, it’s possible to start with a basic home studio. In fact, it’s advisable to start small.
Because, just like all other hobbies, starting too big too soon could:
- make you overwhelmed
- make you discouraged, and
- make you quit
And all the time and money you’ve invested goes to waste
So to avoid all this, it’s better to keep things basic and simple when starting off.
One question that’s in everyone’s mind now is…
Exactly How Much Will a Basic Home Studio Cost?
It won’t cost thousands of dollars of investment in gear to create exciting music and soundtracks.
High-quality music production is now possible with as little as $400.
Students and beginners with low income often express their desire to create a working studio but are hindered by startup costs.
This post is for beginners who want a simple home studio setup to slowly upgrade their equipment and capabilities to a professional level.
We will share a few suggestions for cheap recording studio essentials as well as brand solutions that won’t break your bank and still deliver excellent results.
We will confine our post to ‘in the box’ sound production, but most of what we recommend can also work for live performances as well.
This article is mainly for bedroom producers who would like to set up a working studio at home for less than $400. Still, the principles also apply to amateur and professional sound engineers and artists alike.
Here’s our full recommendation:
The Complete $400 Home Studio
With the following 8 items, you have a complete home recording studio, perfect for anyone just starting out:
- Audio Interface
- Software (DAW)
- Microphone
- Headphones
- XLR Cable
- Mic Stand
- Pop Filter
- Acoustic Treatment
We are assuming you already own a computer.
Your computer shouldn’t be the latest MacBook Pro with every fancy specification you can think of.
An average laptop will do, but, of course, it shouldn’t be a secondhand machine that’s 10 years old.
If you are an Apple user, we usually recommend a recent iMac, Mac Book Pro, or a Mac Mini. Instead, if you use Windows, make sure that your PC is not more than 5 years old. Keep in mind that most creatives in the sound industry prefer Mac Computers.
It’s essential to ensure your computer will run your plugin instruments, DAW, effects, and any other relative software without any problems. Also, make sure your DAW is compatible with the computer’s OS.
Your computer will be the centerpiece of every operation. For this reason, it is a very important part of creating a working home studio.
Now, let’s go ahead and talk about each piece of gear on our list, along with how much you’ll need to acquire them.
1. Audio Interface
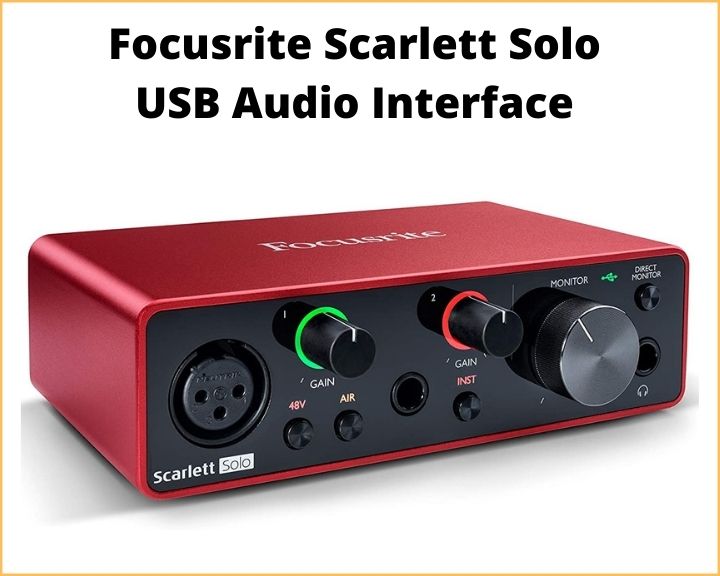
The first thing you will need for your home studio is an audio interface.
An audio interface is essentially a tiny box that allows you to connect microphones, instruments, and any other sound output to it. Then it converts the analog signals to digital and relays that information to your PC via the USB cable.
Unless you want to solely use virtual instruments in all your productions, you’ll have to buy an audio interface.
A poor quality audio interface will hurt your sound output, so shy away from really low-end models.
The good news is that you can get an excellent audio interface for as cheap as $120.We recommend on the lower end the Focusrite Scarlett Solo.
It comes with one mic preamp at the front and a second channel for connecting a bass, guitar, keyboard, or any other instrument that can send a signal.
With two inputs, you can record two instruments simultaneously. It also offers a latency-free headphone jack connection that you’ll use to monitor your recording.
The audio interface connects to your computer via a USB cable. Then, any software you decide to use to record will detect the interface, and you’ll start recording your tracks in no time.
The Focusrite Scarlett Solo is hands down the best audio interface in the $100 range. It is easy to use, it can record audio at very high sample rates and lets you get high-quality audio from professional microphones, either dynamic or condensers, into your PC.
Money spent – $120
2. Software (DAW)
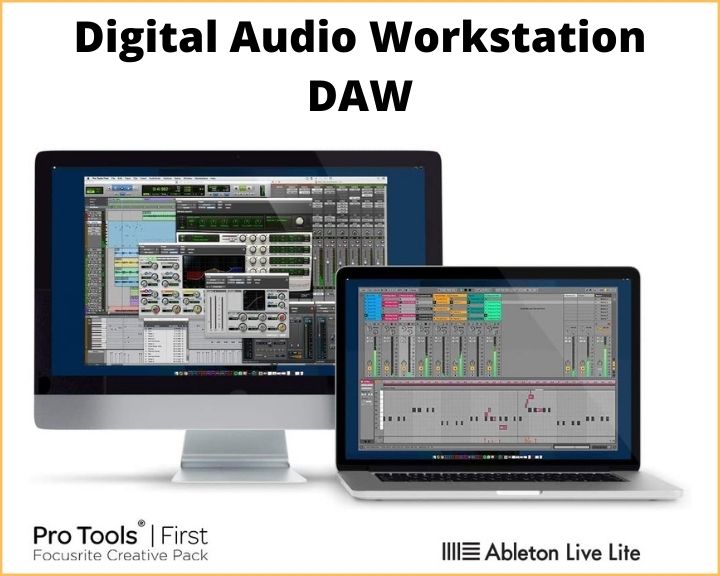
The second thing you’ll need is a music production software, also called Digital Audio Workstation or DAW for short. With this software where you’ll produce, record, mix and master your tracks.
A good audio production software should be able to record and have other audio manipulation effects such as equalization and compression.
With a good DAW, you’ll turn your ideas into sounds and tracks. Then adjust and edit your sound with the required effects. And lastly, mix and master your tracks into a song.
Buying a DAW software can be expensive, but I’ve got good news. When you purchase the Focusrite Scarlett Solo, you get two pieces of FREE high-end software: Ableton Live Lite and Pro Tools.
Ableton Live Lite and Pro Tools are super powerful software that can record, edit and export audio. They help complete your mixing and editing tasks from the first idea to the final mastering of the track.
It’s no wonder the most prominent names in the industry, including Avicii and David Guetta, use these software to produce their hits. And you can also use them for free when you purchase the Focusrite Scarlett Solo because they come bundled with it.
Money spent -$0
3. Microphone
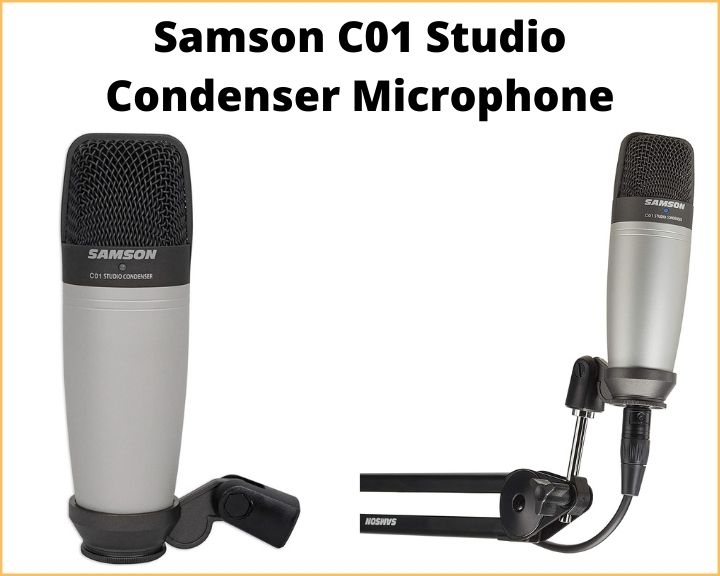
As your home studio grows, you’ll eventually need a variety of different microphones, each for a specific purpose. But for now, all you need is 1 or 2 mics to get started.
The mic you choose will mostly depend on the instruments you have.
Since most of us start out recording vocals, your home studio will need a large-diaphragm condenser vocal microphone.
A condenser microphone is a type of microphone that can pick up sounds with great detail and accuracy. It captures an extensive frequency range and has an excellent transient response.
We recommend the Samson CO1 microphone ($79). It’s one of the best investments you’ll make when starting. It is perfect for vocals, pianos, and stringed instruments.
It has a balanced bass response and high-end clarity. It also has a low-frequency roll-off to get rid of unwanted background noises.
It provides you with a lot of value at its price point. It works beautifully and has an excellent quality build. It will plug right into your Scarlett interface mic preamp.
Because condenser microphones need phantom power to work, don’t forget to activate it on your Focusrite Scarlet.
The good thing is that the Focusrite audio interface got you covered. It provides the necessary voltage for your mic just by switching a button.
Money Spent – $79
4. XLR Cable
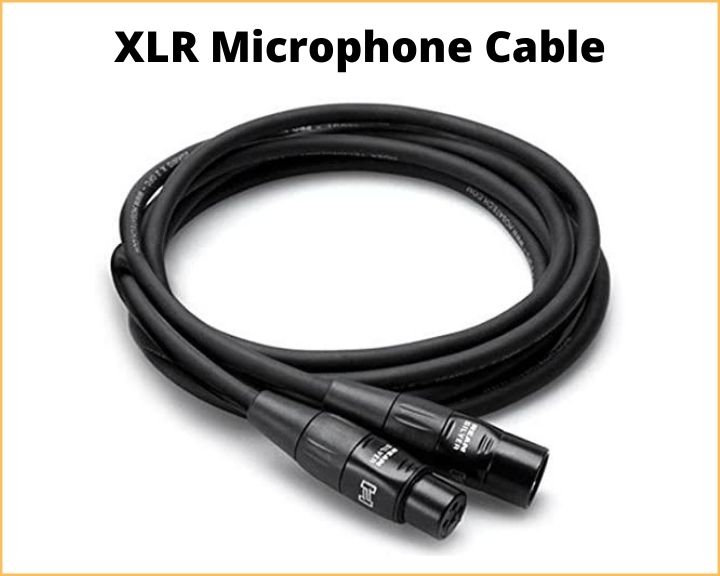
Someday soon, your home studio will have a variety of different cables. But for now, you’ll only need one XLR cable for your microphone.
An XLR cable is the one whose connectors are round and have three pins at the end.
For a simple home studio set up in a small room, we recommend getting a standard 10-20 foot cable for around $30.
I like the Hosa brand of cables. This company makes excellent products, and the prices are really good.
Of course, you can get any brand you prefer, but Hosa has proven to deliver excellent quality at the right price.
If you plan to use a different audio interface than the one recommended in this post, before you buy the mic cable, double-check that your audio interface’s input has XLR connectors.
That’s because sometimes, they have TRS connectors, in which case you’ll need TRS cables.
You’ll notice that a good XLR cable won’t cost you an arm and a leg. With just under $30, you’re good to go.
Money Spent – $28
5. Headphones
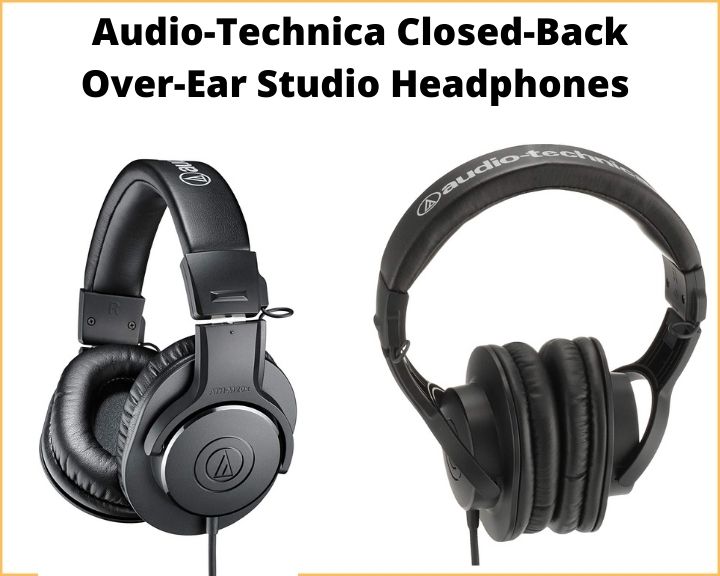
When starting, you’ll spend most of your time recording by yourself. This is why you’ll only need one pair of good headphones in the beginning.
There are two types of headphone designs used in recording studios: closed-back headphones (primarily for tracking) and open-back headphones (mostly for mixing).
As the name suggests, closed-back headphones offer maximum isolation. They don’t allow any outside noise to mix with headphone’s output. Open-back headphones allow outside noise to mix with the headphone’s output.
Generally speaking, open-back headphones offer optimal sound quality, while closed-back have lesser sound quality. While open-back is considered a luxury when starting (as they are more expensive), closed-back headphones are necessary.
My recommendation is the Audio-Technica ATH-M20X headphones ($50). This is an excellent pair of closed-back over-ear professional mixing headphones for live monitoring and mixing.
They offer a superior standard of comfort, even over long periods of use. They are designed to avoid any discomfort after extended use.
The special foam conforms to the shape of your ear to ensure a perfect fit. You’ll appreciate the highly accurate, comprehensive, and natural frequency response it delivers. Best of all, you’ll get a lot of value for your money.
Money Spent – $50
6. Mic Stand
Most beginners assume that all mic stands are equal, and therefore buying just any mic stand will do.
This couldn’t be further from the truth.
Not all mic stands are created equal. And a quality mic stand will play a vital role in any new home studio.
That said, mic stands don’t come cheap. But because we are working with a tight budget, you’ll need an affordable but reliable mic stand.
I usually recommend that you buy a tripod mic stand over a round-base. The reason is that tripods are more stable and have a boom arm, so you can place them in any position you want.
If you are recording drums, the boom arm gives you a lot of flexibility. Instead, if you are recording vocals or acoustic guitars, the tripod stand with a boom arm will make positioning the microphone very easy.
A decent tripod stand will cost you about $30.
Money Spent- $30
7. Pop Filter
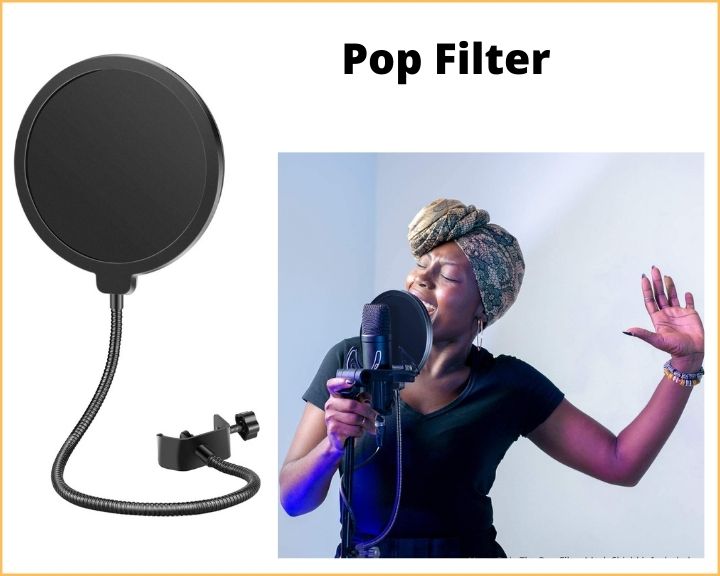
A pop filter is a circular nylon mesh that’s positioned in front of a microphone.
It serves one primary purpose: to eliminate plosives when you speak or sing into a microphone.
Plosives are blasts of air that come out of your mouth whenever you use such letters as B’s, T’s, P’s, and so on.
Just imagine saying a word like “Peter” into a mic. Your mouth will blast a lot of air directly into the mic’s capsule, causing it to produce an unpleasant sound. This causes the mic to pop.
As the name suggests, a pop filter works to filter those popping sounds by dispersing the air blasting out of your mouth in different directions.
This is so that air doesn’t hit the mic in a blast. The result? Plosives don’t sound harsh in your recording.
Plosives are usually louder when using a large-diaphragm condenser mic. While you don’t need to have a pop filter every time you want to sing, when recording is extremely important.
That said, you can buy a good pop filter for just $10.
Money Spent- $10
8. Acoustic Treatment
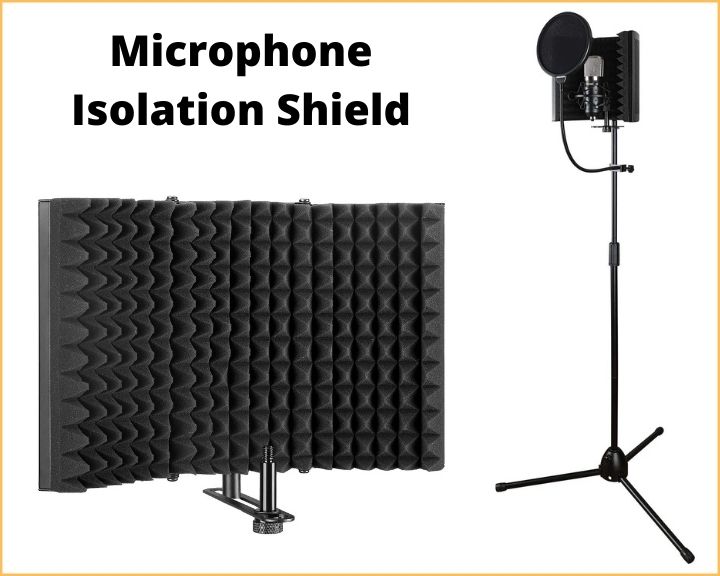
Finally, consider investing in room acoustic treatment, which you’ll come to notice how greatly improves the quality of the recording.
The truth is that professional-grade acoustic treatment is expensive. The good news is that you can make your own acoustic panels that can also serve as decorative objects.
You’ll only need a few materials like towels or foam and a couple 1 x 3 lumber to build it yourself.
You can get the towels from thrift stores which will cost you only a few dollars.
We have a full article that explains how to build your own acoustic panels with step-by-step instructions. Click the link to check it out.
Instead, if you don’t want to build acoustic panels, you can opt for buying a microphone isolation shield. It will reduce echo and sound reflection during vocal recordings.
As your studio grows, you can purchase professional-grade room acoustic treatments later on. It will be one of the most durable investments you’ll ever make in your home studio.
Money Spent -$36
$400 Home Studio Budget Breakdown
- Audio Interface – $120
- Software (DAW) – $0
- Microphone – $79
- Headphones – $50
- XLR Cable – $28
- Mic Stand – $30
- Pop Filter – $10
- Acoustic Treatment – $36
Total – $353
That’s it- all the essentials you need to build a cheap recording studio for under $400, perfect for beginners just starting out on their recording journey.