A live event can be a memorable experience for everyone involved but requires careful planning and attention to detail.
As an audio engineer, sound quality is one of the most critical aspects of event planning. A poorly executed sound system can ruin an otherwise great event, while high-quality sound can elevate the experience and create lasting memories.
A live sound checklist is an essential tool to help you stay organized and focused on the critical tasks at hand and should be divided into five parts:
- Pre-Event Planning
- Equipment Setup
- Sound Check
- During the Performance
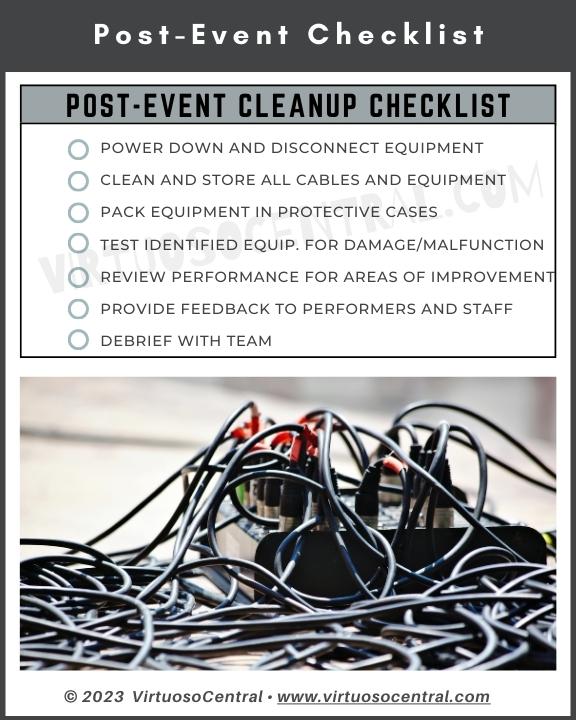
- Post-Event Cleanup
To ensure that your event is a success, we have compiled a comprehensive live sound checklist covering everything from pre-event planning to equipment setup and testing that you can download and print to help you get started. Without further ado, let’s dive in.
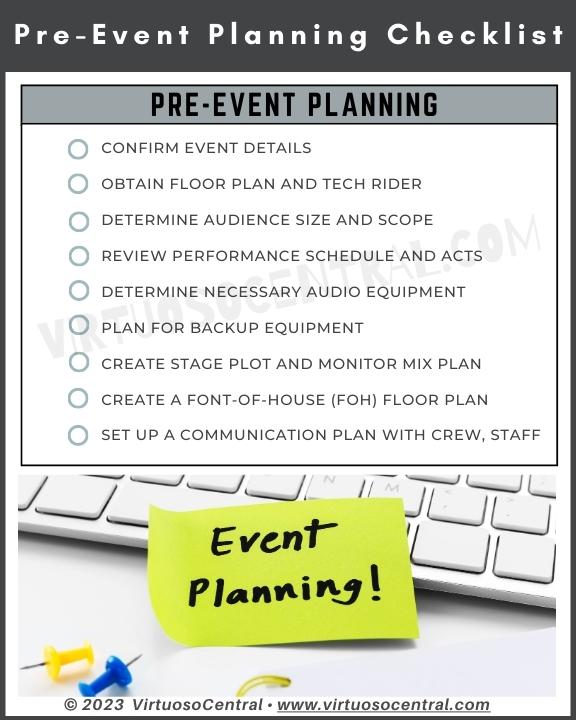
Pre-Event Planning
The first step in a successful live sound event is pre-event planning. It’s essential to gather information about the event, the venue, and the equipment needed to achieve the best sound possible.
Here are some essential items to include on your pre-event planning checklist:
Confirm the date, time, and location of the event.
This step ensures that everyone involved is on the same page regarding the event details, and it’s crucial to avoid any confusion or scheduling conflicts.
Don’t forget to also verify the date and time with the performers to ensure that they are available and confirm the start and end times of their performance.
The event’s location must also be confirmed to ensure that the audio equipment and setup are appropriate for the space.
Obtain a floor plan and a technical rider.
A floor plan provides a visual representation of the space where the event will take place, which can help you plan the layout of the equipment and speakers.
It should include the dimensions of the performance space, the location of the stage, and any potential obstacles, such as pillars or fixed objects.
The floor plan should also indicate the location of power outlets and cable runs. The audio engineer can use the floor plan to plan ahead the speaker placement and microphone positioning, ensuring that the audio coverage is even throughout the venue.
If a floor plan isn’t available, I recommend visiting the venue or where the event will take place to familiarize yourself with the area.
The technical rider is a document that outlines the technical requirements of the performers, including the type and number of microphones, DI boxes, and other audio equipment needed for the performance.
The technical rider is typically provided by the performers or their management and is essential for the audio engineer to plan the necessary equipment and setup.
Determine the size of the audience and the scope of the performance.
This helps you determine the sound system and equipment required to effectively reach and engage the audience.
The audience size plays a critical role in the audio equipment selection process. The audio engineer must know the approximate number of people attending the event to determine the appropriate number of speakers and amplifiers needed to ensure the sound reaches every listener.
The scope of the performance refers to the type and style of the performance, the number of performers, and the instruments being used. The audio engineer must understand the performance scope to determine the type and quantity of audio equipment needed for the event.
Review the performance schedule and the order of the acts.
Understanding the performance schedule can help you plan the sound for each act and make necessary adjustments based on the performance order.
Determine the audio equipment needed.
This includes microphones, cables, mixers, amplifiers, and speakers. It’s important to consider the quality, quantity, and type of equipment needed to achieve the desired sound.
Plan for backup equipment in case of failure or malfunction.
It is vital to have backup equipment in case of a malfunction or failure of any gear during the performance.
Having extra mics, cables, DI-Boxes, speaker cabinets, monitors, and a backup mixing console ensures you have backup equipment in case of a major equipment failure.
Create a stage plot and a monitor mix plan.
A stage plot is a diagram that shows the location of each performer and their equipment on stage.
A monitor mix plan specifies the mix requirements for each performer, which can help you adjust the sound to each performer’s needs.
Create a Font-of-House (FOH) floor plan.
A front-of-house floor plan is a diagram that shows the location of each audio source on the stage relative to the FOH speaker placement according to the size and acoustics of the venue.
This plot helps the sound engineer know the scope of the event to plan accordingly and make a quicker setup.
Set up a communication plan with the performers, the stage crew, and the event staff.
Clear and effective communication is essential to ensure everyone involved in the performance is on the same page and working together effectively.
The sound engineer should establish clear communication channels with the performers, the stage crew, and the event staff.
The communication channels can be walkie-talkies, radios, headsets, or hand signals and should be tested to ensure they work correctly before the event.
Another thing to remember is that the communication plan should establish a clear chain of command and communication protocols.
The audio engineer is responsible for designating a point of contact for each performer, stage crew member, and event staff member. It should also establish a clear protocol for requesting assistance, notifying of technical issues, and providing updates during the event.
So, briefing the performers, stage crew, and event staff about the communication plan and protocols is critical in ensuring that things go smoother during the event.
Equipment Setup
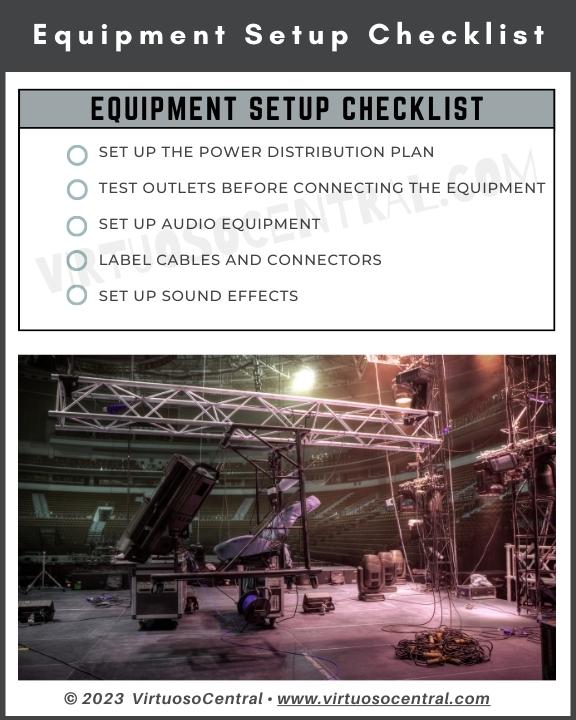
Once you’ve completed your pre-event planning, it’s time to set up the audio equipment. Equipment setup is crucial to the sound quality and effectiveness of the performance.
Here is a list of items you should include on your equipment setup checklist:
Set up the power distribution plan.
Proper power distribution ensures that each piece of equipment receives the necessary power without overloading the circuit breakers.
This prevents equipment failure during the performance and equipment going off due to overloaded electric circuits in the venue.
Before setting things up, the sound engineer must understand the power requirements of each piece of audio equipment, including the amplifiers, speakers, mixing consoles, and effects processors, and must also understand the power capacity of each outlet to ensure that the power supply is adequate to support the audio equipment and setup.
You should also establish a clear plan for power distribution to each piece of audio equipment. This may involve using power distribution boxes, power strips, and extension cords to distribute power evenly throughout the venue, thus avoiding overloading the electric circuit.
Test power outlets before connecting the equipment.
Thisensures that all equipment is connected to a reliable power source. For this, you can use a digital multimeter or voltage tester to confirm that there is power on the outlets, that it’s wired correctly, and that the voltage is within normal range.
Test each piece of equipment to ensure it’s working correctly.
Testing each piece of equipment beforehand helps you ensure that all the equipment you bring to the event is in good working order, which helps you avoid any issues during the setup process and performance.
Set up the audio equipment.
At this point, you can start setting up the equipment according to the floor plan and the stage plot.
The crew should use the floor plan to place the speakers, subwoofers, and other audio equipment in the appropriate locations identified in the floor plan to achieve even and balanced sound coverage throughout the venue.
Using the stage plot, the crew should also place the microphones, monitors, and other equipment on stage to ensure that each performer can hear themselves and each other clearly.
Proper miking techniques for instruments such as drums, electric guitars, acoustic guitars, and bass, and correct equipment placement ensures that the sound reaches the audience in the best possible way while avoiding feedback.
Label all cables and connectors.
Proper labeling ensures that each piece of equipment is connected correctly and helps you prevent confusion and mistakes. Labeling also makes troubleshooting easier.
My advice is always to label and document your connections. Labeling the stage box and cables can save you precious time when you are in a hurry to troubleshoot and fix a problem.
You can use colored tape and a marker to label your cables or buy multi-color cable labels to make things even better and easier to identify.
Set up any effects needed for the performance.
Effects such as reverb, delay, or chorus can add depth and character to the sound, and adjusting them to the room acoustics can enhance the sound quality.
As a sound engineer, you must understand the specific style of music to determine which effects are needed for the performance.
You should also consider the acoustics of the venue and the audience’s location when setting up the effects. This may involve adjusting the effects’ parameters to suit the venue’s specific needs or performance.
Test the effects during the sound check process to ensure they function correctly and the sound quality is clear and balanced.
Sound Check
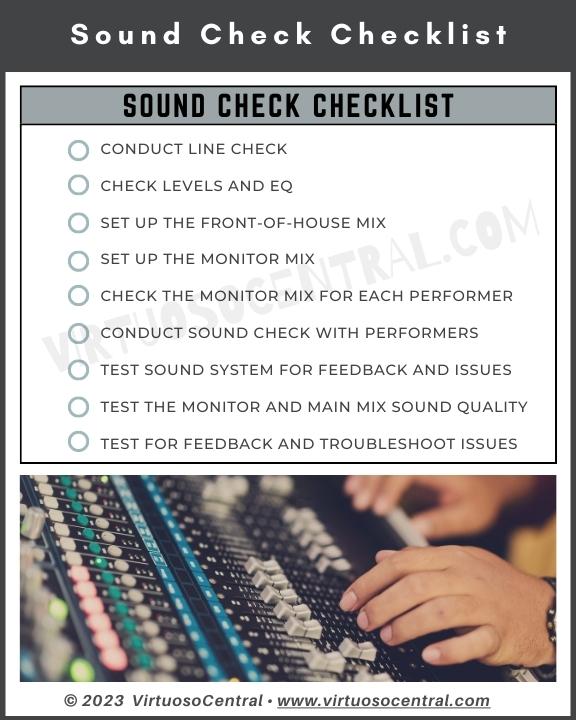
Once the equipment is set up, it’s time to conduct a sound check with the performers. A sound check is an essential step in ensuring that the sound is clear and balanced for the audience and performers.
Here are some essential items to include on your sound check checklist:
Conduct a line check.
A line check involves verifying that all the audio equipment is connected and that the audio signal is transmitted correctly throughout the system without noise.
This involves testing the microphones and instruments individually and adjusting the levels and settings as necessary to achieve the desired sound quality.
Check and adjust the levels of each audio source.
Properly balanced sound is essential to ensure that each instrument and voice can be heard effectively.
In this step, you should set the correct gain for each microphone and instrument to avoid distortion and saturation on the audio signal. It is also crucial to ensure that the gain staging between the different equipment is correctly set.
Doing this guarantees that each audio source is balanced and leveled correctly in the mix, delivering excellent sound quality throughout the venue.
Remember that each audio source is different, and the goal here is to adjust the levels accordingly to ensure that each sound source is appropriately balanced in the overall mix.
Adjust the EQ of each audio source.
EQ is critical to enhancing the clarity and fullness of the sound. Don’t overdo it because it will negatively impact the overall sound.
Take your time to understand the mix and adjust the EQ for each sound source as necessary to create a clear and cohesive mix.
And don’t forget that in any live sound setup, the vocals are the most important part of the mix, so take special care when setting up the EQ for the vocals.
Set up the front-of-house mix.
Setting up the front-of-house mix is essential for ensuring the sound is balanced and clear for the audience.
The front-of-house mix is the audio mix that the audience hears, and if properly set up, the sound can be balanced, smooth, and clear, which can positively impact the audience’s experience of the performance.
Set up the monitor mix for each performer and adjust it to their liking.
The monitor mix is crucial for each performer to hear themselves and others clearly, and it can enhance the quality of the performance.
A well-balanced and properly calibrated monitor mix can help performers stay in sync with each other, stay on tempo, and perform their best.
As an audio engineer, you must understand the specific needs of each performer to set up a personalized monitor mix.
This may involve asking the performers for their specific preferences regarding volume level, EQ settings, and effects processing. Each performer may require a different mix for them to feel comfortable on stage, and you should adjust accordingly.
Test the monitor and main mix for sound quality and balance.
Testing the monitor and main mix involves playing back audio through the entire sound system and making adjustments as necessary to achieve the desired sound quality and balance.
While testing, it’s crucial to check the sound in different areas of the venue, including the front of house, the back of the house, and any other areas where the audience may be located. This helps ensure that the sound quality is consistent and balanced throughout the venue, enhancing the overall experience for the audience.
Conduct a full sound check with the performers.
A sound check with the performers is essential to ensure that each instrument and voice sounds good in the mix and to identify and resolve any potential issues before the performance.
During the sound check, we want to make any necessary adjustments to the overall mix, including levels, EQ, and effects processing, until we get a cohesive, well-balanced, and clear mix.
Test the system for feedback and other issues.
Testing the system for feedback and other issues is necessary to catch potential issues. In this step, you might have to troubleshoot the sound system if necessary to find and fix the problems. This step is crucial to avoid any disruptions during the performance.
In case of feedback, you might have to shift the speaker, monitor, or microphone positions to avoid being in close proximity. You can also use a feedback eliminator to help you ring out feedback.
Performance
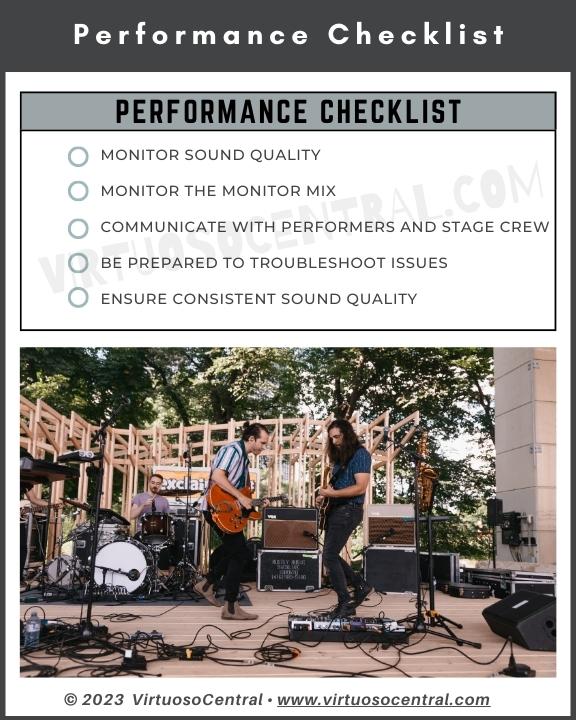
During the performance, it’s crucial to be attentive and responsive to the performers’ needs and the sound quality and be ready to deal with potential problems that can arise.
Here are some items to include on your performance checklist:
Monitor the sound quality and adjust as needed.
This step involves constantly monitoring the system’s audio output to ensure that the sound quality is consistent and balanced throughout the venue.
Monitoring the sound quality is crucial to ensure each performer is heard correctly.
Monitor the performer’s monitoring mix.
During the event, don’t forget to continuously check the monitor mix for each performer to ensure that they can hear themselves and the other performers clearly, and watch out for cues from the performers to adjust accordingly.
Communicate with the performers and crew.
This step involves listening carefully to the performers and observing their movements to anticipate their needs and respond quickly to any issues that may arise.
During the event, be prepared to respond quickly to any requests or cues from the performers. This may involve adjusting the monitor mix level or the overall mix or making any other necessary adjustments to the audio equipment to address any issues that may arise.
Remember that previously we talked about setting a communication plan between the sound engineer, crew, and performers. This is where the communication plan comes in handy when you want to communicate with them in the middle of the performance without it being obvious.
So, paying attention to the performers and constantly making eye contact is crucial to watch for cues. You can use specific hand or signal gestures to communicate with the crew and performers. This ensures quick response when trying to solve issues during the performance.
Be prepared to troubleshoot any issues that arise.
Being prepared to troubleshoot any issues is crucial to avoid any disruptions during the performance. Having a sound system troubleshooting plan will help you shave out a lot of time, keeping to the minimum any disruptions.
Having a few tools on hand, such as a multimeter, flashlight, screwdrivers, cable tester, etc., will help the crew tackle any problems as they arise.
This is where backup equipment helps minimize the disruption time, as you can quickly swap and change the faulty element.
Ensure that the sound quality remains consistent.
Consistent sound quality is essential to maintain the audience’s attention and engagement. Avoid making quick and exacerbated changes in volume or EQ levels.
Only do small incremental changes instead to keep things smooth. Remember, you don’t want the audience to notice any sudden changes.
Post-Event Cleanup
After the performance is over, it’s essential to clean up and ensure that all equipment is stored correctly and maintained.
Here are some items to include on your post-event cleanup checklist:
Power down and disconnect all equipment.
Properly powering down and disconnecting the equipment in a specific order is a good practice and helps avoid potential damage to the equipment.
Start powering down the amplifiers, powered speakers, subs, and monitors. Then go for the mixer and rack-mounted systems.
Clean and store all cables and Equipment.
Storing cables and connectors correctly helps ensure they are ready for the next performance and avoid confusion.
It’s a good practice to clean the cables before storing them. You can use a damp cloth to run the cables through to clean any dust or dirt picked up during the performance.
If necessary, also use a clean, lightly damp cloth to clean the dust-off speaker cabinets and monitors as well.
Don’t forget to remove unnecessary labels to avoid having sticky cables in your next performance.
Pack all equipment in protective cases.
This step ensures that the audio equipment is protected from damage during transport and storage, which helps to prolong the equipment’s lifespan and reduce repair costs.
Only use high-quality protective cases that are specifically designed for the equipment.
Don’t forget to take special care of the microphones, as they tend to be delicate, especially if you use condenser or ribbon microphones.
Test identified equipment for damage or malfunction.
If you have problems with cables, microphones, or any other equipment, set it aside and label it to make sure to test it and repair it before the next performance.
If they are beyond repair, remove them from the good equipment and label them so the crew knows the equipment is faulty or needs repair.
Review the performance and identify areas for improvement.
This step involves reviewing the performance and assessing the sound quality and the overall audio production to identify areas for improvement for the next performance.
A good practice is to record the performance, and during spare time, the sound engineer should listen to it to assess the sound quality and identify any issues that may have arisen during the event. This may involve listening to each audio source individually to identify any problems or areas for improvement.
Provide feedback to the performers and the event staff.
Providing feedback to the performers and the event staff can help them improve future events and enhance the quality of the performance.
Debrief with your team.
The debriefing should be structured and collaborative, with all team members encouraged to share their thoughts and feedback.
This may involve using a structured questionnaire or a discussion format to gather feedback and evaluate the performance.
Once the feedback has been gathered, the team should develop a plan to address any issues identified during the debriefing.
Conclusion
If you are involved with sound systems, never go into an event without a live sound checklist because it will help you stay organized and can help you catch potential issues before they become a problem, ensuring that you have a successful and memorable performance for the audience and performers.
The specific items on the checklist may vary depending on the event, the venue, and the equipment used. Still, the basic principles of planning, organization, and attention to detail apply to all live sound events.
Following the comprehensive checklist provided in this article will help you stay organized and ready, leaving a lasting impression on the audience and performers.
If you liked this article, consider sharing it with others, and don’t forget to visit our website to explore more articles like this one by clicking here. Thank you for reading my blog.