Our lives have changed dramatically since the start of the Covid-19 pandemic. Now we are limited in what we can do as social distancing is still a problem in many places worldwide.
If you take music classes or are part of a band or music group, rehearsing might only be possible using the Zoom app. The only problem is that it doesn’t sound too good, especially if you use the default settings and the onboard microphone on the laptop or phone.
In this post, I will show you a few tips on how to improve the sound quality on Zoom for music.
Improve Your Sound Quality on Zoom for Music
Here are a few tips you can try to improve your sound on Zoom for playing or singing live.
- Avoid using the onboard mic, if possible, get an external USB Condenser microphone
- Configure Zoom for high-quality audio for playing instruments or singing
- Improve the acoustics of the room to avoid echo
- Get closer to the microphone
Let’s delve in each one of these tips in more detail.
Use an External USB Condenser Microphone
It’s no secret that onboard microphones are not that great. Some are better than others, but overall they can’t deliver good quality sound.
One of the reasons is that the onboard mic’s capsule is tiny, limiting its ability to pick up sound vibrations. The small membrane also is very limited to picking up the detailed nuances in sound when playing a musical instrument or singing.
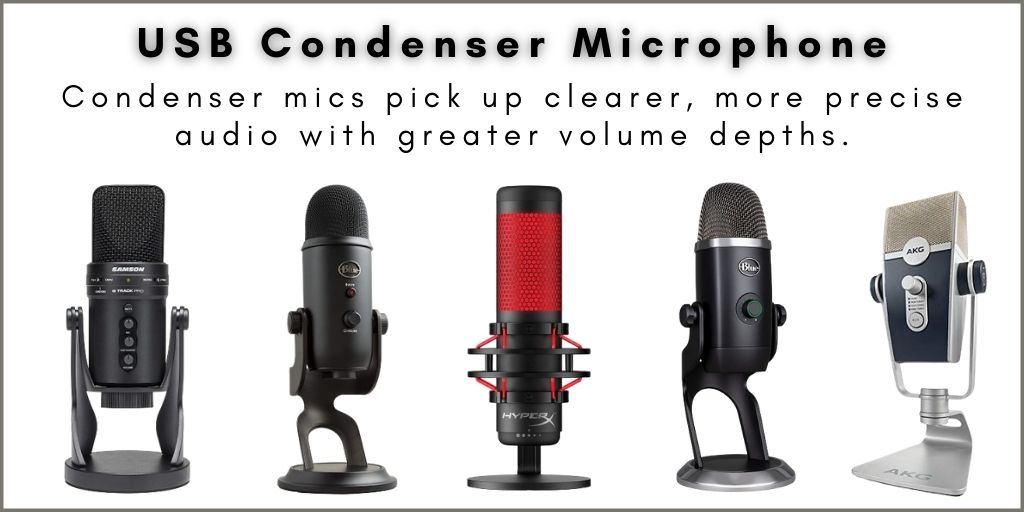
Condenser mics pick up clearer, more precise audio with greater volume depths.
By using a USB condenser microphone, your audio will improve drastically because it’s capsule is bigger and very sensitive to picking up even the smallest nuances in sound, immediately delivering higher quality sound on Zoom for music.
Here are a few examples of USB condenser mics that you can use to help you improve your sound quality for music on Zoom (links to Amazon):
- Blue Yeti USB Mic
- AKG Pro Audio Lyra Ultra-HD Mic
- Audio-Technica AT2020USB+ Condenser USB Microphone
- Samson G-Track Professional USB Microphone
- HyperX QuadCast – USB Condenser Mic
- Mackie EleMent USB Condenser Mic
Configure Zoom for High-Quality Audio for Music
Zoom added a new feature that enables your computer to send high-quality audio. This function optimizes Zoom audio for the highest quality music. This is ideal if you are using the platform for music lessons or for performing with an instrument.
Keep in mind that by choosing this option it can increase CPU utilization and consume greater bandwidth.
Here are the steps you need to follow to configure Zoom for high-quality audio:
- If you have a USB condenser microphone, connect it to the computer you are planning to use. Now it’s time to select it as the default for Zoom meetings.
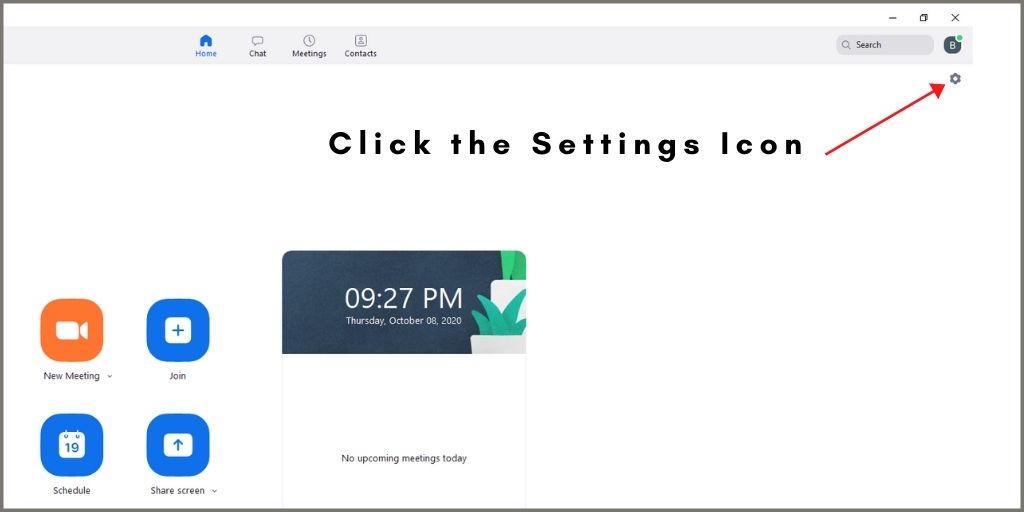
2. To select the USB mic as the default go to the “Settings” in the Zoom main menu, as shown in the image below.
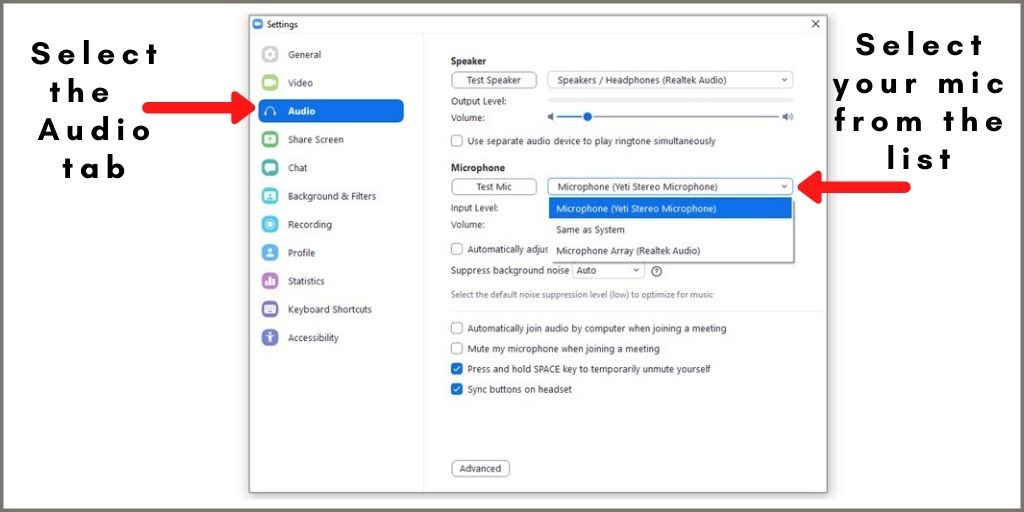
3. Click on the “Audio” tab to open the audio settings.
4. On the right side, where it says “Microphone,” select yours from the drop-down menu. In most cases, as soon as you connect the USB mic, Zoom will automatically find it and set it as your default.
5. Where it says “Speaker,” you can select if you want to use your computer’s speakers or use headphones. Select your choice from the from the drop-down menu.
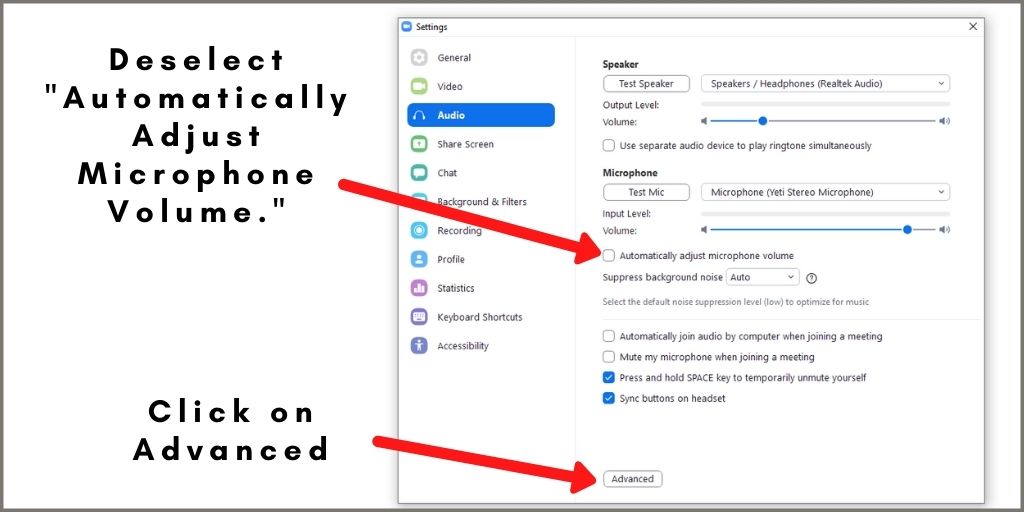
6. Under the microphone section, Deselect “Automatically Adjust Microphone Volume.” The reason is that Zoom uses an algorithm to keep your volume as constant as possible for video conferencing, which is suitable for the spoken word. For music, you want the sound’s dynamic range to be as real as possible, hence the reason for deselecting this option.
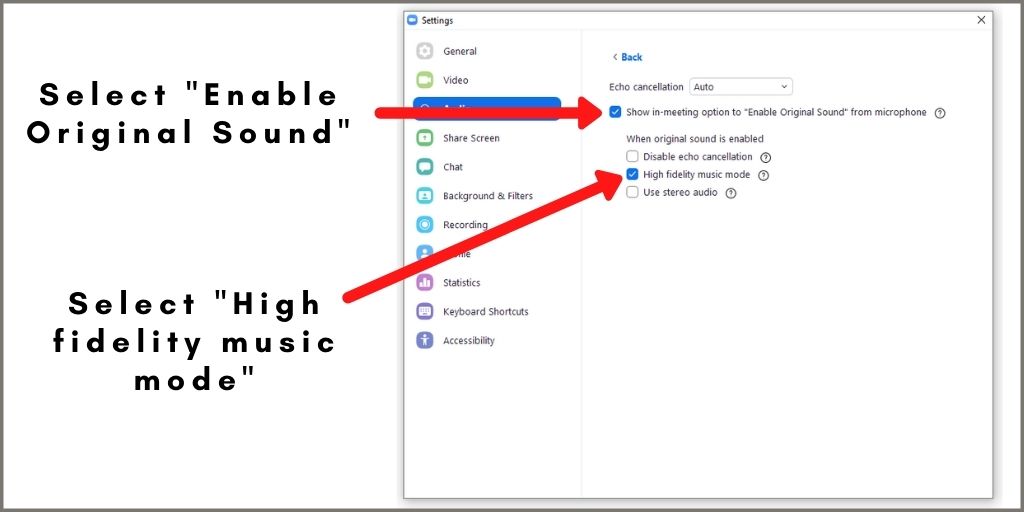
7. Next, click on the “Advanced” tab and select “Show in-meeting option to “Enable Original Sound” from microphone.”
This option automatically disables Zoom noise suppression, removes high-pass filtering, and removes automatic gain control.
Keep in mind that this setting is recommended for playing music and studio-like environments with higher quality mics (USB Condenser Mic), speakers, or audio interfaces. This is what we want to improve the sound quality on Zoom for music.
If you are in noisy environments, don’t use this option because all the noise will be passed to the other end.
8. Lastly, make sure to select “High fidelity music mode.” This option optimizes Zoom audio for the highest quality. This is ideal if you are using the platform for music lessons or for performing with an instrument. By choosing this option, expect an increase in bandwidth use, which means that your internet connection should be fast enough.
Improve the Acoustics of the Room to Avoid Echo
If you use an excellent mic and your configuration is spot on, but the room’s acoustics is poor, the sound quality will still be terrible. Usually, echo is the main problem in places with poor acoustics.
Echo happens when sound waves that move through the air hit hard surfaces and bounce back. To stop the echo, you need a way to absorb the sound waves so that they can’t bounce back and forth within the room.
There are different ways you can improve a room’s acoustics. One way is by using curtains on the wall and carpet on the floors to absorb the sound. Another way is by using carpet on the walls and floors. The only thing is that it might look ugly.
Additionally, you can use absorption panels on the walls to help reduce echo. You can build your panels to add more personality to your room while helping to reduce the echo. Here is a tutorial I found on Youtube to make your own high-performance sound absorption panels very cheap that deliver excellent results.
If you rather have professional acoustic panels like the ones used in recording studios and don’t mind spending some money, choose professional-grade acoustic material.
There are several kits that come with everything you need to improve the acoustics of a room. Here are some examples of what you can get depending on the size of the room (links to Amazon):
Get Closer to the Microphone
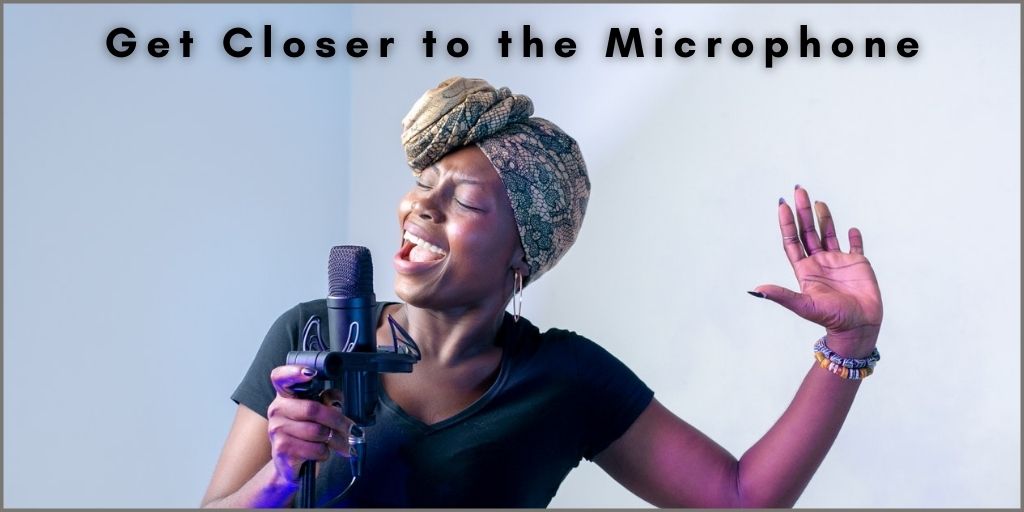
Getting closer to the mic is a simple but effective tip to improve Zoom’s sound quality, whether you are playing music, taking lessons, or singing.
As the sound source gets farther away from the mic’s pick up capsule, the quality decreases rapidly. If the sound source is farther away from the mic, it picks up ambient noise, degrading the sound quality as the sound waves become thinner, losing the sound’s fullness.
You want to get close to the mic but not so much that it could saturate the membrane inside the capsule.
If you are singing and your voice is strong and loud, make sure to leave between 6 to 8 inches from the mic’s head and your mouth. Also, I recommend monitoring your microphone volume on the Zoom app not to saturate the sound. Never allow the signal to clip because it will sound distorted on the other end.
When playing an instrument, place the microphone as close as possible without it being in the way. Placing it between 1 to 3 feet away from the instrument is a common practice to pick up all the performance nuances.
Final Thoughts
It is possible to get good sound quality for music with the Zoom app. All you have to do is follow these helpful tips. By leaving the default settings on Zoom, you limit the audio quality that the platform can deliver.
Make sure you change the settings and have a decent microphone that can pick up all the music’s nuances that are being played.
Avoid excessive echo by limiting the sound waves to bounce back and forth. Lastly, make sure to get as close as possible to the microphone but always monitoring the volume levels so that the audio doesn’t distort.
Got questions? Leave a comment or contact us, we’ll be happy to help.