Sometimes the song that you want to sing doesn’t have a karaoke track, and you end up wondering how can I remove the vocals from a song? After doing some research, you end up downloading an app that wants to charge you to remove the vocal from your favorite song.
I have put this post together to help you with this matter by explaining how to remove vocals from a song using Audacity; an open-source, completely free program that delivers excellent results. Let’s dive in.
Background Information on Removing Vocals
There is advanced software that can remove vocals from songs using complicated algorithms to do so. In our case, we are not using such professional software because they cost thousands of dollars.
If all you want to do is remove the vocals from a song to sing along with a karaoke song, you don’t want to spend that much money and devote months just learning how to use the software. The tutorial in this post is based on phase cancellation to remove vocals.
Every sound is made by vibrations of molecules and can be represented by frequencies. Sound Frequency is a measure of the number of wave cycles that occur in a second. The phase of a frequency is measured in degrees, and it defines a particular point in time of a given cycle.
Two waveforms are considered to be in phase if they start and end at the same time. They are out of phase if they start and end at different times. If two frequencies are 180 degrees out of phase, they cancel each other out, resulting in a loss of signal.
When using phase cancellation to remove vocals, the signal that contains the vocals needs to be 180° degrees out of phase or have the polarity inverted so that it’s canceled out.
This is the principle behind removing vocals from a signal, of course, there is a lot more going on behind the scenes, but this is just a simple explanation of the theory behind the process.
If you take a song recorded in stereo, split the signal into two mono paths, then invert the polarity of one of the mono tracks and remix it, you’ll remove the vocals from that song.
A disadvantage of removing vocals by using the phase cancellation method is that anything in the track that is panned center will be lost because it will be canceled out. One way of mitigating this issue is to add a lowpass filter for the low and mid-low frequencies, between 70Hz to 250Hz.
All of the process explained above is done automatically by audacity by the touch of a button. Still, please keep in mind that the vocals are never going to be removed entirely from the track. Still, they will be almost inaudible, allowing you to use the song as a backing track for singing. Let’s follow the tutorial on how to remove vocals from a song.
Removing Vocals From a Song Using Audacity – Step by Step Tutorial With Pictures
1. The first thing you need to do is download and install Audacity in your computer, click the link, and it will take you to Audacity’s website.
2. After installing it, open the program, and you should see the following on your screen.

3. Click the “File” tab in the upper left corner. From the dropdown menu, select “Import,” then select Audio. A new window will open for you to choose the song that you want to remove the vocals. Browse your files until the song you want is selected and click “Open.” The audio file you want to work with must be on your computer.
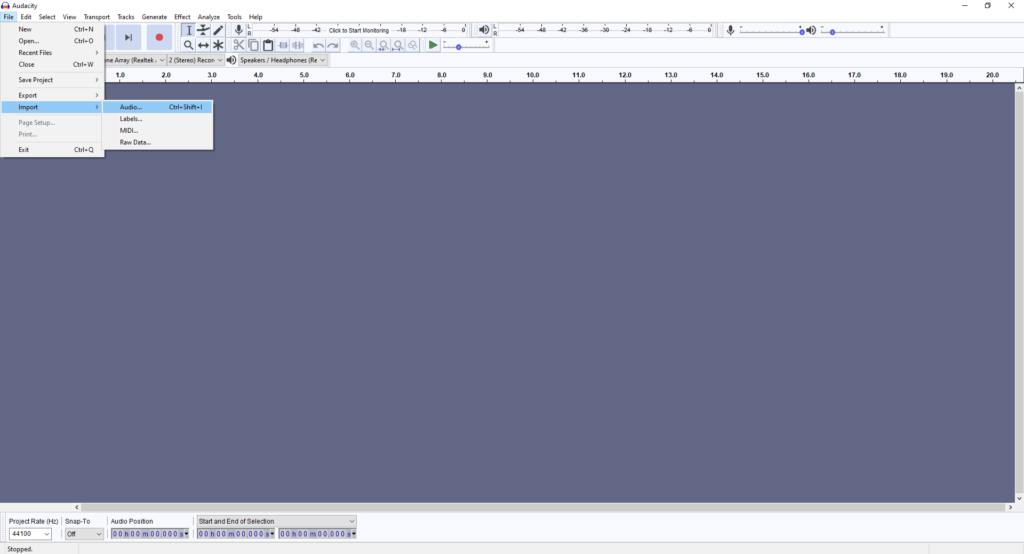
4. After the file is open in Audacity, you should see something similar to what is shown in the image below.
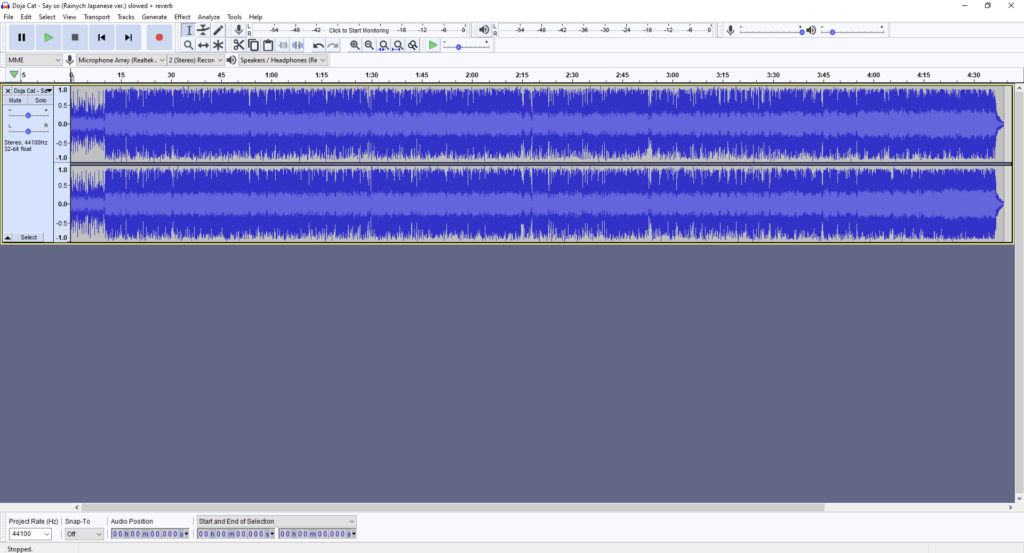
5. The next step is to select the file for processing. To do so, click the tab labeled “Select,” and from the dropdown menu, select “All.” Now the Audacity knows that you want to process the whole file with the vocal remover effect.
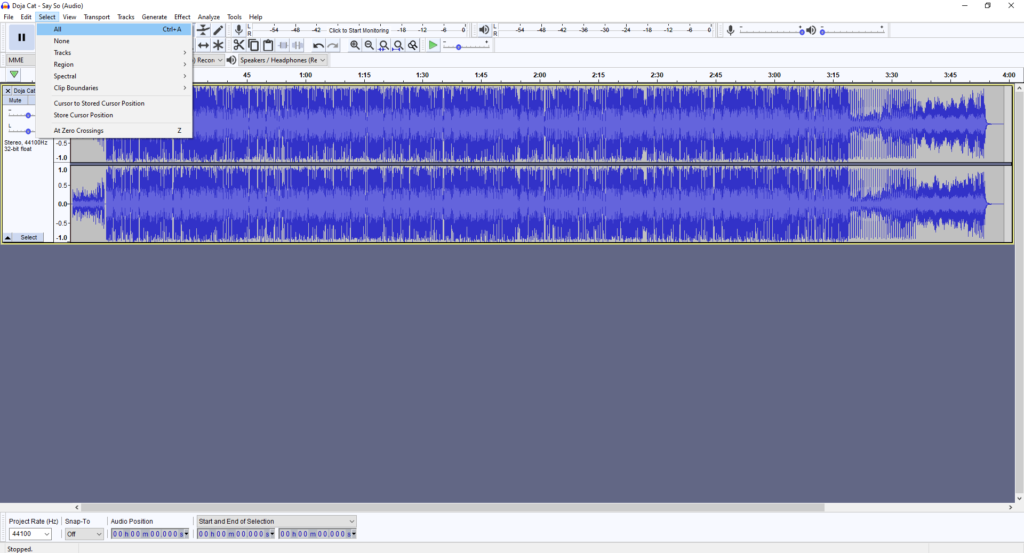
6. In this step, you select the vocal remover effect. To do this, click from the menu the tab labeled “Effect.” From the dropdown menu, go all the way down until you find the one named “Vocal Reduction and Isolation…” and click on it.
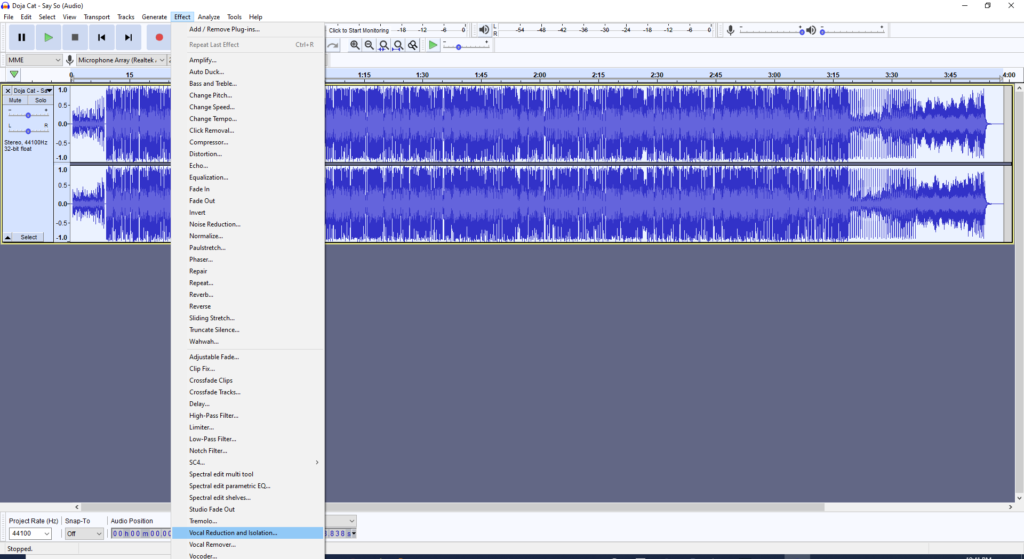
7. After you like the settings, click “OK” for the program to start processing the file and removing the vocals.

8. In case you don’t like the results, click the “Undo” button or click “Edit,” and from the dropdown menu, click Undo. Repeat the procedure by following steps 5 and 6.
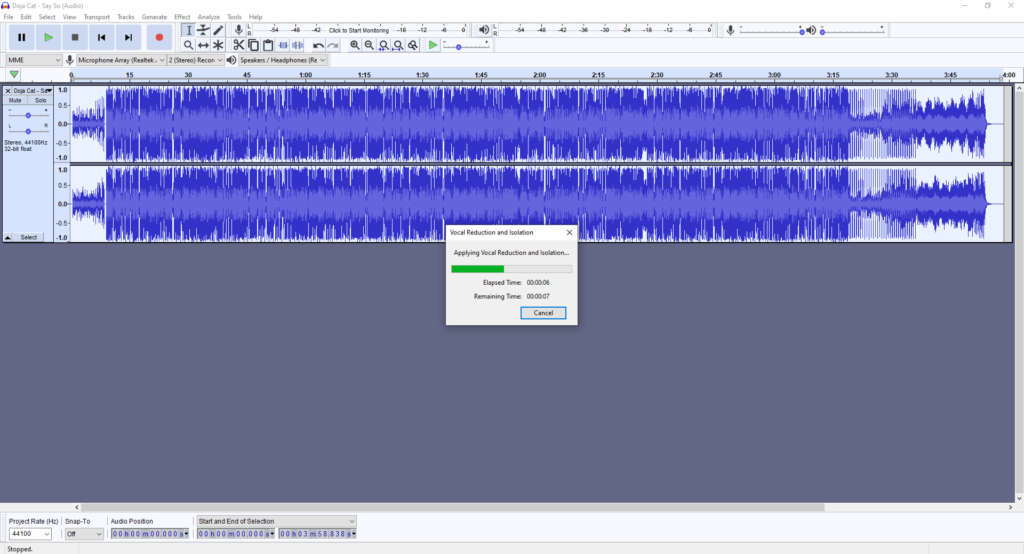
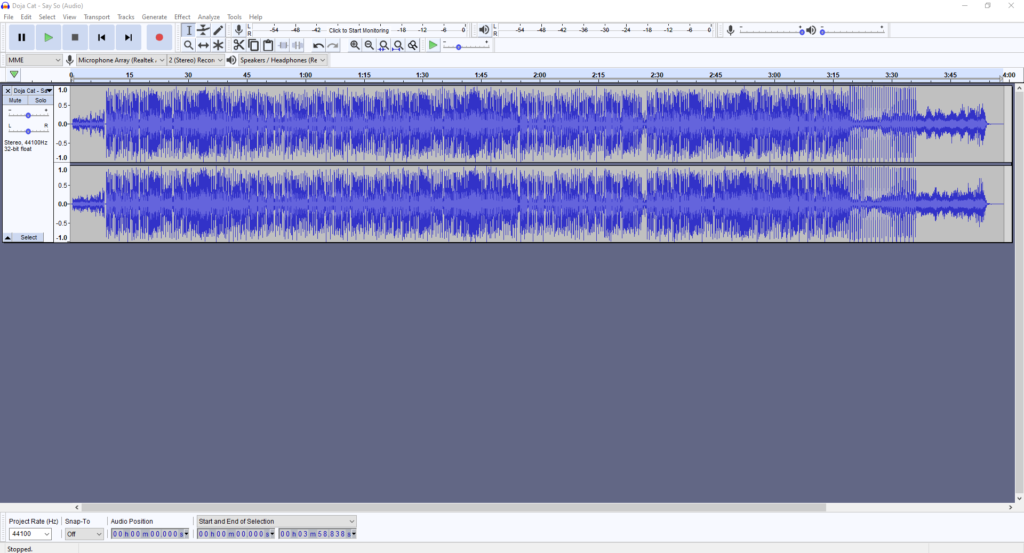
9. After the software is finished processing the finished file should look something like the image below. If you like the result, it’s time to export the file as an Mp3 file so that you can play it on your devices.
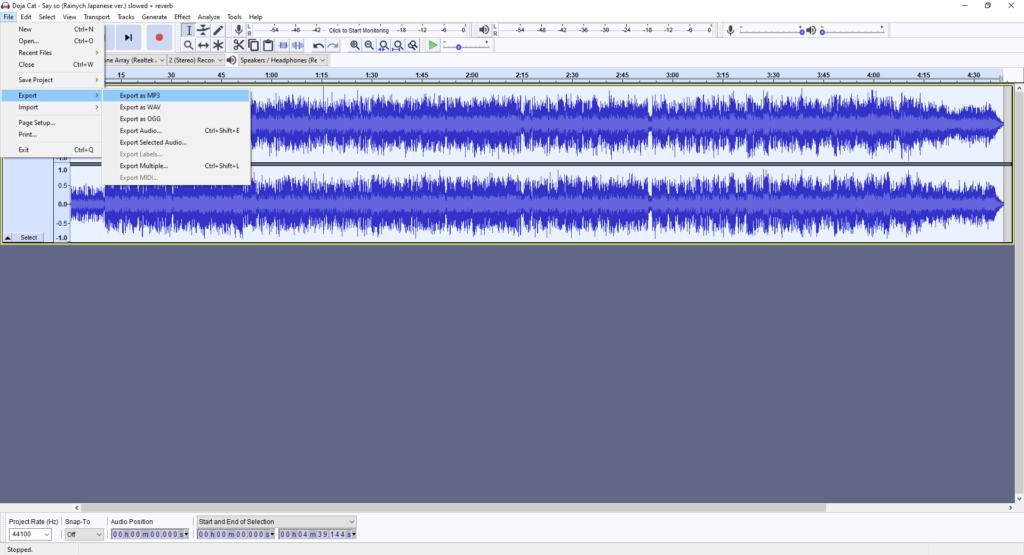
10. To export the project as an Mp3 file, click “File,” “Export,” “Export as MP3”. In the new window that opens, select the bitrate, write a title for the song, and select the folder where you want to save the file, and within a few minutes, it will be done.
Vocal Reduction and Isolation settings for Different Genres
These are some settings I have tried with different genres of music and gotten decent results.
For Pop, Ballad, Soft Rock, Music:
Action: Remove Vocals
Strength: 1.25
Low Cut for Vocals (Hz): Try values between 150 – 250
Hi Cut for Vocals (Hz): Try values between 14500 – 16632
For Hip-Hop, R&B, Electro, Techno, Rap Music:
Action: Remove Vocals
Strength: 1.50
Low Cut for Vocals (Hz): Try values between 120 – 200
Hi Cut for Vocals (Hz): Try values between 13500 – 15500
For Country, Indie, Gospel, Music:
Action: Remove Vocals
Strength: 1.25
Low Cut for Vocals (Hz): Try values between 180 – 250
Hi Cut for Vocals (Hz): Try values between 14500 – 16500
This is what each option means, the information was taken from the Audacity manual here is the link:
Strength: The Strength slider modifies the shape of the center. Higher values increase the degree of reduction or isolation. Zero is off (no reduction or isolation).
Low Cut for Vocals (Hz): The frequencies below will either not be removed or not be included in the isolated audio. It is useful to exclude bass and kick drum. The default value of 120 Hz is good for most lead vocals, or even low male voices. You can enter a higher value around 170 Hz for female voices and about 230 Hz for those of children
Hi-Cut for Vocals (Hz): The frequencies above will either not be removed or not be included in the isolated audio. It is useful to exclude high sounds like bells, cymbals, or Hi-hat. Note that human sounds like S or Z can also be very high in frequency – 5000 to 8000 Hz, so listen carefully to the preview.
Final Thoughts
In this post, I have shown a simple, easy way of removing vocals from a song step by step with pictures for your reference. As mentioned earlier, the quality of the generated file will never be perfect. Still, it is usable, especially for karaoke or backing tracks.
The result will also be different from song to song. You might get better results in one song but not with others. Just try changing the Vocal Reduction and Isolation settings until you get something you like. Also, try experimenting with the settings I have suggested in this post and adjust it to your likings.
I hope this post was helpful to you. If you have any questions or comments, please leave them in the comments section. Thank you for reading my blog.