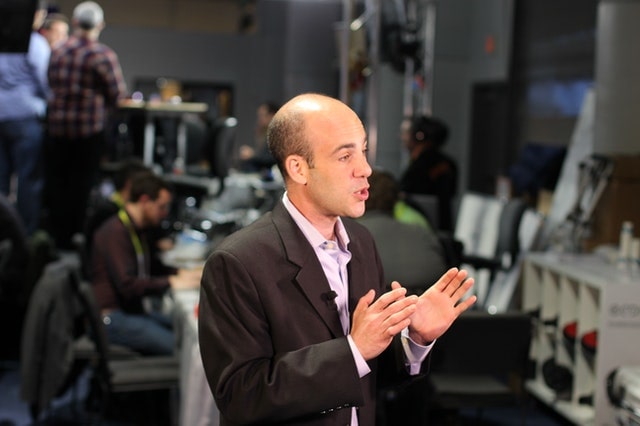
It doesn’t matter how hard you’ve worked on your video for your YouTube channel; if the audio quality is not good, the experience will be compromised. The reason is that the audio in a video is half the experience; it’s not a good idea to neglect it.
In this post, we have put together a few tips that will help you get better audio in your YouTube videos so that your audience and subscribers have a great experience when watching.
6 Tips to Getting Better Audio in Your YouTube Videos
- Shoot the Video In a Quiet, Echo Free Place.
- Work On Developing a Better Vocal Projection
- Use an On-Camera or USB Mic
- Do a Sync Clap Before each Take for easy synchronization
- When Filming Outdoors Use a Windscreen or Deadcat Cover on Your Mics
- Use a Multitrack Recorder to have a Second Audio File of your Shot.
Shoot the Video In a Quiet, Echo Free Place
The first tip on getting great audio in your YouTube videos is to find a room with good acoustics. What I mean is that when possible, avoid shooting your videos in echoey places. It is most likely to get echo in a large room because sound can travel and hit the walls, bouncing back and forth, producing echo.
My recommendation is to find a smaller room and use some type of acoustic treatment, such as sound absorption panels or noise-dampening foam. These types of acoustic treatments deliver exceptional results, but depending on the size of your room and budget, it could get a bit pricey.
An alternative solution to acoustic treatment panels is to use curtains, carpet, or any other material that can absorb the sound from bouncing around.
An easy, cheap way of dampening the sound for your video shoot is to use some stands and put blankets over them. Then get the sheets as close as possible to the subject being filmed, just make sure that the blankets don’t appear in the shot.
The blankets will absorb some of the sound not letting it bounce back and forth, significantly reducing the sound echo when shooting a video.
Work On Developing a Better Vocal Projection

You could use the best camera microphone, or lavalier mic while shooting your video, but if you don’t speak loud enough, your voice is not going to project well.
To have better vocal projection practice boosting your voice volume by speaking from your diaphragm. To be able to boost your voice, you must breathe correctly. Try doing some breath control exercises to help increase your voice’s volume.
When you speak, be sure your shoulders are not rising. If they are, your breathing is too shallow. Shallow breathing means you get an initial burst of volume, but you’ll run out of breath too fast. To correct that, practice breathing through your nose and exhaling through your mouth.
Your breathing should begin down in your stomach, with your diaphragm muscles expanding. By using the correct breathing technique, your voice will drastically improve, and you will have a better vocal projection, which in turn will make every microphone, even the cheap onboard mics of a camera sound better.
Use an On-Camera or USB Mic to Get Better Audio

Often, the mics that come onboard a digital camera or smartphone don’t deliver good audio quality. This is why it is frequently recommended to use a better quality microphone.
Adding an External Mic to Your Digital Camera
If you use a digital camera for recording your videos and it has an input to connect an external mic, get a good quality camera-mountable microphone if your budget allows for it. I recommend getting an on-camera mic such as the Rode VideoMicPro, Rode Compact On-Camera Microphone, or the Tascam DR-10SG.
For example, the DR-10SG from TASCAM is a super-cardioid shotgun mic that has a very narrow pickup pattern, which means that it will pick less ambient noise delivering a cleaner, better audio. Plus, it features a professional quality digital recorder in a single unit. It records to microSD or microSDHC cards. It comes with TASCAM’s unique Dual Recording mode, which automatically records a second “safety take” at a lower level (1).
Using a Condenser Bluetooth Mic with your Smart Phone
Many beginner and intermediate YouTubers use their phones to record their videos. If this is your case and you would like to get better sound using a wireless, Bluetooth lavalier mic, check the SmartMike+ by SabineTek. This microphone gives you excellent value for the price.
It’s small and provides surprisingly good quality audio, plus it’s designed for Bluetooth pairing with your iPhone or Android device, making it perfect for content creators. Together with the free app, you can record audio suitable for podcasts, vlogging, teaching, interviews, and more. Read our full review of the SmartMike+.
Recording The Audio with a USB Condenser Mic
If the format of your YouTube channel is like a podcast where you talk most of the time, it would be a good idea to invest in a USB-Mic so that you get professional sounding videos. An example of a good budget USB mic is the Blue Snowball iCE, Blue Yeti, or HyperX QuadCast. If you want to learn more about which microphone to choose, read our Best Microphones for Podcasting article, there you’ll get more mic options that are excellent for videos that have a podcast format.
Record Voice Over and Synchronize It With Your Video
Let’s say you are recording a Vlog of your trip, and for some reason, the audio is not clear. If you don’t have a USB mic, one thing you can do to resolve the issue is to use the onboard mic from your camera or smartphone to record better audio by speaking close to the mic. Then transfer the audio file to your video editing software and synchronize it with the video.
In case you have a USB mic like the ones mentioned above, you can use free software like Audacity or Garage Band to record a secondary audio track, then synchronize it when editing. This takes us to the fourth tip, do a sync clap before each take for easy synchronization.
Do a Sync Clap Before each Take for easy synchronization
A common practice used by video creators when using external microphones such as USB or camera-mounted ones is to do a sync clap before each take. This practice makes everything much easier when syncing different audio files.
Let’s say you are using your phone’s camera to record your videos, but you don’t like the sound quality of the onboard mic. All you have to do is connect a USB-mic to your computer, open a recording software like Audacity or Garage Band, and hit the record button.
Press record on your phone and get ready for your take. Then clap at the beginning of your video, wait one second and start talking or doing whatever you need for your video.
Next, take the audio file from your USB mic and find the clap audio peak and use it as a reference to sync it you’re your phone’s recorded audio.
After checking that the audio is synchronized to the video, delete the audio file that sounds worse, usually the one from the onboard camera, and edit your video to your likings.
When Filming Outdoors Use a Windscreen or Deadcats on Your Mics

Many perfect shots have been ruined because the wind noise renders useless the audio track. Maybe the video shot can be used, but the audio is not clear because of wind noise. To solve this issue, use a windscreen or dead cover to filter the noise anytime you are recording at the outdoors.
Depending on the microphone you are using, there is likely a windscreen or deadcat filter for it. If you use a lavalier mic, get a deadcat cover for it because it will ensure good audio results under windy situations.
Use a Multitrack Recorder To have a Second Audio File of your Shot

In some cases, it is crucial to use a backup recording device to ensure that you get a secondary audio file of your shot.
Let’s say, for example, you are interviewing someone for your YouTube channel, and you need to do everything in one shot because the interviewed subject is on a tight schedule.
When you are ready to edit the video, it turns out that the audio file is incomplete because the lavalier mic you were using stopped working in the middle of the interview, or it was continually cutting off.
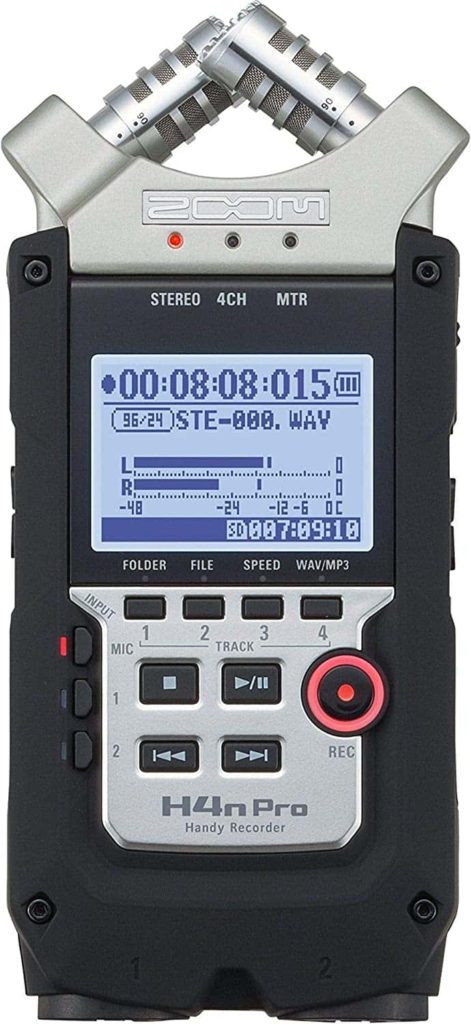
There is nothing to do, the interview is over, and you can’t arrange for a new one. This is why it’s essential to have at least two cameras and two different audio recording devices. For cases like this, I highly recommend using a multitrack audio recorder like the Zoom H4n Pro, Zoom H6, or the Tascam DR-05X.
All of the mentioned multitrack recorders come with stereo condenser mics that will pick up the audio in great detail. Plus, they come with many features, and one that I like the most is the dual recording mode, which automatically records a second audio take at a lower level, in case the main audio take is distorted.
With all of these precautions, you will be sure to have the perfect audio take for editing your videos. That way, your sound will be excellent, and your audience will appreciate it.
Conclusion
In this article, we have presented practical tips to get better audio in your YouTube videos. Also, we have given a couple of techniques so that you have a backup in case your main audio take is lost or is of low quality.