Connecting a laptop to a TV is a simple process, especially if you have a newer model laptop and TV. In this post, I’ll explain step-by-step how to connect a laptop to a TV providing you with different options depending on the laptop you have, so that you can stream videos, look at pictures, or give a presentation straight from your TV.
There are two ways of connecting a laptop to a regular or smart TV. The most common is by using cables such as HDMI or VGA, and the second is wirelessly, no cables running from your laptop to the TV. It all depends on the laptop you have and the ports it has available for video output connection. Let’s get started.
Connecting a Laptop to TV using a HDMI Cable or Adapter
The easiest, but sometimes the least convenient way is by running a physical cable between your laptop and the TV. First you need to check what video output port you have available in your laptop. Some laptops have a full size HDMI connector, while others use a Mini-HDMI. Newer laptops come with a USB-C connector with Thunderbolt 3 connectivity, and older laptops have VGA video out.
Check the image below to have a reference on all the different video out connectors available in laptops so that you can locate the type of port you have.
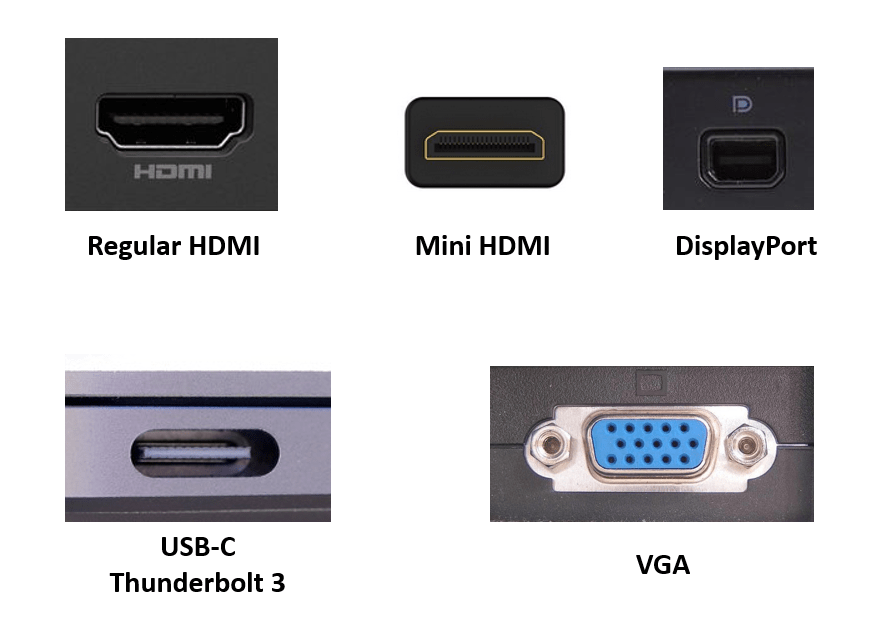
Keep in mind that in some cases you would need an adapter to go from your laptop’s video out connection to a TV’s HDMI. Here I explain each case for your reference.
Using a Full-Size HDMI to HDMI Cable

This is the easiest way for connecting your laptop to a TV if your laptop comes with this port. If your laptop has this port, all you need is a regular HDMI to HDMI (Male) cable for the connection. Follow these steps to connect your laptop computer to a TV using a regular HDMI to HDMI cable.
- With your TV on, use the remote to select one of the available HDMI input channels.
- Connect one side of the HDMI cable to the corresponding port in your laptop.
- The other side of the HDMI cable connect it to the TV, and after a few seconds you should see the computer desktop on the TV screen.
- The TV and laptop should automatically adjust for the best resolution, but If this is not the case, and the resolution is all messed up, try adjusting it manually, here are the steps to follow.
Manually Adjusting the Screen Resolution for Windows 10
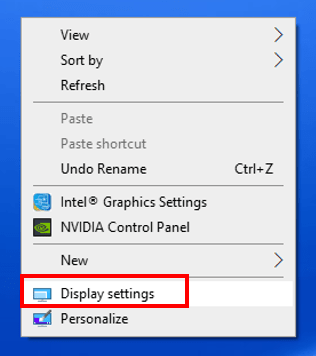
1. Right-click on the desktop and click “Display Settings”
2. Under “System,” click “Display.”
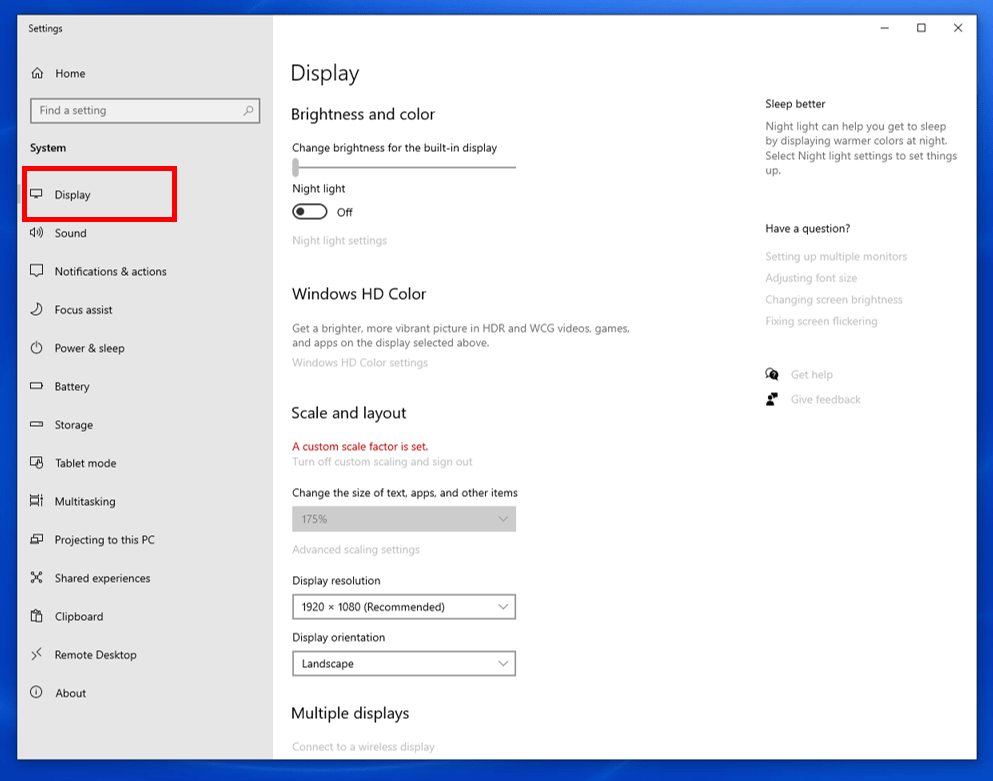
3. Locate “Display Resolution,” and try experimenting with different resolutions until you get one that you like and looks good on the screen. To keep the setting click on “Keep Resolution” if you don’t like it and want to try another, click on “Revert.”

Connecting a Laptop to TV Using a Mini-HDMI to HDMI Cable
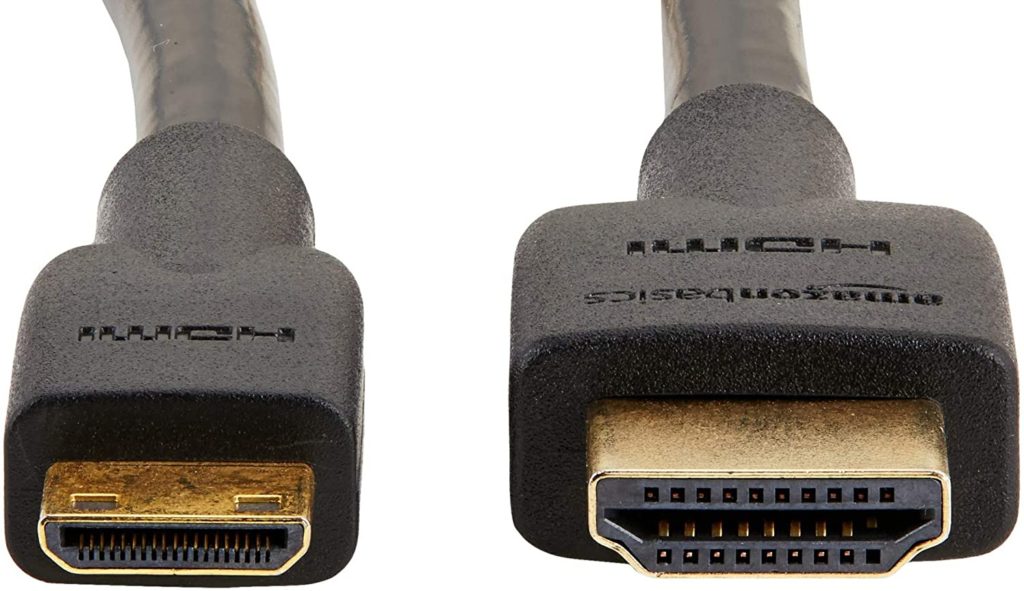
There are some laptop computers that have a Mini-HDMI connector for video out. If that is the case, to connect it to a TV all you need a Mini-HDMI to HDMI cable. To connect your laptop to a TV using a Mini-HDMI to HDMI cable, follow these steps.
- First select the HDMI input channel on your TV.
- Connect the Mini-HDMI side to the laptop, and the regular HDMI to the TV set.
- At this point your TV screen should show the desktop. If it doesn’t or it looks like the resolution is not the correct one, try adjusting the resolution manually. Follow the steps in the previous section for manually adjusting the screen resolution.
Connecting a Laptop to TV Using a Mini Display Port to HDMI Cable
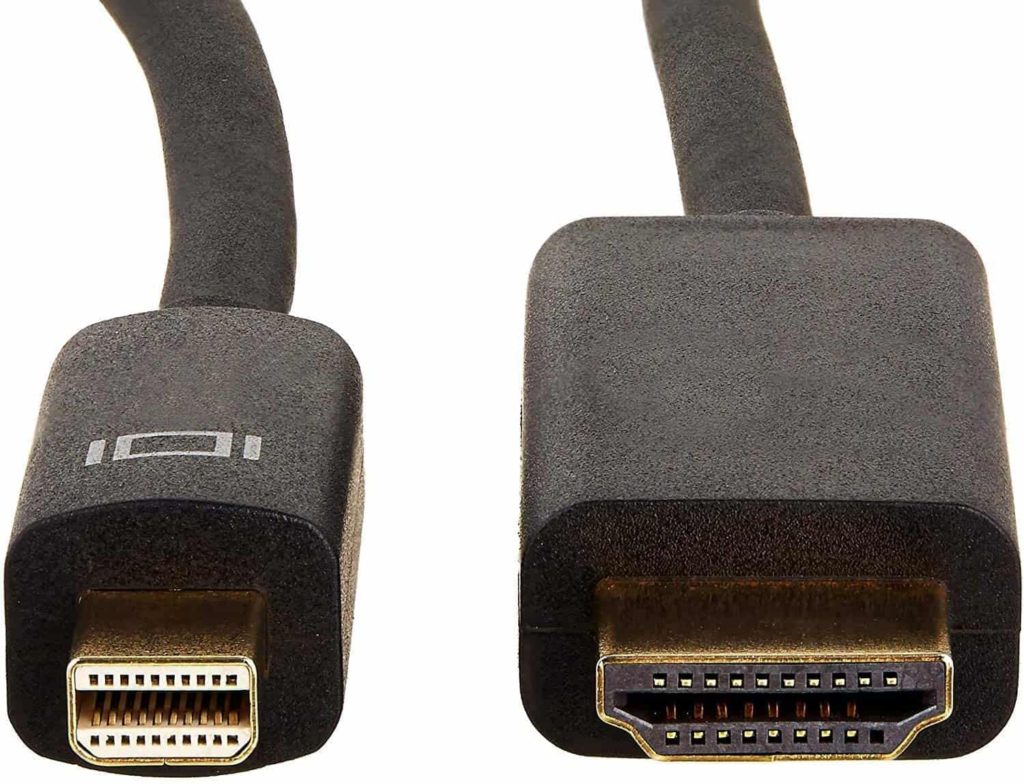
Some computers manufactured after 2008 include a port that has the symbol “P.” This port is not the same as a Mini-HDMI port, it is different. The Mini Display Port was introduced by Apple and it’s a miniaturized version of the DisplayPort audio-visual digital interface.
The Mini Display Port is common in laptops but not on TVs. If you want to connect your laptop a TV using this port, you need to get a Mini Display Port to HDMI Adapter. To connect it follow these steps:
- Connect the Mini Display Port to your laptop.
- With the TV on, select an available HDMI input on your TV.
- Connect the HDMI side to the correct port.
- Wait for the computer and TV to sync. After a few seconds you should see the desktop on your TV’s screen.
Connecting a Laptop to TV with a USB-C (Thunderbolt 3) to HDMI adapter
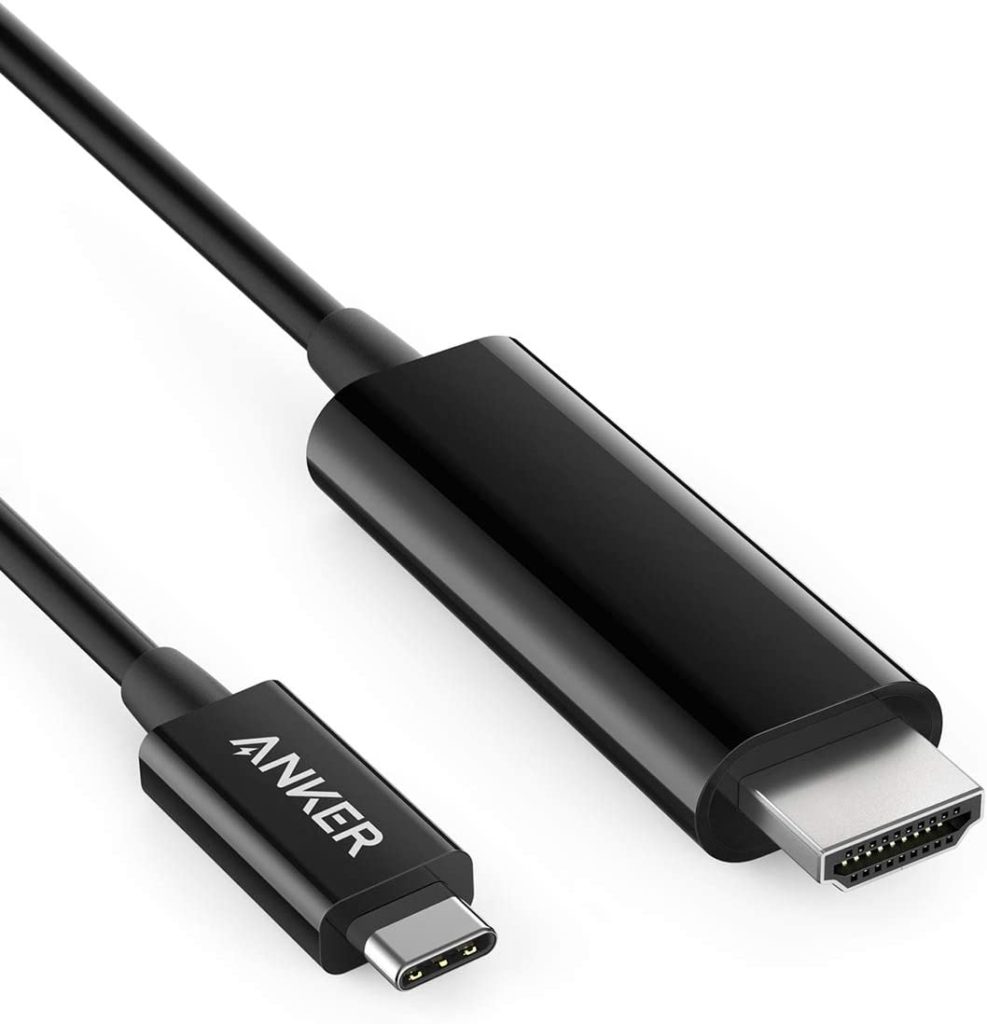
Newer model laptops such as the MacBook Pro, Windows Surface, Dell XPS, HP Envy, etc. Have few ports available for connections. Most new model laptops have Thunderbolt 3 connectivity for interfacing with other devices. It can be used as a DisplayPort for connecting the laptop to a TV. Remember that Thunderbolt 3 uses the USB-C connector form factor for interfacing.
If you have a laptop with Thunderbolt 3 connectivity (USB-C connector), you need an adapter that can convert from USB-C to HDMI (link to Amazon). This connection is plug-and-play, meaning that all you have to do is connect them and they should work, without needing to install any drivers or change settings. To connect your laptop to a TV using a USB-C to regular HDMI follow these steps.
- Connect the USB-C side of the adapter to the correct port on the laptop.
- Select the HDMI input that you want to use.
- Connect the HDMI side of the adapter to the TV.
- You should see your computer’s desktop on the screen.
Connecting an Old Laptop to TV Using a VGA to HDMI Adapter
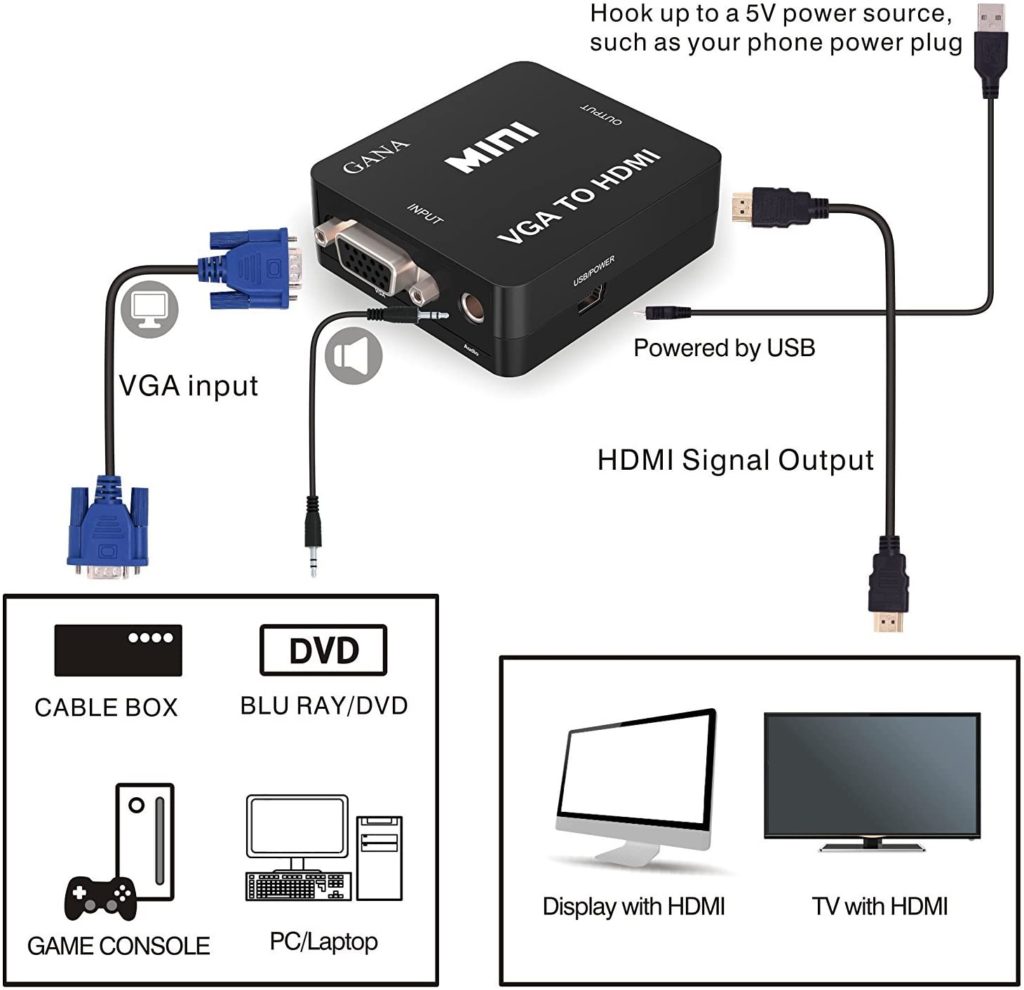
When you want to connect an older laptop that uses a VGA port to a TV, you need to have an adapter box. The reason is that VGA is an analog signal, unlike HDMI which is digital. A VGA to HDMI Adapter Box (link to Amazon), is going to convert the analog signal to digital with a resolution that can go as high as 1080p.
Please be advised that these types of adapters can only convert a video signal one way, meaning that it can convert from VGA to HDMI but not from HDMI to VGA.
These are the steps you need to follow to connect your laptop to a TV using a VGA to HDMI adapter:
- First, you need to hook up the power source to the converter box. Usually, it uses a USB cable that connects to a phone charger or to a 5V source.
- Connect the VGA cable from the laptop to the converter box.
- Connect the audio cable from your laptop’s headphone jack to the converter box. This step assumes that you want the audio coming from the computer to be sent to the TV through the HDMI cable. Remember that HDMI cables can send video and audio signals through the same cable.
- Take the HDMI cable and connect one side to the TV and the other to the converter box.
- Select the correct input channel on your TV, and you should see the laptop screen on the TV.
Here is a diagram for connecting your laptop to a TV using a VGA to HDMI adapter box.
If you need to connect your old laptop to a projector that only has HDMI input, the process is exactly the same, but instead of connecting one side of the HDMI cable to the TV, connect it to the projector instead.
Another case that you might run into is if your laptop has an HDMI video out port and you are trying to connect it to an old TV, monitor, or projector that only offers VGA input. If that is the case, you would have to get an HDMI to VGA Adapter (link to Amazon) to convert the HDMI (digital) signal, to VGA (analog) signal.
This type of adapters are inexpensive and is always good to have one in case you want to use an old monitor as a secondary screen for better productivity.
Connecting a Laptop to a TV or Projector Wirelessly
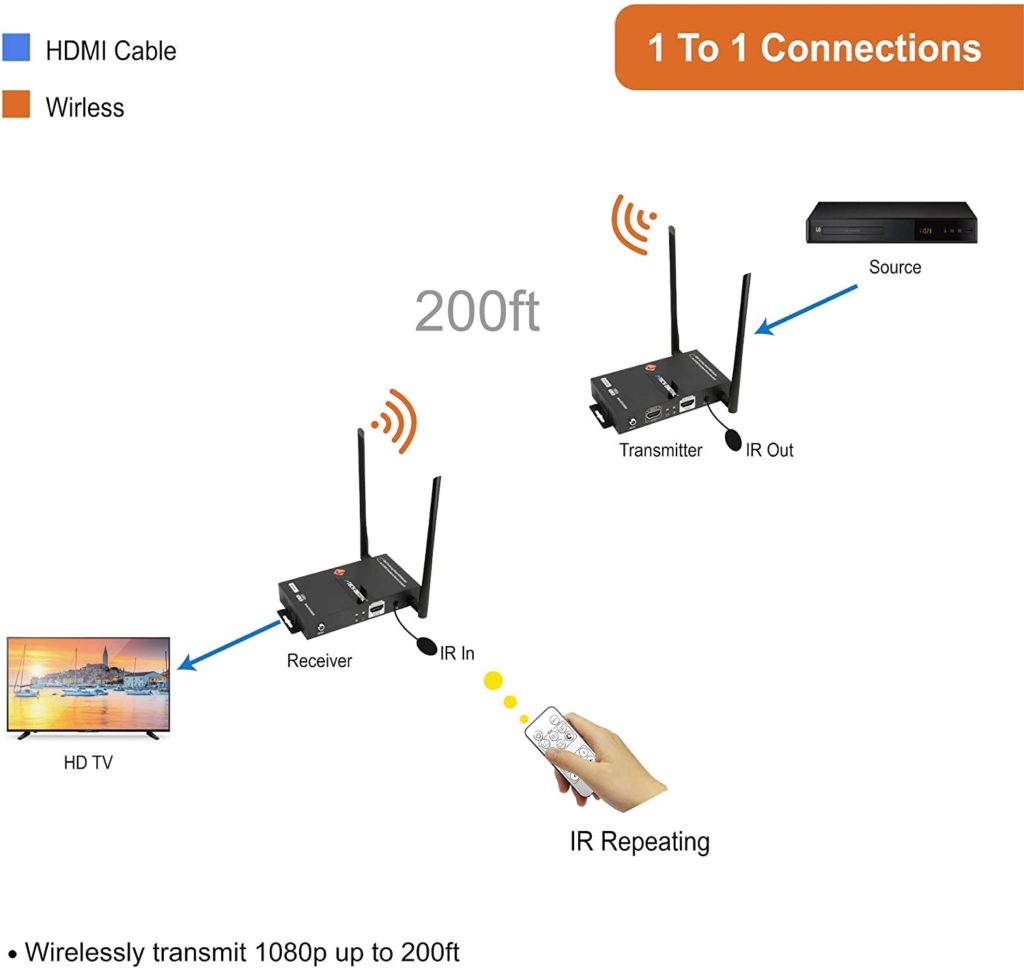
Connecting your laptop wirelessly to a TV or projector is very convenient because you won’t have cables cluttering the place. If the distances are too long, then using cables is not convenient and ends up being expensive. With a wireless adapter all you do is connect the transmitter to your computer’s video out port, and the receiver to the TV or projector.
To achieve HDMI wirelessly connectivity, you need to get a transmitter and receiver system such as the J-Tech Digital HDbitT (link to Amazon) that can transmit an HDMI signal up to 200ft (60m). It also provides the flexibility to get a second receiver, allowing you to wirelessly connect to two TVs or projectors at the same time using only one transmitter and one video source.
Another option is the Ansten HDMI Wireless Extender (link to Amazon), with this device you can get up to 300ft (100m) line of sight. It’s perfect for using it in a conference room, church, or at home for sending an HDMI signal wirelessly around the house.
The most popular and least expensive way of connecting a laptop or any other portable device to a TV wirelessly at home is by using a Goggle Chromecast device (link to Amazon). With it you can stream video, photos, or anything from any smartphone, or laptop. It delivers HD quality with resolutions that go up to 1080p @60fps.
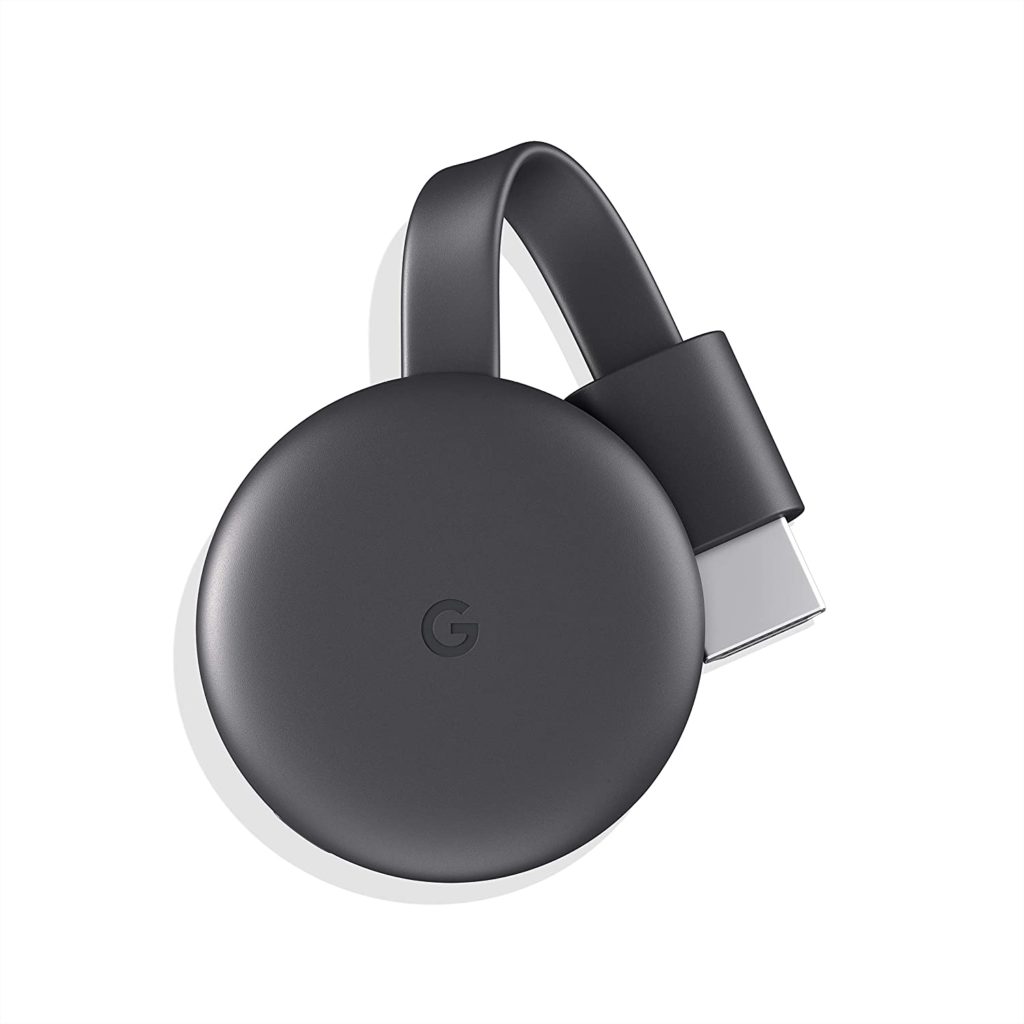
To stream videos, pictures, or presentations from your phone or laptop to your TV; all you have to do is plug Chromecast into an available HDMI port on your TV, download the Google Home app, set up the Chromecast device with some basic information, and start casting content straight to your TV wirelessly.
You can cast music, TV shows, and just about anything you want, and best part is that it is very affordable, so much that you can add one Chromecast to any TV around the house.