
There’s a reason you’re investing your precious time reading this home recording studio for beginners guide. You want to understand all the home recording studio essentials for beginners. You wish to learn how you can successfully plan a functioning home studio without breaking the bank.
Good news! building a home studio on a budget is possible. However, there are a couple of things you must grasp. You should know precisely what home studio equipment you need for a successful home studio setup. Here, you’ll learn all these things plus a ton more.
Why Do You Need a Home Recording Studio in the First Place?
The recording industry has been seeing ever-evolving technological advances over the years. Today, aspiring musicians can practice and record their music at home. No longer do they have to hand over their life savings to obscenely expensive recording studios just for a few sessions.
With the right equipment, an enabling recording environment, and the necessary skills, pretty much anyone can produce radio-worthy tracks. If you have your studio, you can practice all you want and perfect your craft. And you can save tons of money over the long term.
But all that won’t happen unless you take action. Nothing will happen until you start building the studio you’ve craved since forever. And there’s no better time to start than today.
Now, let’s jump right in and discuss what you need to set up a fully functional home recording studio.
How Much Will a Budget Home Studio Cost?
There’s no fixed number for the total cost, of course. Everyone’s situation is different. The fewer stuff you have to buy, the cheaper it’ll be for you.
That being said, it’s unlikely you can build anything worth having with a $500 budget. In most cases, you’re looking at $1,000 or more.
The trick is to buy only what’s absolutely necessary for now. I mean, you can always upgrade down the road.
Here’s another idea to keep in mind. It’s all about the skills you have rather than the stuff you can cram into your home studio.
12 Things You Need to Set Up a Home Studio
Here is the list of everything you need to set up a recording studio at home:
- A Computer
- Digital Audio Workstation (DAW)
- Audio interface
- Microphone
- XLR microphone cables
- Microphone stand
- Pop Filter
- Studio monitors
- Headphones
- Acoustic treatment
- A recording desk
- A recording chair
Let’s dive right in.
1. A Computer for Recording

You’re about to embark on your recording journey, and you need a laptop or desktop computer at this point. A computer plays a critically important role. It’s probably the most important tool for the project you’re launching.
The best computers for recording music don’t come cheap, but you’re just starting, and the worst thing you can do now is to throw money at the project. Instead, move slowly. Allow the project to evolve and develop gradually. And remember: the most crucial element of a truly successful home recording studio is the musician’s skills.
Use what you have. Focus on the specs as opposed to any other consideration. Also, understand that a Mac, Windows, laptop or desktop computer isn’t necessarily better or worse.
When it comes to the specs of a computer to use, these are my recommendations:
- PROCESSOR: you’ll want the fastest processor you can afford, the minimum I recommend is the Intel i5 processor.
- RAM MEMORY: no less than 8GB, the more the better.
- STORAGE: a solid-state drive (SSD) no less than 250GB. If you can afford to buy or upgrade to NVME M.2 SSD, I highly recommend it because it will run smooth and lightning fast, especially when editing.
- OPERATING SYSTEM: I highly recommend a 64-bit OS. Most digital audio workstation software runs on 64-bit operating systems.
- PORTS: you’ll need to make sure that the computer you chose has enough ports as well as the type of ports you’ll need. It needs to have a minimum of two USB ports, if it has more, it’s better that way you have more flexibility. If possible, a Thunderbolt connector is a great idea in case you decide to upgrade later on.
If you have an older computer with a dual-core processor with 8GB of RAM, check your specs against the minimum required to run the Digital Audio Work Station (DAW) of your choice to make sure that it will work.
If your computer doesn’t have an SSD but instead it has an electro-mechanical hard drive, it doesn’t mean that you can’t use it for your home studio setup. Just keep in mind that electro-mechanical HDDs are slower to work with, especially when editing large files but they can work.
Now, here’s the thing. Stop overanalyzing stuff at this point. If you already own a laptop or PC purchased within the last three years, the computer would likely work.
If you don’t own a computer and need to buy one for your home studio project and have the funds to invest in a new system, these are a few examples of computers that are recommended:
2. Digital Audio Work Station (DAW)
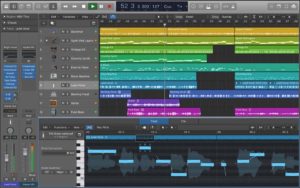
What’s DAW in music production? The term digital audio workstation may sound fancy and probably complicated. But it’s just the software you use to record and edit audio.
Beginners and pros rely on this piece of technology to edit and mix their creations. I can’t say that the DAW is the single most essential component for a recording studio, but it sure plays an enormous role. It is a must-have for every recording enthusiast.
The recording market offers a variety of DAWs software, and each comes with various strengths and limitations. But no matter what DAW you choose, it should enable you to mix — on a time-based grid — different sound sources.
So, how do you choose a DAW? What’s the best and easiest DAW for a complete beginner or hobbyist? There’s a ton of confusion and controversy surrounding this issue. And it’s easy to immerse yourself in the vast sea of varying opinions. I’m here to help you decide what DAW works best for a beginner so you can get started as soon as possible.
Listen, stop wasting time debating what DAW is best for you. Any DAW can do the job when you are building a home studio on a budget. At the beginner stage, I don’t recommend getting expensive software because you will be overwhelmed with the many options and functions it comes with and get discouraged, just keep it simple.
Actually, there’s very little difference between DAWs in relation to sound quality.
Have a Mac? Lucky you! Every Mac comes equipped with a FREE DAW, GarageBand. It’s a clean, simple interface. And everyone with a smattering recording knowledge knows GarageBand is one of the best FREE DAW out there.
Some people feel the GarageBand is too limited, though, but it sure does the job. That’s why most musicians go with the venerated Logic pro — Apple’s flagship DAW. Logic Pro offers amazing MIDI editing capabilities.
I believe it’s only rivaled by Ableton Live and Cubase. Why not go with GarageBand for now? As you learn how to leverage every capability the platform offers, you can upgrade to Logic Pro.
Another free Windows-based DAW software that is an excellent option for a beginner’s home studio setup is the PreSonus Studio One 4 Prime. It can be downloaded for free from the PreSonus website.
For a more complete version of this software, I recommend Studio One 4 Artist from the same company.
Oh, I almost forgot about this, most audio interfaces come bundled with a free version of a DAW software, which is what we are discussing in the next section. But just a heads up, you can get a free copy of the Studio One 4 Artist Digital Audio Workstation software if you purchase any of the following audio interfaces:
Another advise, stop fretting over plugins, and don’t spend a penny at this point on any of those expensive options. What your DAW offers will suffice — at least for now.
3. Audio Interface

You need a way to get sound in your computer so you can process and edit audio. A soundcard or audio interface enables you to effortlessly convert sound from different sources into digital signals. It also helps you to turn those digital signals back into sound after you’ve worked on them.
A few years back, you needed to have a professional soundcard in your computer to do the job and that could cost thousands of dollars. But technological advancements have been happening all along, and nowadays, you can perform high-quality recording with the use of audio interfaces.
So, is a soundcard the same as an audio interface? Basically, yes — either will do the job.
An audio interface is technically an external soundcard. It works supremely well for laptops and a growing number of people are using it on their desktop as well.
I have written a post dedicated only to reviewing the best audio interfaces for beginners who are on a tight budget. The reviewed interfaces give you the best value for your money.
An audio interface looks like a box with a face featuring several inputs for instruments and mics. It also comes with outputs for headphones and speakers.
What’s the best or most popular audio interface for home recording? There are many brands and options when choosing an audio interface. Depending on how many inputs/outputs you need, the type of preamp topology used and other variables the prices can range from less than $100 to thousands of dollars. Still, for beginners, I would recommend the 3rd Gen Focusrite Scarlet Solo. Its sibling, the Focusrite Scarlet 2i2 (3rd Gen) is also a great pick.
Both of these options come bundled with Pro Tools, First Focusrite Creative Pack, Ableton Live Lite, Softube Time and Tone Bundle, Focusrite’s Red Plug-in Suite.
Another audio interface I recommend for a beginner’s in-home studio is the Behringer U-Phoria UMC202HD. This is a very easy to use interface that will have you recording your tracks in no time. It comes bundled with a copy of Tracktion that is one of the world’s fastest and easiest to use Digital Audio Workstations (DAW) for composing, recording, editing, and mixing.
The UMC202HD is also compatible with most of the popular recording software including Avid Pro Tools, Ableton Live, Steinberg Cubase, and others.
Many beginners often ask: Do I need to shell out for an interface when I can use a USB mic? No, you don’t have to buy it. You can use a USB mic, instead if you are recording vocals only or using the mic for picking up the sound of an acoustic instrument. But there’s a reason many people invest in a good audio interface.
By having an audio interface, you can also connect instruments such as guitar, keyboards, etc. and record more than one channel at the same time.
If you have a band with five instruments and vocals, for example, it would make sense to use an audio interface with multiple inputs so that the session can be recorded at once, otherwise, you would have to record each instrument separately and then mix it in the DAW software.
4. Studio monitors
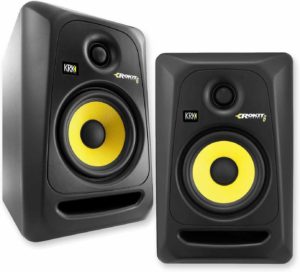
What’s a studio monitor, and what is it used for? Anyone who strives toward perfection in home audio reproduction uses the best studio monitors their budget allows. These are special loudspeakers designed to reproduce sound as natural as possible so that when a recording is mixed and later edited it provides a sound as accurate as possible.
So, what’s the difference between studio monitors and regular speakers? Studio monitors are designed with an ultra-flat frequency response for professional-level listening.
Near field studio monitors are supposed to sound with a tight bottom, focusing on the mid frequencies, and providing detailed highs. In your in-home studio, you need them for mixing, editing, and mastering.
I can’t overemphasize the following. Consumer speakers aren’t designed to be used in recording studios. The sound that comes out of them is not accurate enough for mixing, editing or mastering.
For example, you won’t like the mixes you get if you use such speakers. They tend to be too heavy on the lower frequencies or exaggerated on the highs, making the mix inaccurate. That is why I strongly recommend getting a pair of decent studio-grade monitors for your home studio to produce a studio-quality mix.
You can use either active monitors or passive monitors, but active monitors are better. Active monitors use built-in amps while passive ones rely on external amps.
So, why active and not passive monitors? Because active monitors use specially designed amplifiers and speakers that are perfectly matched to provide a more accurate sound.
A standard studio monitor consists of a woofer, a tweeter, an amp, and the control panel. The best home studio monitor should offer an ultra-flat frequency response with very low total harmonic distortion.
The following are great examples of monitors depending on your budget for a beginner’s studio:
Mackie Creative Reference (CR4)
Yamaha Hs5 Powered Studio Monitor
I have written a post dedicated only to reviewing the best affordable studio monitors, each one of the reviewed monitors gives you the best sound possible at an affordable price.
5. Microphones

Your home studio needs at least one or two mics. I know you’d love to add the best of the best vocal mics to this growing list of equipment. But a professional top of the line studio microphone can set you back as much as $10,000! And you’d not want to spend that much money on a mere mic, would you? It’s just not a very good idea for a beginner.
Not all microphones are created equal, each one is designed with a frequency response that is tailored for a specific purpose. Similarly, there are different pickup patterns depending for what is going to be used for.
If you’re looking for an insanely effective mic at a reasonable price, go for an all-round option. Large diagram Condensers are great all-round choices. You can accomplish just about anything with them.
With condensers, the frequency response you get is incredibly articulate. If you’re a vocalist, grab a condenser. The Rode NT1 is an awesome and affordable choice.
Condenser microphones are also a great choice for performing live. Check out the best condenser microphones for live vocals article.
Another great choice for vocalists is the Audio-Technica AT2035. With this large-diaphragm condenser mic you will get smooth, natural sound and very low noise.
For Acoustic Instruments, these are my recommendations:
If you’re a guitarist and need amplifier miking, it’s better to go with a dynamic microphone. Dynamic mics take high-volume sounds pretty well. The SM57 is a great dynamic mic to start you off.
For miking acoustic guitars, pianos, and cymbals, my recommendation is the AKG Perception 170. This small-diaphragm condenser microphone is ideal for high SPL applications up to 155 dB. Making it a perfect choice for budget recording of overheads, percussions, acoustic guitars and other stringed instruments.
For miking drums a good option is:
Samson DK707 7-Piece Drum Microphone Kit
For bass drum and bass guitar these two options work perfectly well:
6. XLR Microphone Cables
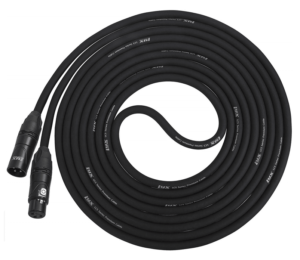
Selecting XLR mic cables for your studio may not be exactly a glamorous phase of the home studio setup. But you sure need good cables in your range.
When it comes to designing a home recording studio for beginners, people often ask the following question. How much do decent XLR cables cost?
Pro musicians often say “it doesn’t matter what cable you use.” But have you seen their assortment of mic cables? Lots of these folks spend a small fortune on cables. Yet they keep saying “it doesn’t matter.”
But it matters, you know. I’ve seen dirt-cheap Chinese cables that don’t work at all. And others that work for a week or two before they break. And don’t attempt to return them — you’ll hate the awfully stressful return process.
I’ve also seen premium mic cables that deliver laudable performance but leave you wondering whether it’s not a full-blown rip-off.
Honestly, most premium cables work better than the cheapest options I’ve encountered. They offer better lay, shielding, strand count, and impact absorption. They also provide better connector conductivity.
If you can afford them, choose cables with a shorter lay. The lay refers to the distance between twists in a cable. Premium cables typically pack more wire, and they’re more (relatively) expensive. In addition, they’re more flexible and offer much better noise cancellation.
Premium cables usually use braided shielding. And they’re super strong and last long. Braided shields also offer better conductivity than either serve or foil shielding. Serve shields are often used in mid-range cables while most budget cables have foil shields. And serve shields offer better flexibility than braided ones.
Impact absorption may not be very important for cables for a home studio.
Silver is a better conductor than gold, but it needs frequent cleaning to keep tarnishing at bay. That’s likely why many people prefer gold-coated connectors even if they’re more expensive.
Finally, we have quad cabling, a relatively recent engineering technology. This factor dramatically reduces electromagnetic interference emanating from nearby equipment. This aspect also ensures that cables see reduced intermodulation distortion (IMD). Plus, you’ll get much better sound quality.
IMD is the accidental creation of ghost signals (not part of the original signal). These ghost signals show up when the original signal(s) pass-through devices that aren’t linear.
The average musician may not notice the difference in performance between cables of different quality levels. That doesn’t mean no difference exists, though.
You don’t want to spend a boat-load of cash on cables. So, go for more affordable options that deliver great performance. While you can use the best budget cables, I’d recommend that you go with mid-range options. You can get good mid-range cables whose prices hover between $30 and $60. When it comes to cables for a beginner’s studio these are good options, click the links to see the price on Amazon.
Just choose the length that works for you.
7. Microphone stand
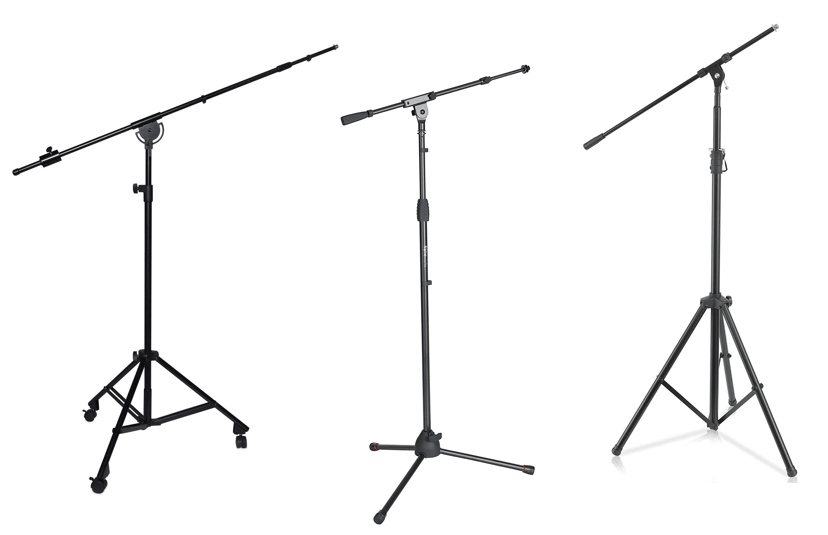
Needless to say, you need a good microphone stand or several. A good mic stand ensures your mics stay where they should be at all times. Imagine trying to grab a falling high-end mic during a performance so it doesn’t crash into the ground. See, you need a top-quality mic stand. However, buying a good one shouldn’t wipe out your entire savings.
Now, there are good cheap mic stands and expensive nightmares. So, don’t buy before devouring a couple of home studio mic stand reviews.
The best mic stands cost over $100, and you can shell out for 1 or 2 if you can afford it. But you should easily find a budget mic stand that works perfectly.
Whether it’s a tripod, tripod boom, overhead, round-base, or low-profile stand, ensure you’re getting the best bang your buck.
Note: when it comes to the best mic stand for home recording, don’t always go for the lowest-priced option. The vast majority of those ones don’t do the job. Be ready to spend more so you can get much better results.
The following are the microphone stands that would be perfect in a home studio setup, some of them I have personally used and are of good build quality.
Pyle Heavy Duty Microphone Stand
Gator Frameworks Tripod Mic Stand
LyxPro Professional Microphone Stand
8. The Pop Filter
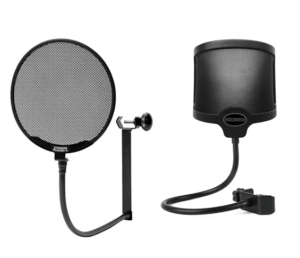
Popping sounds aren’t uncommon while recording. But that’s where the best pop filter for home studio comes into play. These sounds occur naturally when you’re singing or speaking out letters such as b or p. They’re called plosive sounds, and they don’t do any good for your music.
You also don’t want your recordings to contain those unpleasant hissing S-sounds. These sounds are technically referred to as sibilance. You produce these undesirable noises when saying words such as ship, sip, and zip.
As you speak, your tongue naturally forces a whole stream of air toward your teeth. What you get is a high-pitched, high-amplitude sound that may lower the overall quality of your audio.
The right pop filter helps keep these unwanted sounds acceptably low so you can have the finest sound possible. They also prevent moisture (from your mouth) from entering the mic. And that adds longevity to your mics.
When shopping for a pop filter, pick the right size, shape, and mount. Choose a filter whose diameter suits your recording style and your mic’s size.
Grab a flat filter if you’re trying to save every buck you can. But this option requires the user to speak from a particular angle.
The best flat pop filters are:
Auphonix Microphone Pop Filter (MPF-1)
Stedman Proscreen XL Pop Filter
I believe curved pop filters are the best bet. Why? Because you can speak or sing from any angle. If you move a lot while recording, choose a curved filter with a larger diameter. That’s the surest bet.
The best-curved pop filters are:
9. Headphones

First off, you just can’t use the earbuds that came with your smartphone. In fact, you should stay away from consumer headphones. Why? They’re created to ramp up different frequencies such as bass or treble.
If you use them, you won’t hear your recording as it actually sounds. That being said, there are in-ear headphones purposely designed for use in home studio situations.
So, get the best home studio headphones within your budget. You’ll find that the level of accuracy they deliver is matchless. They let you perceive your production as it really sounds so you can make the necessary edits.
But don’t throw away those Apple earbuds. Instead, use them to listen to how your audio will sound to those who’ll enjoy your music.
It’s best to use closed-back home recording headphones. They feature snugly sealed earcups. You won’t have noise leaking into your mic, especially when you’re recording vocals.
Closed-back headphones are also great for when you’re practicing or performing with others. They help you to focus on your performance without distractions.
These are few examples of closed-back headphones that can be used for a home recording studio, to find out the latest price click the link, it will take you to Amazon.com:
You can also use open-back headphones. What’s the difference between closed-back and open-back headphones? The earcups for the latter let air pass through unhindered. And that results in a more spacious sound.
Open-back options are also great at helping you find specific instruments in your mixes. Plus, they sound more natural — even more accurate — than closed-back options. And most people find they’re a better bet for mixing and mastering.
These are great examples of high-quality open-back headphones that you can use in a home studio setup, the link will take to amazon to check the latest price:
You can also find composite options that offer the best of each type of headphones. Consider picking semi-open headphones. These ones don’t let excess noise in or out. Plus, they deliver more open, spacious sound.
I recommend the following semi-open headphones, click the link to check the price on Amazon.
10. Acoustic Treatment
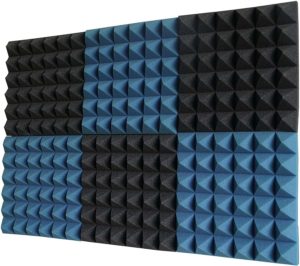
Don’t be like most beginners. I mean, don’t underestimate the importance of your home studio’s acoustics.
I get it — you’ve invested in great condenser mics and studio monitors. It’s easy to think that just because you’ve taken care of these items, you’ll get great sound without doing anything else. Well, you’re wrong. You must do more if you want audio that sounds professionally produced.
You MUST give enough attention to your recording room’s acoustics. If there’s one factor that has an enormous effect on how your tracks sound in the end, it’s acoustics. Part of why world-class recording studios charge obscenely expensive rates is they’ve spared no expense on acoustic treatment. Such studios have some of the smartest acoustical engineers on the planet handling this aspect.
Stop fretting about this, my friend. No one said you should be a highly competent acoustic engineer to enhance your space’s acoustics. But you sure need to have a firm grasp of the basics.
Stop worrying about direct sound as it travels from the source toward your mic. Its tone, for the most part, stays the same, and its frequency remains intact. That’s because it doesn’t come into contact with walls, the floor, and other surfaces.
But you must take care when it comes to reflected sound. Some of the sound that leaves your guitar, piano or whatever doesn’t travel to the mic expressly. It briefly interacts with different surfaces in the room before reaching the mic.
In the process, small changes — good or bad — may happen to the sound. How the ears perceive the sound that eventually reaches the mic depends largely on the size of your studio.
Sound quality is also a function of how many reflective surfaces the room has, and the nature of those surfaces.
To create a room with amazing acoustics, you need 2 things: space and money. Larger rooms have better acoustics than smaller ones, everything else being equal.
If you’ve ever been to any well-designed cathedral, you know that every sound feels fantastic. That’s because cathedrals are often large, and they’re designed to sound fabulous.
Money is the other critical essential to creating a recording studio that sounds terrific. Let’s be honest here: you need tons of cash if you desire a studio that delivers to-die-for sound. But you’re a beginner, and you may not have set aside much money for this. Or you just don’t want to spend every dollar you have at once.
So how will you circumvent these two problems, money and space? Here’s the trick — find a way of introducing fake reverb into the room. But how do I add fake reverb to my home studio?
Here’s how…
How to Create Fake Reverb for a Home Recording Studio
You want more direct sound and less of reflected sound. So, filter out reflected sound while leaving behind the direct sound. Luckily, there’s a solution called acoustic absorption. It works, but to get excellent results, use acoustic absorption alongside sound diffusion.
Unfortunately, when you eliminate reflected sound completely, the studio feels sort of like dead. And that doesn’t feel so great. To avoid this scenario, it’s advisable not to remove every trace of reflected sound. And that’s where diffusers come in. With diffusion, it’s pretty easy to achieve a natural balance in sound frequency.
So, what are the elements of successful acoustic treatment? You need bass traps, acoustic panels, and diffusers.
· Bass Traps
If you have a small room, you’ll likely have issues with bass frequencies. To absorb those low frequencies, use bass traps. But how will I take care of mid/high frequencies? Well, you can still use bass traps for these frequencies. Actually, you can use bass traps exclusively. The best bass traps are porous and filter out mid/high frequencies satisfactorily.
Where do you install bass traps? Position them in the corners of your studio. You can’t choose not to use bass traps. They’re critical to the success of your home studio setup.
· Acoustic Panels
Acoustic panels absorb mid/high frequencies. But they do pretty much nothing for low frequencies. Evidently, you can’t rely on them alone. They’re normally thinner than bass traps, and each unit covers a larger wall area.
But why use acoustic panels at all when you can just use bass traps and save money? It’s because they enable you to solve a problem that bass traps won’t help you address. They help deal with any sound waves occurring between opposite, parallel walls.
· Diffusers
Finally, we have diffusers. They help you handle any remaining sound frequencies in the studio. Not everyone uses diffusers, though. Folks that don’t use them argue that they (diffusers) don’t enhance small rooms in any noticeable way. In addition, they’re expensive. I’d say use diffusers for when you want professional-quality recordings.
Buying each of the 3 solutions described above can be expensive. Luckily, the market also offers all 3 of them together in affordable packages. I recommend 3-in-1 packages from either Auralex or Primacoustic.
A good option for a vocal booth or small room studio is the Auralex Acoustics D36-DST. It will cover a total of 36 square feet. If the space you are trying to cover is bigger, the acoustic panels can be placed in different parts of the room to reduce unwanted slap and flutter echo, and other sound problems, in your recording space.
Another great option is the Auralex D108LCHA/BUR D108L. It’s an excellent choice for small to medium-sized home studios, live rooms, and rehearsal spaces. It can give you good acoustic results, and it provides an elegant look that will impress.
The Primacoustic London 8, 10, or 12 are three different kits that you can choose depending on the size of the room that needs the acoustic treatment.
Don’t confuse acoustic treatment with soundproofing, though. They’re not the same thing. And they don’t serve the same purpose.
Difference between Acoustic Treatment and Soundproofing
Soundproofing is what you do when you want to keep peace with your family and neighbors. It seals out the noise so you can practice as hard and as long as you want without disturbing others.
While soundproofing may help with a room’s acoustics, there’s a whole world of difference between the two. You may not always need soundproofing, but acoustic treatment is a must-do. Let’s just say soundproofing enhances a room’s acoustics but isn’t absolutely necessary. It’s something you do for others (especially neighbors) rather than for yourself.
Using a Microphone Isolation Shield for Acoustic Treatment
If you are a vocalist and have a tight budget to get an acoustic treatment kit, you can use a microphone isolation shield. This is an affordable option, that delivers excellent results.
The best microphone isolation shields are:
Monoprice Microphone Isolation Shield
LyxPro VRI-20 Absorbing Shield
Neewer Microphone Isolation Shield
Neewer Tabletop Compact Mic Isolation Shield
11. A Recording Desk
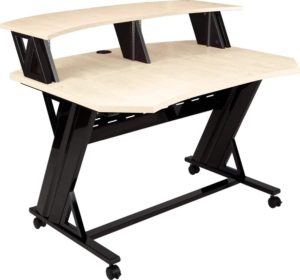
I understand. You spent all the time shopping for everything else and forgot you need a place to place your recording equipment.
You need a desk that looks great. Preferably one that blends well with the overall décor of the room. The desk should offer adequate surface area, enough to accommodate all the equipment you have.
Most important, the desk should be sturdy. No one wants a wobbly desk. So, spend enough time researching the best studio desks for home recording. Here’s one more thing. Pick a choice you can move around with ease.
Here are some suggestions for a recording desk:
Z-Line Designs Cyrus Workstation
Studio RTA Producer Station Maple
Any of these options are desks with a sleek, modern look. They are attractive, sturdy, and have a large-surface-area. Click the links to check the latest price on Amazon.
Finally, you need…
12. A Comfortable Chair
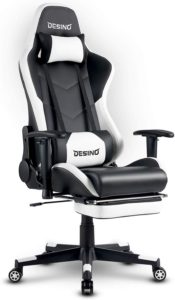
It’s easy to overlook stuff that has little to do with the actual recording. Stuff like a comfortable home studio chair. Obviously, you need to have in that music room the best comfortable, ergonomic chair you can afford. You’ll likely be spending tons of hours sitting, after all. And that can end up hurting your health.
Back pain is common among folks who sit for hours at a time. While chiropractic care can help resolve back pain, it can be quite expensive.
It’s best to stand and walk around every 30 or so minutes. And having a comfy chair makes a whole world of difference. Not only will you enjoy doing your thing more, but you’ll also experience much less fatigue.
The best ergonomic chairs for your home recording studio are:
Home Recording Studio for Beginners: Final Thoughts
In this home recording studio for beginners guide, you’ve learned a ton (hopefully). You now know what you need to create a successful home studio. You crave a home studio setup that works, but one that won’t drain your finances. That’s why this guide offers several budget and mid-range recommendations.
As you’ve seen, setting up a home recording studio involves quite a lot. But it’s certainly something you can handle. This guide started you off, and that’s good. But you should probably read more on how to handle the actual setup.