This website uses cookies to improve and personalize your visit. Learn more about cookies. Got It

  • Skip to primary navigation
  • Skip to main content
  • Skip to primary sidebar

Virtuoso Central

  • About Us
  • Contact
  • Privacy

Informational

Beginners’ Tips for Coming Up With Brilliant Podcast Ideas

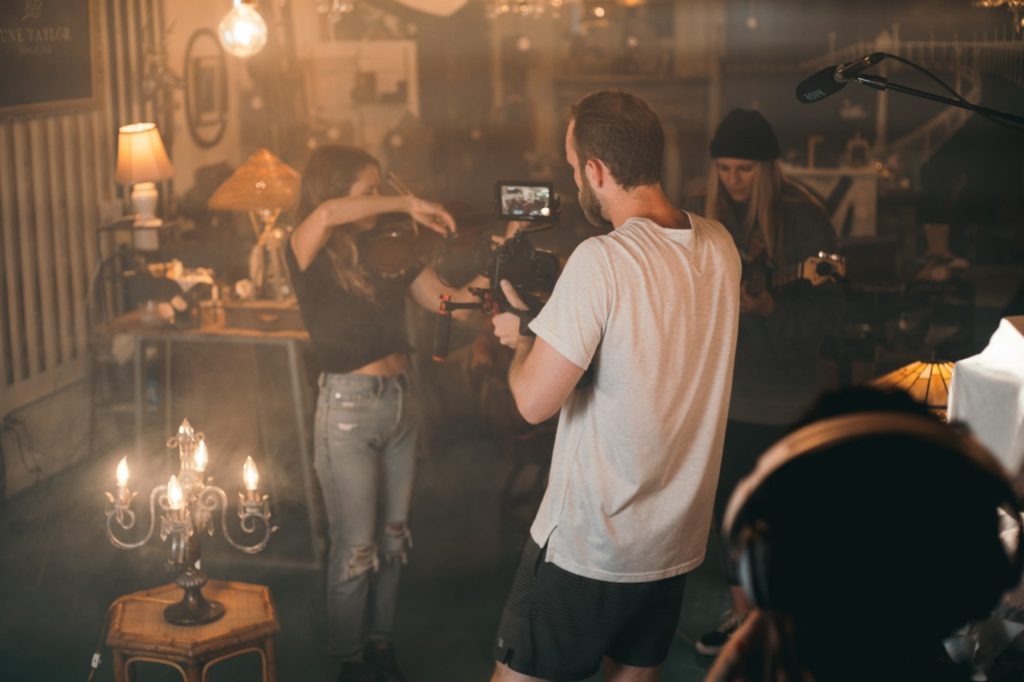
Do you have something to say but are not quite sure what it is yet? Podcasting is a great way to get your voice heard and can be done with a relatively low start-up cost. But if you are starting a podcast, you want to do it right, and that involves choosing the perfect topic. 

If you are stuck for ideas on topics for your podcast, have no fear. Below, we present our must-read guide on how to come up with the best podcast ideas for beginners. 


Use What You Know

The first golden rule of podcasting is to discuss something you know. You need to come over as passionate and knowledgeable about your subject. If not, people will not be interested, and the podcast will sound like you are reading from a book. 

Everyone has a topic they know well or something that they are passionate about. All you need to do is add to this with some research and a great topic for each podcast; then you can begin. 


Finding Engaging Topics

Once you have your theme, you need engaging podcast episode ideas. Without this, your podcast becomes another gaming podcast or another cooking podcast. Your topic lets you stand out from the crowd. 

Start by brainstorming ideas that are relevant to your niche. Once you have a list of around ten solid ideas, do some research and reading. You may find ones that are even more interesting, which you can add to the list.

Now number the topics based on the level of interest you think they would bring to listeners. This is the running order of your podcasts, with one being your debut cast. Once you start to reach the end of the list, you can develop more ideas using the same procedure. 


Know Why You Are Doing It

Knowing why you are doing this will be a great motivator and shape the ambiance of your creative podcast ideas. Usually, the deciding factor comes down to three things—fun, charity, or business.

Doing a podcast for fun will let you have a bit more room to maneuver. You can joke, laugh, and generally be silly. These types of podcasts are extremely popular, as they make people feel part of the excitement and lift spirits.

Charitable podcasts are ones that strive to provide value and something of benefit to listeners. They may be focused on improving mental health, wellness, or for people suffering from an illness. They should generally be caring in tone, but they do have room for some fun and jollity.

Finally, some podcasts are used to promote a business. They should be quite serious and showcase the expertise of the podcaster. It may help to get guests that are leaders in the field being discussed. 

Of course, any of these can overlap. It is perfectly acceptable to have a business podcast that blends with a fun one. But knowing what you want can help you focus on finding your topics and define your audience. 


Your Personal Experience Can Be the Best Idea for Your Podcast

As well as having your own interests and expertise, you will also have your own experiences. These can be just as valuable, particularly if you have achieved something great or managed to pull yourself through a traumatic time. Humans want to hear about other people’s experiences and stories.

You can hear this all the time in podcasts. It may be how someone has managed to lose weight, overcome crippling illness, or climb a mountain. The difference is that your outlook and story will be unique to anyone, even those who have gone through an identical situation. 


Give Your Take on Events

Another great podcast idea for beginners is to talk about current events. An event may be defined as a number of things that have happened or happening at the moment.

It does not have to be news but could be the release of a new movie, music video, fashion line, or any kind of happening. Every day, these things are happening all around the world and you can use them as your topics. 

The good thing about events that are just happening is that you usually have a lot of information on them to fill a good podcast.

Promoters and marketers are actively searching to get their event seen by people, and podcasts are a great way to do this. Contact the organizers for extra information, or even invite some of them onto your show. 
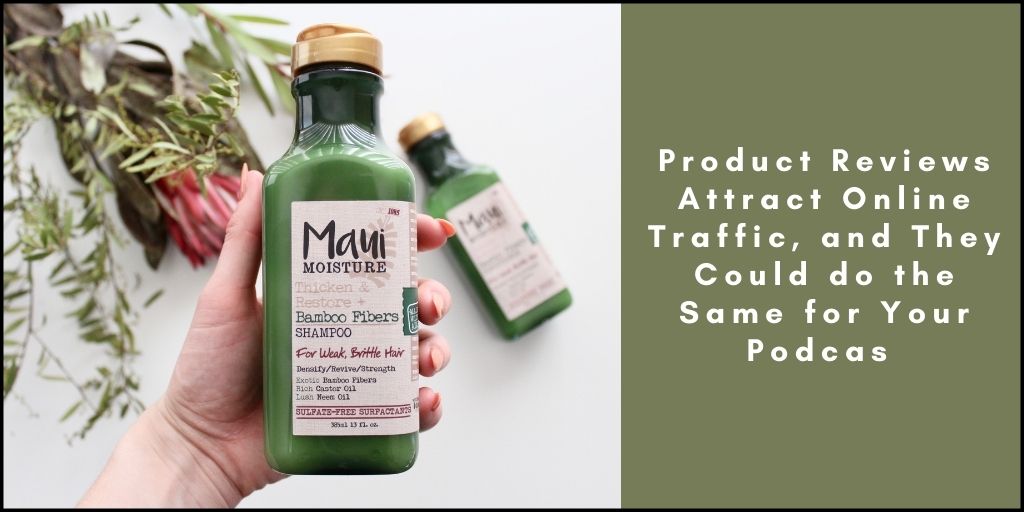

Review a Product

Product reviews attract a lot of traffic online, and they could do the same for your podcast. If you can’t think of an interesting niche you are passionate about, then reviewing products could be an idea.

Remember to keep product reviews honest, stating positives and negatives, so that listeners start to value your opinion and return to the show. 

Using a podcast for product reviews takes a little more money to get started up because you have to buy and test the products you are reviewing. However, once you get an audience, you may find that companies are willing to part with goods for free, just for the review.

One alternative is to review products you may buy anyway, either as part of your job, hobby, or day to day life. 


Get Factual

Offering knowledge is a great way to build a podcast audience. The allure is that in the end, your listeners leave feeling like they have learned something. That is what keeps them coming back. 

You can find facts and figures being released every day. From serious medical studies and social statistics to absurd facts and funny figures. All of them can be used to spark some excellent discussions, stories, and podcast episodes. 


Just Press the Record Button

Once you have some podcast ideas for beginners, try a few out before you broadcast. See which feels right, then try to form a plan, concentrating on your overall arc. Once you have this figured out, all you need to do is start producing content.

Don’t stay only in the brainstorming and preparation stage; you need to start creating the content. The faster the content is out there, the better because you will get feedback, and you’ll learn as you do. 

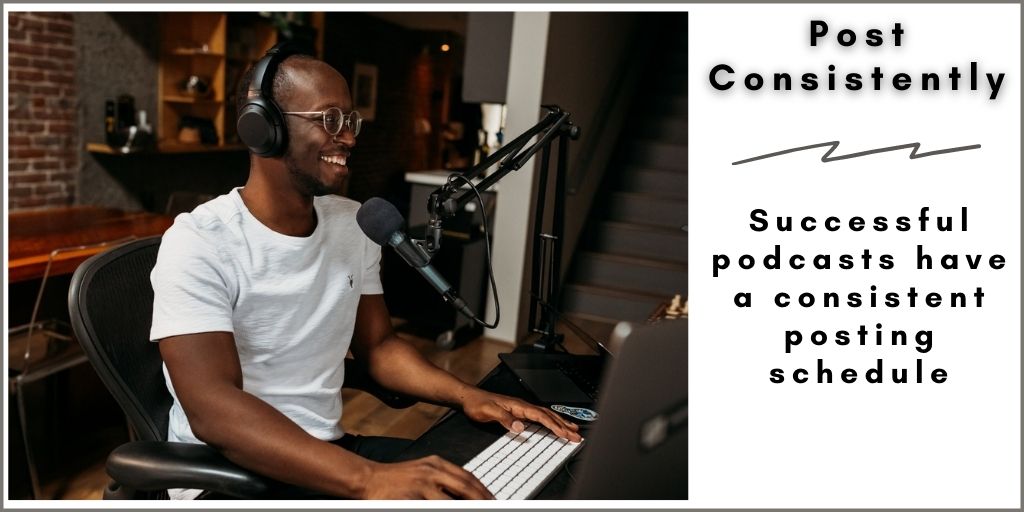
And remember, even the best podcasts started by publishing the first episode, take that step and be consistent, let time do its magic, and you’ll see the results.

Virtuoso central has a host of handy blog articles on everything audio, from microphones to musical instruments. If you enjoyed this, you must read our guide on podcasting equipment, so you can get the best audio quality on your show without breaking the bank. 

How To Create a Podcast Using an iPhone or iPad

A great way to liven up staying at home during this pandemic is by listening to some podcasts. There are over 100 million podcast listeners per month. Many podcasters can earn a lot from making a podcast like Joe Rogan and Dave Ramsey. 

So, do you have experience in a specific subject or niche? Why not start your own podcast to grow your personal brand or company’s presence on the internet?

To create a podcast, you don’t need a fancy recording studio or a complicated setup. All you need is your iPhone or iPad and an interesting idea to talk about.

If you wonder how you can share your experience and create a podcast with an iPhone or iPad, read on to learn more on how to create a podcast and your needed podcast equipment. 


Using Your iPhone or iPad to Start Podcasting

The iPhone and iPad are expensive gadgets with lots of features and plenty of processing power to record, edit, and publish high-quality podcasts. So, take advantage of its features to create your brand new podcast.

This is what you need to start podcasting using your iPhone or iPad:

  • A good external microphone capable of capturing high-definition audio
  • A free recording/editing app
  • Some work to improve the acoustics of your recording environment
  • Choose the right niche

Let’s explore each one in more detail.


External Microphone

Podcasts are all about high-quality audio. The reality is that the onboard mic of your iPhone cannot pick up high-quality audio; for that, you would need an external microphone.  

Most external microphones use the old 3.5mm audio jack, but later versions of the iPhone no longer have it, so an adapter is needed. You can also get microphones that can specifically connect to an iPhone or iPad’s lightning port. 

One of the best microphones you can connect to your iPhone’s lightning port is the Shure MV88 iOS Digital Stereo Condenser Microphone. It’s an Apple-certified accessory that can get cardioid, stereo, and bi-directional audio input. You can choose between five presets to get the best recording possible depending on the situation: Flat, Singing, Speech, Loud, and Acoustic Instrument. 

Another excellent choice for the iPhone and the best microphone for the iPad is the Shure MV88+ with its studio-quality recording. It also comes with five presets along with two free apps, improving your experience.

The kit includes a Manfrotto PIXI tripod, phone clamp, and mount, as well as iOS and USB-C cables for next-level compatibility and connectivity. Just set up the tripod, place your phone on the clamp, connect the mic to the Lightning port, fire up the recording app, and start recording the podcast right away.

The Shure MV88+ is user-friendly and easy to use for both beginners and experienced. 


Apps for Recording the Podcast on your iPhone

Your voice is the star of your podcast, and it needs to sound perfect. The Ferrite Recording Studio app is a free app with an intuitive layout. Most of its editing functions move more towards touch gestures for easy use. 

Some of its features include multi-track editing, touch arrangement, and fast imports. It can immediately take away all the silent cuts in your recording, making it easier for you to edit. The only downside of Ferrite Recording Studio’s free version is it has a limited recording duration, but for beginners, it should be enough.

You can also use the included apps from Apple. GarageBand is another great app for recording and editing your podcast. It allows you to record multiple audio tracks, edit them, and export them into mp3 files.

You can also create tunes with its collection of touch instruments, loops, and a wide array of sound packs. This is perfect for creating intros, jingles, and outros that you can use on your podcast to make it more professional. 


Tips on How to Create a Podcast

Podcasting is an excellent tool for building a loyal fanbase while generating leads. Creating a podcast doesn’t need those fancy setups and studios; all you need is a gadget, whether it be your iPhone or iPad. So, here are some steps you need to remember when recording with your iPhone and iPad:

Pick the Right Audience

You don’t have to direct your podcast to everyone of every age and gender. Narrow down your target audience to reach other people who have the same passion as you. A podcast made for everybody will lack personality and may come out as uninteresting. 

Choose Your Niche

Before you record and create a podcast, you need to find a theme that you should stick to. It’s a common mistake for beginning podcasters not to know your genre, which is a no-no. Remember these two important questions:

  • Who is the podcast directed towards?
  • What is your theme? 

Once you find a topic like politics, culture, or gaming, conduct a little research. Try to find a unique perspective that you can talk about relating to your theme or topic. It helps to talk about issues that differ from others to make your podcast stand out. 

Plan a Podcast Format

Find a format that fits your podcast; you can choose to do the podcast alone, have a scripted story, or go with in-depth interviews. You have to find a middle ground as to how long each episode of your podcast should be. Most listeners love straight forward and informative podcast episodes. 

Make sure also to have a set format for your episode formats. You can start with a teaser and intro, then end with a call-to-action and outro music. Create a habit of publishing your podcast consistently, either daily or every week, so your audience knows when to expect the next episode and prepare it. 

Show Some Professionalism 

It’s time to create the cover art of your podcast. Your cover art will be the first thing your audience sees and make a first impression. You need a unique cover art for your podcast to catch your audience’s eye along with your quality content. 

Don’t know how to create the cover art for your podcast? Don’t worry; head over to the app store, download the “Canva” app and install it on your iPhone or iPad.

With the Canva app, you can create beautiful, creative cover art. Do you feel like you lack creativity when it comes to graphic design? Worry not; choose from the hundreds of ready to use design templates and personalize it to fit your brand. Within minutes you can have the cover for your podcast channel.

Next, you need an intro and outro that you can place in most of your podcast episodes. Remember always to tweak and edit your audio to make it sound clearer. You can also add some background music and sounds to make your podcast more interesting. 

Record In A Quiet Area

There are many factors in your home that may be quite noisy such as traffic or air conditioners. Before you start setting up for your podcast, you should find a quiet place. Find an area in your house with minimal background noise. 

It would be best if you record in an area with no reflective surfaces. The reflective surfaces will make your audio sound echo-y and distant. Add some carpets, pillows, and soft objects in a room to help you reduce sound reflections. 

Launch to a Podcast Hosting Service

The most accessible channel for your podcast is the pre-installed Apple Podcasts. Apple Podcasts, known as iTunes before, is one of the most popular podcast hosting services. There are about 52% of people using Apple Podcasts while Spotify has 19%. You can also use services like SoundCloud to upload your podcast.

Time to submit your feed to the Apple Podcasts Connect. Wait at least 24 to 48 hours for a reply from Apple to send you confirmation. Once you receive a confirmation email, your episode will be live. 

You can check your initial traction, such as downloads, ratings, and subscribers. Remember that your goal is not to generate huge numbers for your episodes but to create a loyal following.

Also, keep in mind that it can take some time to see the results when you are starting from cero. Post consistently and allow time to do its magic.

Ask for feedback from your followers to see what you can change to improve each episode, and never overlook or forget to respond to the comments. You want to be engaged with your followers to see growth.


Create A Podcast On An iPhone Or iPad

The iPhone and iPad are awesome gadgets, so take advantage of its features to create a podcast. Get the right mics, the best editing programs, and work on improving your recording environment.

Take your time planning and practicing your podcast.

If you need help finding out which products fit you the most, check our other articles as we provide extensive reviews to help you gauge which sound gear and other tools to invest in.

How to Record High Quality Audio on Your iPhone

Improve the Sound of the Videos and Podcasts You Record on Your iPhone

It’s no secret that onboard microphones are not that great. Some are better than others, but overall they can’t deliver high-quality sound. Although technology has improved a lot in the last few years, the sound quality still needs improvement.

Onboard mics can’t deliver HD sound because they are not designed for such a task; besides, they have physical limitations.

Whether you are recording a vlog for your YouTube channel, a podcast, or live music performance, your phone’s audio quality can be improved.

So, how can you record high-quality audio on your iPhone?  The straightforward answer is by using an external microphone with a larger and more sensitive membrane or one with multiple mic capsules for better stereo dispersion. That way, it picks up the more subtle nuances in sound, and you end up with a high-quality audio recording from your iPhone.

For a more detailed answer, Keep reading this post to find out.

Understanding the Limitations of your iPhone’s Onboard Microphone.

Sound waves are vibrations that travel through the air. A mic’s function is to pick air pressure vibrations generated by the traveling sound waves and convert them into an electric signal.

If the mic’s membrane is small, it limits the frequency response it can pick up from the traveling sound waves.

In case you didn’t know, a mic’s frequency response defines the range of sound it can reproduce and how its output level changes within that range.

If a membrane has more surface area, its frequency response will be better because it can capture more acoustic energy from the air pressure vibrations. Consequently, the mic’s membrane produces a higher electric signal, thus a more accurate audio signal.

With a higher electric signal, you get better performance because your signal to noise ratio will be lower when compared to other types of microphones with smaller membranes.

The onboard mic on your iPhone or Android device is tiny, limiting its ability to pick up a wide range of sound vibrations. The small membrane is also very limited to picking up the detailed nuances in sound when playing a musical instrument or singing.

Smartphones use audio processing algorithms to improve the sound quality but still falls short if you want high definition audio quality.

How to Record High-Quality Audio on Your iPhone

To record better-sounding videos for your YouTube channel, deliver a better experience when live streaming, or podcasting, you need to use an external condenser microphone.

There are many options to choose from, but not all deliver the same audio quality. Depending on which application you need it for, the choice can be different. Here are a few options depending on what you want to record.

Best iPhone External Microphones for Recording Better-Sounding Videos

If you are a content creator, you would agree that the iPhone’s video quality is pretty amazing. It can deliver HD video quality up to 4k at 60fps with the 2020 models.

If you use your iPhone to record videos for platforms like YouTube, TikTok, Instagram, or Facebook, you want to deliver videos that sound as good as they look.

Here are the top microphone picks that are designed and proven to provide excellent sound for your videos.

Shure MV88+

Ideal for Creating Better-Sounding Video Recordings

Shure created a mobile rig for content creators that works flawlessly with any of your Apple devices right out of the box. Thanks to its MFi certification, you can be sure that it is 100% compatible with Apple products, except the iPad Pro.

All you have to do is connect your iPhone via the included Lightning connector and start recording videos with high-quality audio.

Specs That Speak for themselves

The MV88+ is a professional condenser microphone with two 10mm capsules arranged in a Mid-Side configuration to provide you with an adjustable stereo dispersion controlled by the app. This feature is suitable for capturing different types of sources, from speech to acoustic sounds and music.

It comes with several DSP presets for speech, singing, acoustic, loud, and flat. The frequency response is from 20 Hz to 20 kHz, and the maximum loudness/SPL (Sound Pressure level) that this mic can handle is 120 dB. It has an adjustable gain range that goes from 0 dB to +36 dB.

Enhance the Sound Quality with the ShurePlus MOTIV Audio & Video Apps

To enhance your setup, download the ShurePlus MOTIV audio & video Apps from the Apple App Store or Google Play Store to enable many more features.

The app gives you more control while recording and the ability to save and share your content in multiple formats.

With the app, you also get a 5-band equalizer to adjust the sound to your taste, a wind noise reduction setting to minimize the wind’s sound in the recording if recording in the outdoors, a limiter, and a compressor to maintain constant levels in the audio.  

The audio compressor feature helps you maintain a constant volume without affecting your voice or music’s dynamics throughout your recording. This feature is a must if you want to produce high-quality professional content.

This high-quality microphone for your iPhone has an all-metal construction for durability, just like any other Shure microphone. 

Compatible with Multiple Devices

Although this mic is specially designed for Apple products, it’s also compatible with Android and any other device that accepts a USB Type-C connector. Just make sure that the USB Host, either a phone or any other device, can deliver at least 100 mA of current to power the mic.

If you are not sure if the MV88+ is compatible with your device, click the following link to check compatibility.

Check Price on Amazon

Best iPhone External Microphone for Recording Podcasts, Acoustic Music, and Livestreaming

When recording a podcast or live music performance using your iPhone, you have to ensure that the audio is detailed, crisp, and clear to pick up the more subtle details in the voice or music and provide an excellent listening experience to your audience.

Remember that with podcasts, you rely only on audio to catch the audience’s attention. That’s the reason why all the top podcasts have one thing in common; they sound amazing. Of course, the message plays an important role, but when all is said and done, if the podcast sounds awful, no one will listen to it.

Here are the top microphone picks proven to provide excellent sound for podcasting, live streaming, and music recording using your iPhone or iPad.

Shure MV88

The Perfect Solution for Recording Podcast and Live Acoustic Sounds

This mic is a bit different than the MV88+. The Shure MV88  mounts to your phone via the lightning connector, which serves as the mic’s holder. It offers a multi-directional pick-up pattern that can be adjusted through the app for the best results possible.

The mic’s capsules can tilt and rotate to provide you with more flexibility to get the best result when interviewing for your podcast or capturing a live acoustic performance. Best of all, the sound quality of this mic is excellent.

Specifications that Stand Out from the Rest

This mic is Apple MFi certified, ensuring that it works with any iOS device with a Lightning connector.

It comes with two matched 10 mm condenser capsules arranged in a Mid-Side configuration providing a broader pick-up polar pattern that can be controlled straight from the app. Select and adjust the width for stereo, mono bidirectional, mono cardioid, and mid-side polar patterns.

But what makes this mic different from the MV88+ s is that you have the advantage of manually rotating and tilting the capsules to get the best shot and audio quality at the same time.

The Analog to Digital Converter (A/D) can be configured for an audio resolution up to 24-bit/48 kHz, with a frequency response of 20 Hz to 20,000 Hz. The gain is adjustable from 0 dB to +36 dB.

Get More Professional Controls with the ShurePlus MOTIV Apps

With the ShurePlus audio & video apps, you can access features like a 5-band EQ, limiter, compressor, and DSP presets. When using the DSP presets, the app adjusts the settings to deliver the best results for that specific situation.

For example, select the speech preset to record podcasts or interviews. With this setting, your app will accentuate the upper mid-frequencies to enhance the vocal range for speech.

If laying down a vocal demo or recording voice, choose the singing preset. The app will adjust the EQ and compression settings to deliver the best audio quality while singing.

Do you need to record an acoustic instrument like a guitar? No problem, select the acoustic preset, and all the controls tuned to capture all the performance’s nuances.

When you need to record in a loud environment like a live concert or band rehearsal, select the loud preset designed for picking up sound in loud places without distorting the recording.  

In some cases, you’d want to pick up sound just as it is without adding EQ or compression for a more natural audio recording. In such a case, choose the flat preset, and all the settings will be reset to deliver a real sound with no coloring.

High-Quality Build

Shure engineered the MV88 with an all-metal construction body to withstand the most demanding recording conditions.

Check Price on Amazon

Apogee HypeMiC

The HypeMic Delivers Excellent Sound for Recording Vocals, Professional Voice Over, Livestreaming, and Podcasting Straight From Your iPhone.

The HypeMic from Apogee was designed from the ground up, considering the needs of content creators. It is a plug-and-play solution that works seamlessly with iOS, macOS, and Windows 10. It is optimized to work with Apple apps like GarageBand and Core Audio compatible apps on Mac.

Video Credits: Kyle Mann

Specs Designed for Producing Beautiful Recordings and Live Streams

To record high-quality audio on your iPhone, leverage the specs of the HypeMic. Its medium-size cardioid condenser capsule is sensitive enough to pick up the most subtle details present in any sound. All thanks to the extended high-frequency response it can deliver.

The HypeMic is the only USB microphone available in the market with a built-in analog audio compressor to deliver incredibly clear vocals and acoustic sounds. Its analog to digital converter has a 24-bit/96kHz sound resolution for pristine sound quality.

It comes with three available settings on the analog compressor. The low compression setting is perfect for shaping the vocals and instruments in your music recordings.

The medium setting works great for podcasts, interviews, and live streams to deliver constant, more stable volume to your audio. The high compression setting is for providing the highest audio levels possible without distorting the sound.

Monitor yourself while recording with zero latency by connecting a pair of headphones to the available 3.5mm output.

The maximum loudness/SPL is 130dB, and the maximum gain it can provide is 46 dB.

Video Credits: Apogee Electronics

What’s In the box?

The Apogee HypeMic comes with everything you need to start recording right away: In the box, you’ll find:

  • 1 x HypeMiC
  • 1 x Desktop tripod
  • 1 x Microphone stand adapter
  • 1 x Pop filter
  • 1 x Carry case
  • 1 x Micro-USB to USB-C cable – For connecting it to a laptop
  • 1 x Micro-USB to USB-A cable – For connecting the mic to a desktop computer
  • 1 x Micro B-to-Lightning cable – To connect the mic straight to your iPhone or iPad
  • 1 x Quick start guide.
Check Price on Amazon

Shure MOTIV MV51

Unmatched Audio Quality When Recording Vocals, Guitars, Voice Over, Livestreaming, and Podcasting Right From Your iPhone or iPad

A large-diaphragm condenser microphone is the real deal if you want to record high-quality audio on your iPhone. With Shure’s 90 years of experience designing the best microphones in the market, you’ll get legendary sound performance with the MV51 microphone, which provides best-in-class audio. Plus, you get the ultimate convenience in digital audio recording straight to your phone with this mic.

The MOTIV MV51 is MFi certified, which guarantees it will seamlessly work with your iPhone or iPad through a direct Lightning connector. No need for external adapters.

Video Credits: Shure Performance & Production

Specifications Designed to Deliver Legendary Performance

One of the best features of the MV51 is the 1-inch electret condenser capsule with a unidirectional cardioid polar pattern perfect for delivering the best audio quality for your podcasts, music performance, and video streaming.

The A/D converter has an audio resolution of up to 24-bit/48 kHz and a frequency response of 20 Hz to 20,000 Hz. The gain can be varied from 0 dB TO 36 dB.

Its maximum SPL is 130 dB. This is considering that the gain is set to a minimum to avoid distortion.

Monitor yourself while recording by connecting headphones to the available 3.5mm output with zero latency. Plus, with the included onboard touch panel control, get quick access to gain, mute, and headphone volume adjustments.

This mic doesn’t need external batteries to work. It’s powered through USB or Lightning connector.

The vintage-looking, all-metal housing is made to last and protect the components inside from tough environments.

At only 20.27 oz (574.7 g) and dimensions of 128 × 86 × 70 mm H × W × D, you get a portable, high-quality large-diaphragm microphone that delivers the best possible audio quality for your iPhone and iPad recordings.

Presets and Features Designed to Make You Sound at Your Best

As with all Shure’s digital microphones, with the MOTIV MV51, you get 5 DSP Preset Modes  (Speech, Singing, Flat, Acoustic Instrument, and Loud) easily accessible from the onboard touch panel control. With the app, get access to more features like automatic gain adjustment, EQ, compression, and limiting for optimal results with your live recordings.

Video Credits: Shure Performance & Production

It is Compatible with Multiple Devices

This microphone is designed specifically for Apple products, but it’s also compatible with Android and Windows. Just make sure that the USB host supports USB Audio Class 2.0 and Micro-B OTG (On-The-Go) connectivity.

 If you are unsure if the MOTIV MV51 is compatible with your device, click the link to check compatibility.

This is What You’ll Get in Box

  • 1 x Shure MOTIV MV51 Microphone
  • 1 x 3 ft (1m) USB-to-MicroUSB Cable
  • 1 x 3 ft (1m) Lightning-to-MicroUSB Cable
  • 1 x 3 ft (1m) USB-C-to-MicroUSB Cable
Check Price on Amazon

Final Thoughts

Recording high-quality audio on your iPhone is possible, but you have to use an external microphone that can deliver pristine audio and be compatible with iOS devices. This post presented several options proven to deliver excellent audio quality and are compatible with your iPhone and iPad devices.

If you need to lay down tracks, record a podcast, live stream, or record better-sounding videos, pick one of the options presented in this post, and you will immediately hear the difference.

How to Start a Podcast: A Complete Guide to the Essential Equipment You Need to Get Started

Do you have a voice that needs to be heard?

The podcast is one of the newest and most exciting forms of entertainment, allowing anyone and everyone to talk about their passions, interests, and opinions in front of the world. If you have something to say, you need to join the podcasting revolution.

While podcasting is low cost, there are some items you will need, and some you may wish to add to make your podcast more professional. Read on to find out our essential equipment list when wondering how to start a podcast.


How To Start a Podcast

Before we dive into the equipment setup, let me tell you that you don’t need to have a professional setup or make a significant investment to start a podcast. You can even use your smartphone to begin.

But after proving the concept, you may decide to invest in some equipment to make your podcast more professional as you grow. Make sure to get the right equipment.

The amount of equipment you need will depend on the type of podcast you plan to make. If you are alone, then your setup can be relatively modest, and you can choose to upgrade later to enhance the audio quality.

However, if you start to go out into the field or have multiple guests on your podcast, you may need a larger setup and more money.


This is What You Need to Start a Podcast

Here is the list of the essential equipment you need to start a podcast:

  • Laptop or Desktop Computer – we are asuming you have one
  • A microphone – USB or XLR
  • An audio interface or Podcasting Mixer – not necessary if using a USB microphone
  • Headphones
  • Broadcast Microphone Stands
  • Handheld Portable Recorder – for a portable, mobile podcast recording setup
  • Sound treatment and proofing

A Microphone

The microphone is the device that will pick up your voice during the podcast and relay it to the computer. Of all the podcasting gear you purchase, this is the most important, and you should opt for the best microphone that your budget will allow.

A cheap microphone will make your voice sound thin, tinny, and have too many mid frequencies when recorded. 

The best ones will have low sensitivity, so they are not picking up background noises.

Condenser Vs. Dynamic for Podcasting

The most common types of microphones are dynamic and condenser. Both have their advantages and disadvantages.

A condenser mic delivers crisp, studio-like audio quality that is very detailed, picking up even the subtle nuances in the voice. That could be a problem if you are recording in a noisy environment.

On the other hand, the sound delivered by a dynamic microphone is smooth and mellow, with reduced high frequencies, and not edgy. This microphone type is better at rejecting noise from the environment because the membrane is less sensitive than condensers’.

Many professional podcasters like Joe Rogan prefer using dynamic microphones as the sound produced is radio like, and they are best suited for podcasting. Dynamic mics will require you to speak directly into the microphone. 

Which Type of Connection, USB, or XLR?

USB microphones allow direct access to a laptop without needing an audio interface or audio mixer. Internally, they have the necessary circuitry to digitize the sound and send it in a digital form to the computer.

In contrast, a microphone with an XLR connection can’t convert the analog signal into digital. It would need an audio interface to do so. Just keep in mind that most professional-grade podcasting microphones use XLR connection.

For a solo podcaster that only needs one microphone to record a podcast, get a USB mic. The setup is straightforward, and it delivers excellent audio quality.

The Shure MV7 USB microphone is perfect for a solo podcaster because it offers the flexibility of a dual USB or XLR connection and a built-in headphone output that allows for direct headphone monitoring while recording.

Plus, the audio quality is similar to the legendary Shure SM7B used worldwide in the best radio and podcasting studios.

If you plan to have a setup for multiple guests, get XLR microphones as they are the standard used for connecting them in a mixer.


Audio Interface or Podcasting Mixer

The audio interface is only required on your podcast equipment list if your microphones have XLR outputs, and you plan to have several microphones for multiple guests.

However, the audio interface gives you more control over the sound before it hits your recording device. If you are balancing multiple microphones and sources, the audio interface will soon become a necessity. 

An audio interface works like a mixing desk, allowing you to channel all your inputs into one port and balance them. They will then go to your computer to be recorded. 

There are multiple options available when choosing an audio interface. They all depend on your needs when starting a podcast. The main factor will be the number of inputs needed for your XLR mics.

If you are using two XLR mics, get an audio interface with at least two inputs. 

Here is a list of the best audio interfaces depending on your budget. Click the link to check them out.

What about a Podcasting Mixer

Now that podcasts are becoming more popular than ever, companies like Rode and Zoom have introduced all-in-one podcasting mixers to make it even easier to record and edit podcasts.

These podcasting mixers are more advanced audio interfaces offering up to 8 input channels, including a dedicated call-in channel with separate level controls to connect a smartphone for call-in interviews.

You can even connect the mixer to your computer via a USB cable to allow audio feeds from video conferencing platforms such as Zoom, Microsoft Teams, Google Hangouts, GoToMeeting, etc.

To start recording your podcast, all you have to do is connect the microphones and headphones for each presenter, insert a Micro-SD card, and start recording without needing a computer.

With these mixers, you can also mix, adjust tone, record, and some models even allow you to edit the podcast without needing a computer, all with one tool.

What’s more is that they also include programmable touchpads for inserting sound effects, music, commercials, jingles, and more.

We have a dedicated article presenting in-depth reviews of the best mixers for podcasting; click the link to check it out.


Headphones

Headphones are an essential item on your podcast equipment list. They can be used for balancing and mixing the sound that is going into your microphones.

As this is the sound that listeners will hear, not the sound you hear in your recording space, you must have a good pair of headphones to give an accurate audio representation. 

If you have multiple guests on your podcast, it’s essential to have one headphone per guest. That way, they can hear everyone that’s on the set recording.

Ensure your headphones are comfortable, as you may be wearing them for an extended period of time.

Here is an article that you might find helpful. It presents the best studio headphones for any budget. Any of these choices will make a perfect companion for your podcasting studio.

Finally, remember that headphones will last you a long time, so any money spent on them is an investment.


Broadcast Microphone Stands

A broadcast stand, often named a boom, is a large adjustable stand that holds a microphone. It allows you to move the device around and hold it in place without tightening or loosen joints. They are often used in professional radio broadcast studios. 

The broadcast mic stand offers you a lot more flexibility. It means you do not have to be static when recording, and you can choose to adjust your position as you talk.

It is definitely not an essential item, but one that will provide many comforts if recording for long periods of time. 


Handheld Portable Recorder

Handheld recorders are a great option if you are recording on the move. They are battery-powered so that you can remain mobile at all times.

Sound is recorded into a Micro-SD memory card that you can later plug into a computer to remove the files for editing.

Handheld recorders come with built-in microphones, which can be of exceptional quality, depending on the model you buy.

Many also have inputs for XLR and line so that you can add external microphones to them if needed.

Zoom is the go-to recorder for an excellent balance of price and quality. A handheld recorder like the Zoom H4n Pro, Zoom H6, or the Tascam DR-05X are excellent choices.

All of these recorders come with stereo condenser mics to pick up the audio in great detail. Plus, they come with many outstanding features that you can check out here.


Sound Treatments and Proofing

One of the most important things you need other than the equipment is a quiet space for recording. This space must be silent, and you must set it up so that your microphones don’t catch background noise.

If you use sensitive mics, like condensers, you will easily pick up ambient noise like outside traffic, the weather, or someone talking in the next room. This is why it is essential to soundproof the room if necessary.

Even if you have great equipment and manage to find a quiet space, you may still have some audio problems. Your room may echo too much, or you may be getting pops on your microphone from your vocals.

These acoustic problems are quite natural when recording. But you can fix them by using things you have at home or purchasing some items to overcome them. 

The Pop Filter

The first is a pop shield. Depending on the mic you have, the pop filter fits over or in front of it, creating a shield between your mouth and the microphone.

This dulls the ‘pop’ sound that occurs from some phonetic vocal sounds. Here are some examples that you can use available at Amazon.

  • Dragonpad Microphone Pop Filter
  • Neewer Mic Pop Filter Shield
  • Blue Universal Pop Filter

Acoustic Treatment

Finally, to dull your voice’s echo in your recording space, you can use materials like curtains on the walls and carpet or area rugs on the floors.

Another way is to build simple DIY acoustic panels and attach them to the walls to minimize excessive echo. These panels can also be decorative, making it appealing to your audience if you also record a podcast video.

Here is a tutorial I found on YouTube explaining the process for building inexpensive sound-absorbing panels. 

Video Credits: DIY Perks

If you got extra cash, you could also buy several acoustic soundproofing treatments. These are the absorbing panels used in professional recording studios. They come in various forms, from mic booths that attach to your microphones to wall panels. 

Here are some excellent examples of microphone booths with acoustic absorbing material and wall panels that you can get at Amazon.

Microphone Isolation Shield

  • Aokeo Microphone Isolation Shield
  • Monoprice Mic Isolation Shield
  • Aston Microphones Reflection Filter

Wall Panels Acoustic Treatment

  • Acoustimac DMD
  • ADW Acoustic Panels
  • Primacoustic London
  • JBER Acoustic Studio Foam

Podcast Kits

Several bundled kits are available on how to start a podcast that contains everything you will need in one box. They vary in quality depending on price but may be an option now you know how to start a podcast with the right equipment. 

Check out the following links to see a complete list of equipment you need. I have divided it into three bundle list categories: basic, intermediate, and professional.

The basic podcasting bundle list is perfect for a solo podcaster who is starting and only needs the essential equipment.

The intermediate equipment bundle list is tailored for podcasters who usually record their podcast by themselves but have a guest occasionally.

The professional bundle is ideal for podcasters that have three or more guests. It also offers the ability to receive phone calls and online guests on conferencing platforms such as Zoom, Skype, Microsoft Teams, etc.

So now you have the gear, do you need help with the setup? Virtuoso central has several articles on setting up and getting the best audio quality from your equipment. Come to our blog and let us help you with your professional podcast set up!

Tips for Live Streaming Your Next Performance

Live streaming revenue is expected to rake in over $70 billion in the next year. Are you prepared to take your piece of that pie?

It’s expected that the majority of internet traffic will be focused on live streaming. As a musician, this is an amazing opportunity to get more listeners — but only if you know how to take advantage of this moment.

Going live on video isn’t easy. There’s a lot that goes into it to make sure you have the best quality sound, video, and more to ensure your fans, both new and old, can see the best you have to offer.

We’ve got the definitive guide to live streaming your next performance. Keep reading to learn how to rock your next live online performance.


The Best Live Streaming Equipment

As a musician, you know how essential it is to have the right gear. When live streaming, you’ve got to make sure that what you use to live stream is just as good as what you use for your live gigs.

What will you be using to stream your performance, your phone or a DSLR camera? Both have their pros and cons to consider.

Using Your Phone To Live Stream a Music Performance

Your phone is the easiest to use. You can easily access any live streaming apps from your main screen, and you can set it up with a tripod. The setup is fast and easy.

You won’t have access to as many filters or effects as you would if you use a DSLR. The trade-off is that it’s also easy to interact with your audience immediately.

One of the main disadvantages of using your phone is the low audio quality. The phone’s mic is not designed to pick up all the nuances of the performance.

There are some workarounds on this issue. One way to use an external condenser microphone specifically designed for phones.

Something like the Shure MV88+ is the perfect choice because it is a stereo condenser mic that will deliver an excellent sound, way better than the phone’s standard mic.

Live Streaming a Music Performance Using a DSLR Camera

If you use a DSLR camera, you’ll need to hook it up to your laptop or computer with a USB connection. However, your streaming images will look much better than what you get from your phone’s camera.

Another advantage of using a DSLR camera is that by connecting it to your computer, you have more flexibility to use multiple cameras for different angle shots. It also allows you to use an external audio interface or USB mixer for connecting as many microphones as you need.

To control everything connected to the computer, you can use a free, open-source, cross-platform streaming, and recording program such as OBS Studio.

Suppose you prefer to have a more straightforward setup, and you’d rather only use the DSLR camera. In that case, you can opt for using an external mic that hooks up to the camera for picking up better quality audio from the live performance.

Stereo condenser microphones like the Sennheiser MKE 440 and the Tascam TM-2X are perfect for delivering fantastic audio quality without needing a big setup with several mics connected to a mixer.

Click the link for a complete list of the best microphones to use with an DSLR camera that deliver excellent audio quality for live streaming or video recording.

Using IP PTZ Cameras for Live Streaming your Next Music Performance

Wouldn’t it be nice to have a live streaming system that one person controls and be able to get high-quality video and achieve it by using a handful of equipment?

By utilizing a couple of PTZ IP cameras, a hardware video controller, and a computer with OBS Studio, you can have a live streaming multimedia system that one person can control, delivering excellent video quality.

In case you didn’t know, PTZ stands for Pan, Tilt, and Zoom. Usually, these types of cameras are used in surveillance systems. They can be controlled by a software app or by using hardware controllers. Modern PTZ cameras can deliver 1080p @30fps HD video quality. You can even get higher-end ones that can provide 4k quality video.

The hardware controller has a joystick that you would use to move the camera for pan, tilt, and zoom. I have written a complete guide presenting step-by-step instructions on building a budget live streaming system using IP-based PTZ cameras and joystick controllers. Click the link to check it out.


Your Venue Setup

When people tune in to your performance, what will they see? What’s your sound quality like?

Live venues have their unique challenges, but so does live streaming. Not only do you need to sound great, but you also need to look great too.

It doesn’t matter if you are streaming from your bedroom or stage; you have to make sure that it looks pleasant and inviting. This doesn’t mean that you have to spend a lot of money.

You can use what you already have or buy a few inexpensive things that will take your setup to the next level.

We’ve talked about using your phone vs. using a DSLR camera. Once you’ve got your video streaming equipment locked in, it’s time to talk about what your audience will see when they tune in to your online show.

Create Nice Visuals

Setting up a simple lighting rig will help your audience see you clearly. Read up on the three-point lighting to understand the basics of showing up right on camera.

Make sure your background looks nice, too. Hanging up a curtain and using some cheap fake plants to fill in gaps behind you is an affordable and straightforward way to create nice visuals.

To make your performance look more intimate, you can add multicolor LED light strips around the perimeter and choose a color that goes with your performance’s mood. This simple tip also adds personality to your live streaming performance.

If you rather have a stage-like lighting setup, we’ve put an article walking you through some simple, cheap stage lighting tips that can help you get a professional lighting rig that doesn’t break the bank.

Use some blotting paper or even a light dusting of translucent powder if you think you’ll look too shiny on screen. Do a test run of your setup before you go live to make sure you look your best.


Have the Right Sound

As mentioned earlier, your phone or camera’s microphone is not good enough to deliver the best quality sound. As a musician, you can’t afford to ignore how you sound when streaming live.

Remember that sound is 50% of the overall experience when live streaming your performance. If your setting looks fantastic and your video quality is spot on, but the audio quality is low, the listening experience will be affected, and your audience won’t like that.

Multiple Microphones Can Deliver Better Audio

When a band performs for live streaming, it is better to set up several microphones. If possible, use one mic per performer connected to a mixer for better audio quality. Basically, your setup will be similar to the one used when performing on a live gig.

If you decide to go this way, use a mixing board that is USB capable—that way, you can send the audio signal straight to the computer for streaming.

Suppose your audio console doesn’t have a USB output. In that case, you can use an audio interface to connect the mixer to the computer.

We have a full article on how to connect an analog mixer to an audio interface. Click the link to check it out.

Single Performer Sound Setup for Live Streaming

For a more straightforward setup that still delivers good quality audio for your audience, invest in a good external USB microphone. You can find reasonably priced mics that will go a long way towards making you sound more professional.

Suppose you’re a single performer or a small 3-person band and have a tight budget. In that case, you could use a single stereo condenser USB microphone connected to the computer to pick up the sound.

Something like the AKG Lyra Ultra-HD or the Blue Yeti would deliver high definition sound when live streaming your next performance, and both are stereo microphones.

single performer sound setup for live streaming connection diagram

Multiple Performers Sound Setup for Live Streaming

Have a band with four or more performers? To capture all the performance with great detail, you can use two overhead microphones to get better stereo separation while delivering high-quality audio.

For this setup, a couple of matched pair AKG C-214 with mic stands connected to an audio mixer like the Yamaha MG10XU allows you to equalize the sound to fit the situation best.

This setup has the added benefit that the MG10XU comes with an audio compressor to normalize the signal level while maintaining the sound’s dynamics. Plus, it is USB capable for easier integration with your computer. It also has phantom power.

The C-214 is a condenser mic, and as such, it requires phantom power to work. Make sure that the device you are going to use to connect it has phantom power.

If the AKG C-214 is out of your price range, figure out how directional your mic is when picking up sounds. Placing it where you sound best and where other elements of your performance won’t get in the way is crucial.

multiple performers sound setup for live streaming connection diagram

Simpler Sound Setup for Multiple Performers

Don’t want to use an audio mixer in your setup at all? That’s fine; just make sure to minimize distortion by using a limiter at the end of your audio chain.

Suppose you are using a two-channel audio interface like the Focusrite Scarlett 2i2 to connect a couple of SM-58’s to pick up the performance. Make sure that the signal coming into the computer from the interface is not distorting.

A good rule of thumb to avoid distortion is to check the audio level meter on the streaming platform. Don’t let the audio signal level to go into the yellow or red area. The last thing you want is for distortion or feedback to ruin your live stream.

The limiter doesn’t have to be hardware-based. Platforms such as Zoom have audio limiters embedded in their algorithms to avoid distortion.

As with your video, you need to test your sound before you go live. Keeping surprises and technical difficulty to a minimum is key to putting on an outstanding live stream performance.

simpler sound setup for multiple performers connection diagram

Choosing a Streaming Platform

Most social media sites have an option to go live. Choosing the best option comes down to a few different factors.

First of all, where is the majority of your audience? If you have a large following on Facebook or get lots of likes on your YouTube videos, you’ve got your answer.

Second, what’s the easiest platform for you to use? Each one has its pros and cons.

Read up on each one’s specifications to make sure you get the most out of your live stream. Things like audience interactivity, filters, or effects, and more can sway you one way or another.

If you have a large following on several social media platforms, try streaming simultaneously to all of them to reach as much as possible all of your audience.


Before Going Live

You’ve got your set up, your setlist, and you know what you’ll be using to broadcast your live performance. There are still a few more things you should do before going live.

Internet Bandwidth Requirements for Live Streaming your Performance

Ensure that your internet connection has a large enough bandwidth so that the streaming quality is good. If possible, have a backup internet connection just in case the main one fails.

Your upload speed should be at least 10Mbps to deliver 1080p video quality to the streaming platform. If you want to live stream at 4K, my recommendation is to have an upload speed of at least 25Mbps.

Test Your Live Stream Without an Audience First

You should practice live streaming before the big event. Here’s how to do it on Facebook:

  • Select “Go Live” on Facebook
  • Before you start streaming, click the “To” menu to select your audience
  • You’ll see options to make your stream public, only available to friends or a group, or only to yourself
  • Live stream your entire setup just to yourself to catch and fix any issues ahead of the main event.

This is your best option to make sure you’ll look exactly how you want to look when you perform. Make sure you have enough backup batteries if using wireless devices to do your entire show.

As you can see, those audience options give you the ability to broadcast to just a small group of people. You can do your performance as a live exclusive or make it available to the public to gain more listeners.

You might be able to monetize your performance as well. Be careful if you’re doing covers, though; you might get shut down for copyright infringement.


Live Streaming Your Next Performance the Right Way

Streaming online is different than performing at a live venue. With our guide, you have the tools you need for live streaming your next performance the right way.

Since you’ll be performing online, don’t forget the work you need to do before and after the performance.

Promote your stream on your social media channels, and don’t forget to interact with your fans and thank them for coming.

If you liked this article, we’ve got plenty more to make your performances shine. Check out our guide on getting the best audio at your next live gig!

Live Sound Tips for Beginners

You sound great at practice, and you’ve finally landed a real gig. But, mixing live sound is very different from mixing your recorded music. 

You’re probably afraid of the dreaded feedback sound. Or worse, just not sounding as good as you know you do. A good live sound mix can make or break the show, even if you sound amazing. 

With the right settings, sound gear placement, and a good ear, you can have a great live sound. Below, you’ll find 8 essential live sound tips for beginners.


8 Essential Live Sound Tips for Beginners

If you are a beginner running sound systems, you know how challenging it can be to deal with several things simultaneously to deliver professional sound quality in a venue. Here are a few live sound tips to help you speed up the learning process.

  1. Position Your Monitors in the Right Place
  2. Prevent feedback
  3. Practice Your Microphone Technique and EQ
  4. Use Effects Tastefully
  5. Understand Your Mixer
  6. Don’t Skip Sound Check
  7. Familiarize Yourself With the Venue
  8. Train Your Ears

1. Position Your Monitors in the Right Place

Not being able to hear yourself during a live show is one of the most stressful things to experience. If you can’t hear yourself sing or play, you can’t make the needed tone or key adjustments. This can create a slightly off sound, even if normally you’re perfectly on key. 

You can prevent this from happening by placing the monitors in the right position. It may take a few adjustments to get the monitor level and position just right.

The idea is to make sure each band member can hear themselves without the microphone picking up sound from the monitor. 

For example, in front of the microphone, facing the vocalist is the best position for a singer’s monitor. That way, they can hear themselves clearly, but the microphone is less likely to pick up the sound and create feedback. 


2. Prevent feedback

Unintentional feedback is a live musician’s worst nightmare. It disrupts an otherwise good sound and makes for an unprofessional appearance. 

Feedback is the result of sound from the speakers going back through the microphone.

To prevent feedback from happening, make sure to position all mics as close to the sound source and as far away from speakers as possible. Turn off any unused mics to avoid them picking up sound and causing feedback.

In theory, it looks easy to avoid feedback, but in reality, it takes practice, and having a good understanding of what causes microphone feedback and how to stop it before it happens it’s crucial.

During Soundcheck, go through the loudest parts of your set to ensure feedback isn’t going to happen. 

Remember, practice makes perfect. Getting used to how the equipment reacts and knowing the steps needed to avoid feedback is what separates excellent from mediocre sound.


3. Practice Your Microphone Technique and EQ

Every microphone is different, but usually, the singer should be about 1 to 2 inches away from the mic.

Because you get so close to the microphone, singers should have their own microphones. That way, they won’t be afraid to get up-close and personal with it. Avoid using house microphones. 

Also, different microphones will produce slightly different sounds. So, one microphone might sound great with one singer and not as good as another singer. It’s important to find the one that suits the vocalist. 

During Soundcheck, have the singer experiment with different distances from the microphone. Then, by staying consistent with that distance, you avoid confusing fluctuations in audio levels. 

It’s also essential to practice and be comfortable equalizing vocals and instruments for live events. With enough practice and the right ear training, you’ll be able to quickly adapt to using different types of microphones in different acoustic scenarios. 

Check or guide on how to EQ live vocals for a more detailed explanation.


4. Use Effects Tastefully

Effects can make vocals stand out among all the other instruments, which is good, especially for rock bands or any band with a larger, complicated sound. However, it’s essential not to go overboard with it and maintain the integrity of the vocalist. 

Depending on the genre and singer preferences, vocal effects can create depth and intrigue. Reverb or chorus are popular vocal effects to use in live sound. 

Some PA systems have built-in reverb and chorus effects, which is an easy way to incorporate them. Guitarists use pedals for effects, and vocalists can also use pedals.

Pedals are good for vocalists who want to control their own effect levels because they can be easily accessed on stage. 


5. Understand Your Mixer

The mixer is the brain that controls the PA system. Without it, you’d have no control over what comes out of the speakers. Mixers come in all sizes and can range from two to forty-eight or more inputs. 

Each input can be used for a different aspect of the live sound. This makes a mixer essential to equalizing sound live.

With a mixer, you can manage the vocalist’s output or the guitarist’s or whatever instrument is on stage. This helps to balance the sound that goes through the speakers. Otherwise, it would be near impossible to balance the sound in a live show. 

It’s also a good idea to label each input on the mixer with whatever instruments or mics that is attached to. That way, if you do need to make mid-show adjustments, you won’t scramble to figure out what knob does what. 

If you are a beginner and want to know in more detail what each knob on the mixer does, check our introductory guide to mixing consoles.


6. Don’t Skip Soundcheck

Getting to the venue ten minutes before the show isn’t going to cut it. Each location is different, and you’ll have to adjust the sound according to its unique acoustics. 

You want to avoid last-minute sound adjustments as much as possible. The more time you can get for Soundcheck before the show, the better. Then, you’ll have more time during the show to focus on actual performance or special effects. 

During Soundcheck, you can familiarize yourself with the acoustics of the venue and device a plan accordingly.

To avoid feedback, as mentioned earlier in the article, you should place the microphones, monitors, and main speakers, and try different positions until you find the best one. And the only way to figure that out is by doing a soundcheck.


7. Familiarize Yourself With the Venue 

Along with Soundcheck, you have to familiarize yourself with how the venue acoustic affects the live sound and consider the venue’s vibe.

If you’re playing a rowdy bar, by all means, be loud. However, if you’re playing somewhere with a more chill vibe, such as a coffee shop, being too loud might hinder customers and prevent you from landing that gig again. 

Ultimately, you want to judge the crowd and the venue and adjust your levels accordingly. 


8. Train Your Ears

It can take sound technicians months of training to train their ears for the small variances that can affect live sound. One method for training your ear is to attend several live shows and listen for things like muddy vocals or buzzy guitars. 

When you know what to listen for, using your ears is much easier. Also, familiarize yourself with the sound and setlist of the band playing.

Of course, if you’re mixing your music, you’re already familiar with how it’s supposed to sound. 


Want More Live Sound Tips? 

Playing live is what many musicians live for. So, of course, you want it to be perfect. With these tips, you should have the knowledge it takes to have a smooth live performance. 

Visit our blog for more live sound tips and more!  

5 Common Podcast Mistakes You Need to Avoid

Do you have an idea for a podcast?

Over the past decade, podcasts have skyrocketed in popularity. Now, there’s a podcast for nearly every topic. Some people have been able to build their entire careers around their weekly episodes. 

Yet, if you want to get off on the right foot and build your listener base, you need to know how to start off strong. Even if you’ve already started your podcast, you might be wondering how to refine your approach.

In order to have a great show, you need to know how to avoid common podcast mistakes.

But what are they, and how do you navigate around them? Keep reading to learn more!

5 Common Podcast Mistakes You Need to Avoid

1. Not Posting Consistently

We all have busy schedules, and it’s no secret that podcasting can take up a ton of time. You might have to spend hours coming up with ideas and turning them into full-on, viable episodes.

Yet, successful podcasts don’t just launch and then post whenever their creators feel inspired. Instead, they come up with a schedule and let their supporters know when they plan to upload.

But how do you determine when you should post? 

When you start out your podcast, think about how often you think you’ll be able to allot time to your craft. Then, measure how long it takes you to make a podcast. Factor in the amount of time it takes to come up with ideas, draft a script, record, and edit.

Once you have this down, figure out how many podcasts you think you’ll be able to make a month. Some people update every week, while some post more infrequently. 

Still, once you launch your podcast, you might need to play around with how often you post. Try out a few schedules until you figure out one that works for you.


2. Not Knowing Your Genre

Do you want to know a secret? If you have a podcast, you need to know about your competition. Why? 

Because it’s crucial to identify what already exists out there for finding out where you fit in.

Podcast creators have to hit a difficult note. They have to be aware of what other people have done well and why it works. At the same time, they need to know which different approach they want to bring in that sets them apart from other people.

As the podcast creator, it’s your job to know as much about your podcast as possible. This includes how your podcast adheres to your genre’s expectations and what spins you put onto it. 


3. Not Editing

Many people want to create their podcasts as fast as possible, and while doing that, they neglect the editing portion of their work. That’s why it’s one of the most common podcast mistakes.

Why do you need to edit?

No draft of a podcast is 100% perfect, especially on the first take. You might have certain unwanted background noises or parts of the podcast that drag on. Before you put an episode out into the world, you need to listen to it at least once.

Think about how you can make it better. Have a few other people else listen to it and tell you which parts were interesting and which should be taken out.

Of course, everyone’s opinions are subjective, so one person might love a part that another doesn’t. Yet, if your first listeners all agree that they don’t like something, you may want to consider taking it out.

Want to minimize the amount you need to edit? Consider investing in tools such as a pop filter, which will help you sift out unwanted popping noises that we naturally make when we pronounce plosive letters like B’s, P’s, T’s.

More Editing Advice to Avoid Common Podcast Mistakes

How do you make sure you make good editing choices?

First, consider the overall theme of your episode. Then, listen to your recording and determine whether each section serves to advance the theme. If not, is there anything that should be changed or cut?

Here’s another important tip that may seem contradictory to some people: listeners like to relate to the content they consume. What does that mean for you? 

You might want to leave that comedic mess-up in, especially if it blends well with the overall tone of your show. It builds a rapport with your listeners and makes you feel more like an accessible human being rather than a disembodied voice.

Still, minimize the number of noticeable errors in your podcast. 1 or 2 can make you appear more relatable, but a large handful just makes you sound too sloppy.


4. Neglecting Sound Quality

Do you want to know why many people give up on podcasts? Because the sound quality is not up to par.

We live in quite a particular age. Your listeners consume a vast amount of media every day, and their ears have grown accustomed to the sound of good audio.

Because of this, the modern consumer may not understand anything about sound quality but still be able to tell when it’s not good. 

That makes it pertinent for every podcast creator to have good sound. If they don’t, many people won’t bother to listen because the sound quality annoys them too much.

To get a good sound, you need the right equipment. Do your research and invest in a good microphone and audio editing system that fits within your budget. Then, use it to make sure you present your show in the best light.


5. Not Becoming Familiar with Copyright Laws

Before the internet, copyright laws were fairly straightforward: don’t take any large quotations from any source and reproduce them for your own gain without credit.

Yet, when people began posting things online, the rules started getting more sticky. After all, so many people shared things that didn’t quite belong to them, and it started becoming more and more challenging to determine how fair use applied to these items.

Besides, different countries have different copyright laws. Though the internet does not have borders, what might be considered fair use in the United States might not be fair use in England and vice versa. 

Because of this, you need to be careful. Refrain from using any music or other media elements unless you are thoroughly aware of the laws surrounding your right to use it. 

In fact, you should probably not use copyrighted material unless you’re a lawyer. Otherwise, you might find yourself deep in a lawsuit you can’t afford.


Ready to Start Your Podcast?

Now that you know more about the most common podcast mistakes, it’s time to put that knowledge into action!

Podcasts can be incredibly rewarding endeavors, and if you work hard on them, you’ll end up creating something you’re proud of. By avoiding the mistakes below, you’ll be well on your way to making a good podcast.

Have a question about producing your podcast? Contact us today to learn more!

Podcast Tips: 10 Strategies for Recording Better Sounding Podcasts

Podcasts rely only on audio to catch the audience’s attention. That’s the reason why all the top podcasts have one thing in common; they sound amazing. Of course, the message plays an important role, but when all is said and done, if the podcast sounds awful, no one will listen to it.

If you are a beginner looking to start a podcast or already have one and want to sound more professional, keep reading this post because we provide you with practical podcast tips and strategies for recording a better sounding podcast. 


Top 10 Tips & Strategies for Recording Better Sounding Podcasts

Here are the best strategies and tips you can follow for recording your podcast and get high-quality audio consistently.

  • Use the right podcast equipment – Consider Getting a Plug-and-Play Bundle
  • A Good Microphone Can Make All the Difference
  • Use The Right Pop Filter – It’s There for a Reason
  • Use Good Microphone Techniques – Get Close to The Mic
  • Try to Be Consistent With your Voice Timbre
  • Monitor your Volume Levels – Don’t Distort the Signal
  • Use an Audio Compressor to Get Consistent Volume
  • The Room’s Acoustics Can Make or Break a Podcast
  • Use a Backup Audio Recorder
  • Edit The Podcast Before Releasing it

In the following sections, we go into more detail on each tip. Let’s get started.


Use the right podcast equipment – Consider Getting a Plug-and-Play Bundle

If you are a techie person, finding compatible gear to set up your studio will be easy. But, if you are not familiar with the ins and outs of audio equipment, this task can be overwhelming.

You have to decide the type of microphone you want – dynamic or condenser. Further, you need to determine if you’re going to use an audio mixer with the capability of connecting several microphones or have a simple setup using a single USB microphone.

Are you planning to have guests over the phone or use a conferencing platform like Zoom to have multiple remote guests on your podcast? Maybe you also want to include some sound effects to make your podcast more original. This and many other things you need to consider when choosing equipment to set up a podcasting studio.

Please understand that to start a podcast, you don’t need to have a professional setup or make a significant investment. You could start by using your smartphone or laptop. But if you have proved the concept and decide to invest in some equipment, make sure to get the right equipment.

Having the right recording equipment is one of the best podcast tips we can offer you because it will have the biggest impact on the overall quality of your podcast’s audio. It will also determine how flexible your setup is to accommodate and adapt to different situations.

If you are new to this, one thing you can do is start researching and reading articles about all the equipment you need to start your podcast. 

Instead, if you feel like you don’t want to spend the time reading articles about selecting audio equipment, you can go around this issue and get a podcasting bundle with everything you need to get started right away on your podcast.

Check out the following links to see a complete list of equipment you need. We have divided it into two bundle categories basic and professional.

The basic is perfect for a solo podcaster and a guest. The professional bundle is ideal for podcasters that have three or more guests. It also offers the capability to receive phone calls and online guests on conferencing platforms such as Zoom, Skype, Microsoft Teams, etc. (links to Amazon).

Basic Bundle for Solo Podcaster

  • AKG Lyra Ultra-HD USB Condenser Microphone
  • Audio-Technica Professional Studio Headphones

Here is the connection diagram for the basic bundle for a solo podcaster so that you can visualize the setup. This setup is done with the recomemded gear on the links above.


Basic Bundle for Solo Podcaster and One Guest

  • Focusrite USB Audio Interface [Quantity 1]
  • Audio-Technica Professional Studio Headphones [Quantity 1]
  • Rode PodMic Dynamic Podcasting Microphone [Quantity 2]
  • Gator Microphone Boom Stand For Podcasts [Quantity 2] [This stand includes the XLR cable for connecting the microphone to the Audio interface]

The following image is the connection diagram for the basic bundle for a solo podcaster with the ability to add a guest to the podcast. Use the diagram for your set up reference. This setup is using the gear recommended on the links above.


Professional Podcaster Bundle

  • Rode RODECaster Pro Podcast Mixer [Quantity 1]
  • Audio-Technica Professional Studio Headphones [Quantity 4]
  • Shure SM7B Cardioid Dynamic Microphone [Quantity 4]
  • Gator Microphone Boom Stand For Podcasts [Quantity 4] [This stand includes the XLR cable for connecting the microphone to the podcast mixer]

Here is the connection diagram for the professional bundle mentioned above. Use the diagram for your set up reference.


A Good Microphone Can Make All the Difference

Maybe buying a podcasting bundle is an investment you don’t want to make at this moment. If that’s the case, you can get the best USB microphone for podcasting, depending on your budget. Next, all you have to do is connect it to your laptop and start recording with high-quality audio. Your audience will appreciate it a lot.

If you ask any professional podcaster for podcasting tips, they will all agree that a must-have for recording is a good quality mic, and there is a good reason for this.

The microphone that comes with your laptop is a small electret mic. Its membrane has a small surface area limiting its ability to pick up detailed sound vibrations.

By using a USB condenser microphone, your recorded audio will improve because it’s capsule is bigger and more sensitive to picking up even the smallest nuances in sound, immediately delivering higher quality sound for your podcast.

We have prepared a detailed guide on what to consider when choosing a mic for podcasting. Click the link to check it out.


Use The Right Pop Filter – It’s There for a Reason

One of the most annoying things you can have in a recording is popping sounds. They distract, and the sound is harsh to the ears.

As a podcaster, it’s your responsibility to make sure that your recordings sound as good as possible to deliver an excellent listening experience to your fans. Loud popping sounds are definitively a bad listening experience. Having great content and a good listening experience will have your fans coming back for every podcast release.

Popping sounds are produced by fast-moving air blasts from your mouth whenever you use words with hard letters, like B’s, P’s, T’s.

As its name implies, a pop filter is a device designed to slow down and dissipate fast-moving air blasts.

Pop filters come in different sizes and shapes. Depending on the microphone you decide to use for your recordings, it’s possible that it already brings one.

For example, the legendary Shure SM7B is a microphone used by podcast producers worldwide, one of which is Joe Rogan because it delivers an excellent tone. This mic includes a pop filter that is installed on the mic’s head.

Most condenser microphones don’t bring a pop filter. If that’s the case, getting a pop filter would be necessary to avoid getting plosive sounds while recording.

Most microphones are compatible with any pop filter available in the market. Still, it’s a good idea to make sure that the pop filter you decide to buy is big enough for your mic. Here are a few pop filers designed for condenser mics (links to Amazon):

  • Dragonpad Microphone Pop Filter
  • Neewer Mic Pop Filter Shield
  • Blue Universal Pop Filter

Use Good Microphone Techniques – Get Close to The Mic

One of the easiest and most effective podcast tips we can give you for getting better sounding podcasts is getting closer to the mic while recording. A good rule of thumb is to leave no more than 6 inches between your mouth and the mic’s head.

You want to be close to the mic because if you are far away from the pickup capsule, the audio quality decreases rapidly.

Suppose the sound source is farther away from the microphone. In that case, it picks up ambient noise, degrading the overall sound quality as the sound waves become thinner, losing the sound’s fullness.

You want to get close to the mic, but not so much that the proximity effect could saturate the membrane inside the capsule, thus saturating the signal. Leave at least 2 inches but no more than 6 from the mic’s head.

Control Your Breathing Sound

When sitting close to the mic, it will pick up the sound when you inhale and exhale. If the breathing is too loud, it can be distracting, and for some people, it isn’t very pleasant.

A good breathing technique is to try smaller, slower breaths, but if you need to take a big breath, just look away from the microphone.


Try to Be Consistent With your Voice Timbre

The timbre of your voice defines your tonal character. As a professional podcaster, you want to keep your voice’s tone as consistent as possible.

When recording your podcast, you can speak with your natural voice or modulate your voice to give it a distinctive tone to capture your audience’s attention. Avoid overmodulating and make sure to be consistent with your vocal tone and style.

In case you didn’t know, voice modulation refers to the ability to control your voice when speaking by varying the tone, stress on words, pitch, and changing the speech rate.

This simple tip is important because your audience gets used to your voice’s timbre as it creates a bond between you and your listeners. Being inconsistent with your voice’s timbre and tone will negatively impact the overall quality of your podcast.


Monitor your Volume Levels – Don’t Distort the Signal

When recording your podcast, whether you are using a laptop or podcasting mixer, ensure that the signal levels are not distorting.

Audio distortion occurs when the signal’s volume is too high and falls outside the input’s dynamic range.    

To avoid distortion in your podcast recordings, monitor the volume levels while recording. If using recording software, you’ll see the volume level scale represented in colors.

When the indicator is in the green area, it means that the signal volume is ok. The yellow means that the audio is louder but still is within the range. When the red indicator lights up, the volume is too high, and the resulting audio will be distorted.

Keep your volume in the green section for your normal conversational tone and only allow the yellow section if you need to add more emphasis to the conversation. The red will render your recording useless as it will sound distorted.

Also, make sure that your guest’s microphone levels are at the same level as yours. Even if everyone is talking simultaneously, make sure that the levels don’t peak into the red section.

The dynamics in a conversation can change from low to high in a second, so how can you keep the volumes consistent with all the mics? This takes us to the next podcasting tip, use an audio compressor for consistent volume levels.


Use an Audio Compressor to Get Consistent Volume

Keeping a consistent volume on a podcast from beginning to end screams professionalism. This small but often overlooked podcasting tip can make a huge difference in the overall listening experience.

If you use a good microphone, your voice will sound crisp and pleasant. But, what about the inconsistent volume levels? If you move away from the mic, the voice will sound thin. If you speak too loud all of a sudden or laugh loudly, all of these inconsistent volume levels will have your listeners reaching for the volume knob every few seconds.

Remember, podcasts are mostly consumed by people who are multitasking. Most of which use earphones to listen. Having very soft and all of a sudden loud levels in the recording is unacceptable.

Here is where the audio compressor comes in. An audio compressor is a device that creates a more leveled volume to your sound by amplifying the audio when it’s too low, normalizing it in others, and toning down the loud bits.

In other words, when used right, an audio compressor will create a consistent audio level throughout the whole recording while keeping intact the dynamics of the sounds.

Most modern audio mixers come with audio compressors. Podcasting mixers are designed to make a podcaster’s life much easier by providing compressor and limiter presets to create the most professional recordings.

Of course, you can take the raw recording with inconsistent audio levels and use any DAW (Digital Audio Workstation) software to normalize the levels. Still, it’s always a better practice to have raw recordings that have a consistent volume.


The Room’s Acoustics Can Make or Break a Podcast

You could have the best equipment to record your podcast and create the best content, but if the room’s acoustics is terrible, the sound quality will still be dreadful. Usually, the main problem in places with lousy acoustics is excessive echo.

There are different ways you can improve a room’s acoustics if you’re dealing with echo. One way is by using curtains on all the walls and carpet on the floors to absorb the sound. Another way is by using carpet on the walls and floors; the only problem is that it looks ugly and unprofessional.

Lastly, you can use absorption panels on the walls to help fix the echo problem. You can build your panels and add more personality to your recording room while reducing the echo at the same time.

Here is a tutorial I found on YouTube to make your own high-performance sound absorption panels very cheaply, still delivering excellent results.

Video Credits: DIY Perks

If you rather have professional acoustic panels like those used in recording studios and don’t mind spending some money, choose professional-grade acoustic material.

Several kits come with everything you need to improve the acoustics of a room for recording. Here are some examples of what you can get depending on the size of the room (links to Amazon):

  • Acoustimac DMD
  • ADW Acoustic Panels
  • Primacoustic London
  • JBER Acoustic Studio Foam

Record The Podcast in a Quiet Room

Another podcast tip to get better sounding podcasts is to record in a quiet room. One thing you want to avoid at all costs is recording in noisy environments.

If you live in a house with multiple people or have noisy neighbors, it can be difficult to avoid noise. You can try to use materials to seal the gaps on the doors and windows while recording. You can also try using thick curtains that can absorb sound.

Here is a good article that explains in more detail soundproofing techniques to avoid noise while recording.


Use a Backup Audio Recorder

Let’s be real; accidents can and will happen. You could make a mistake and forget to press the record button on your laptop. Or the hard drive can fail, making you lose the recording of your latest podcast that needs to be released tomorrow.

Although we can’t foresee an accident from happening, we can take preventive measures to reduce the risk.

Another excellent strategy from the list of podcast tips that can be a lifesaver is to use a backup recording device to ensure that you get a secondary audio file of your podcast.

Let’s say, for example, that you are interviewing someone like Gary Vee for your podcast, and you only got one shot because he is on a tight schedule.

When you are ready to edit the recording, it turns out that the audio file is incomplete because the lavalier mic you were using stopped working in the middle of the interview, or it was continually cutting off. 

There is nothing to do, the interview is over, and you can’t arrange for a new one. This is why it’s essential to have at least two different audio recording devices recording simultaneously.

For cases like this, I highly recommend using a multitrack audio recorder like the Zoom H4n Pro, Zoom H6, or the Tascam DR-05X. These recorders come with stereo condenser mics to pick up the audio in great detail. Plus, they come with many excellent features.

One of the features that I like the most is the dual recording mode. When set to this mode, it automatically records a second audio take at a lower level in case the main audio recorded is too loud and distorted.

With all of these precautions, you will be sure to have the perfect audio take for editing your podcast. That way, your sound will be excellent, and your audience will appreciate it.

Bonus Tip – Do a Sync Clap Before each Take for easy synchronization

Here is a real-life example. Let’s say that you recorded a very important interview for your podcast. When editing, you realize that the main audio file is mostly good, but at the end of the recording, the guest’s response to your final question has a very low volume because he moved away from the mic.

In this case, you would need to overdub the main audio file with the backup recording.

A common practice used by content creators when using secondary backup recorders is to do a sync clap before each take. This practice makes everything much easier when overdubbing audio files for editing.

Press record on your laptop and multitrack recorder and get ready for your take. Then clap at the beginning before starting to speak, wait one second, and start recording your podcast. When editing, the clap can be used as a marker to know where to synchronize both audio files.


Edit The Podcast Before Releasing it

After you are done recording, edit your work before releasing it to the public. You want to catch any mistakes or any audio problems and fix them with your audio editing software. You wouldn’t turn in a report before checking it, right? The same principle applies to your podcast.

Look for any audio inconsistencies, delete the parts that are not useful and always try to keep the same time length for all your podcasts.

If you don’t have an audio compressor on your mixer and see the inconsistent volume levels, use available plugins on the DAW software to fix it. This ensures that your audio sounds professional.

Keep in mind that your ultimate goal should be to provide the best listening experience to your audience. This, combined with creating engaging content, will ensure your podcast’s success.

Big Lights, Small Budget: How to Rock With Cheap Stage Lights

Your fingers are tired from all the practicing. You have finally crawled from the dungeon that is your practice space. Your instrument is set up, and the amps are in place. The soundcheck is finally done, yet as you look out at the crowd filing into the venue, something is missing. 

That something is lighting. Even at the smallest of events, a set of cheap stage lights can make your performance be more professional and make the audience think they are at a stadium-sized event.

In this post, we give you our best tricks for making cheap stage lights look professional. Read on to find out!


Stage Wash

The easiest and cheapest method to light your stage is with a wash. A wash is one color that fills the whole area. It can even be done with a single light. 

If the lights are not mounted, play around with where you want to put them. The stands will need to be in a place that does not obstruct the audience’s view and does not impede your performance. 

Ideally, choose a light that can change color. Take a little time beforehand to prepare the light color changes to match the mood of the song. Avoid an all-white light wash, as it will look like the show has ended and will be less than flattering to the band. 

Here are a few examples of some affordable stage wash lighting that can help your performance look professional (links to Amazon):

  • 24 LED RGB Stage Wash Light Bar
  • 24 LED 96W RGBA Stage Wash Light
  • 108 LED 20″ 25W Wash Light Bar

Backlighting

Backlighting is the process of lighting a person or object from behind. This technique is used a lot in photography and video as it stops the focus of the piece from looking flat, or from having them look like they are floating in mid-air. Just a little backlight combined with lighting from the front can make a huge difference.

Backlights can be colored or white. Don’t make them too intense, as the glare onto the audience will obscure the performers. Experiment with the best place to position them before the concert.

To achieve this lighting effect on stage, you can use par wash lighting. You could place them on the floor looking up towards the subject. If instead, you use a stand to place the par lights, make sure they are looking down behind the subject and select the light color that goes well with the song’s mood.

Most par lights need to be plugged into a power outlet to work. Nowadays, you can find wireless par lights with a rechargeable battery inside that can last up to 15 hours. That way, you have more flexibility in where you want to place them on stage.

Here are the links for both the wired and wireless ones:

  • Wired RGBP 18 LED Par Lights (Includes 4 pcs)
  • Wireless Battery Powered RGBW 24 LED Par Lights (Includes 4 pcs)

Cheap Stage Lights With Fixtures

One great way to get a professional stage look is to use cheap stage lighting as fixtures on stage. Not only can this look exceptionally cool, but it can also have the illusion of making the stage appear much bigger than it actually is. 

Lighting does not even have to be expensive. You can use strip lights from a hardware store or colored neon. Placing it behind the band will also add a very flattering backlight.

Of course, for those with a bit more of a budget, the band logo in lighting would always look good. That also does not have to break the bank, depending on how you do it. 

Another way to add more lighting effects to your stage without breaking the bank is by using a set of LED beam spotlights. These types of lights come as a set, including a tripod stand for easy and quick setup.

The spotlights can also be used as strobes if you want. They have built-in sound-activated programs that include several effects to make one complete show.

If one set is not enough to light the whole stage, you can get two or more sets and connect them in daisy chain form to synchronize them with the sound.

Here are a couple of examples of LED beam spotlights sold as complete sets that include the tripod stand:

  • Set of LED Mobile Stage Lighting Spotlights
  • LED Spotlights Lighting System

Light Individual Members

Another way to make your setup look professional with the minimum number of stage lights is to light each member individually. Of course, this only works with smaller ensembles and may get expensive if you play in a ten-member function band. However, for a small band of around 2 – 5 people, it can make a real difference. 

The beauty of this setup is that you can hide and boost individual members’ presence at different points by merely varying the lighting. This can help you pick people out for a solo or hide any auxiliary members needed.

Choose lights that can switch between white light and color so that you can alter the mood. If you have a little extra in your budget, you may want to buy another light to cast a wash over the stage, so you have a constant backdrop.

To light individual members, you could use a spotlight or a par light like the ones mentioned previously in the article.


Create Texture

For smaller venues and DIY setups, adding texture to stage lighting can be a great addition to your set up. This doesn’t mean having colored lights circling across the carpet like in cheap disco lighting. Instead, create some filters to sit in front of your light to add some odd shapes and effects. 

One easy idea is to have a card with slits cut in. Light will shine through like sunlight through a window blind, creating dynamic lines on your stage. With the right positioning, it could even make your set up look bigger. 


Uplights

Uplights are a great way to create some atmosphere, especially if your budget is limited. Uplighting is the process of shining a light from below up towards the target. It can create dramatic upwards shadows and give an eerie, horror effect when done on individual performers. 

The main trick with uplighting is to make sure it does not get in the way of performances. Guitarists with pedalboards and equipment may find misplaced uplighting a real annoyance, especially if it shines directly into their eyes whenever they look down.

You may decide to use one uplight on your main singer and turn it on for intimate pieces and solos.

To achieve this effect on the band, place the lights on the floor in front and away from the performer at an angle that doesn’t shine directly into their eyes.

If you want the beam of light to be narrow, bring the light closer to the subject. For a broader light effect, move the par light further away. Just keep in mind that the light effect can be lost if the light source is too far from the target.

Make sure to take the time to try different positions ahead of the event to find the best placement for the lights.

Here is an example of an affordable uplight pack that can be used to achieve this and other light effects, as shown in this article:

  • 36 RGB LED Uplight Sound Activated (8 pack)

Moving Lights

Moving lights can be tricky on a budget. Done wrong, they can distract from the performance. But done right, they can add depth and excitement.

Use moving lights to scan the audience and crowd. Focussing on one band member may look jittery and unprofessional if you are not using a professional rig. Instead, focus on adding impact and effect to the whole room.

You may wish to combine this with some of the textures discussed before. A low-cost laser set up would be ideal for this. If you can manage to combine it with a smoke or haze effect, you will have another excellent layer to your performance. 

The following is an example of an affordable moving light:

  • 12 LED RGBW Sound Activated Moving Head

Setting Up

Lighting is usually the last thing a band would think of, especially when doing a DIY gig. However, it shouldn’t be, and if you plan your whole stage setup with lighting in mind and use a few of these tactics, you can get great results from cheap stage lights. 

If you found this article useful, then check out our other handy blog posts. For anyone setting up their own gig or concert, you must read our article on how to choose the correct PA system, so your sound matches your professional lighting set up. 

Understanding Audio Gear Specifications: A Musician’s Guide

As a musician, getting the best quality sound out of your equipment is extremely important. Bad volume levels, improper mixing, and inferior audio quality can all ruin even the best performances and recordings. 

And unless you’re a trained engineer, the mind-boggling amount of different specifications on your audio gear can be a minefield to work your way through.

Luckily, we’ve put together a handy guide for the most common audio gear specifications. If you are shopping for audio gear and need assistance with the jargon, read on!


Frequency Response

Every sound that we hear is comprised of different frequencies. A whistle has a much higher frequency than a bass guitar, for example. Frequencies are measured in Hertz (Hz). The human ear can perceive frequencies between 20-20,000 Hz.  

Different instruments and even voices fit within various frequency ranges. And not all audio equipment can handle everything equally well. Let’s look at microphones first.

Frequency Response in Microphones

The average vocal microphone has a frequency response from about 50-18000 Hz. This covers a pretty decent range on the human hearing spectrum while cutting out some of the low-end interference from breath or wind noise. 

In comparison, a kick drum microphone will generally have a much lower frequency response, going down to 20 Hz or even below (sub-bass frequencies), while cutting out some of the mid-range and leaving some high end for the “attack” of the beater.

Going further, every microphone will have its own different frequency response. A high-end vocal condenser microphone might have more “presence” in the high and mid-range frequencies. In contrast, a bass cabinet microphone will have more in the lows. 

Frequency Response in Speakers

Speakers also have specified frequency responses, divided by what type of speaker it is. A subwoofer (low end) generally lies between 20-200hz, while a tweeter (high end) will be tuned to the 2k+ range. Horns cover the range in between.

Frequency responses are represented as a curve on a graph. Generally speaking, the flatter the curve, the flatter and more “accurate” the frequency response is. This is best for speakers, while microphones tend to be more specialized in their application.


Impedance

Impedance is crucial when matching PA speakers or guitar cabinets to amps, as well as making sure your inputs (instruments, microphones) are at the correct levels.

Simply defined, impedance is the resistance a circuit has to voltage. Impedance is measured in Ohms. The most common audio gear impedance scenarios you’ll encounter are with speakers and amplifiers. 

The most important thing to note about impedance is that it should match from source to receiver. If your PA speaker has an impedance of 8 ohms, match the amplifier’s output to that. This is the easiest way to match your audio gear correctly.

Another specification you might run across while shopping for pro audio gear is “Hi-Z” and “Lo-Z.” These are indicators of the impedance of a microphone or instrument and let you know what kind of cables to use and what to plug them into.

Impedance in Microphones

Microphones are generally Lo-Z. This means that they have a low impedance. Lo-Z cables are also called balanced because they have a third negative wire. This is most obvious with an XLR (microphone) cable, which has three prongs inside, one for each wire. 

Low impedance cables are better at rejecting noise, making them the best option for live performance and recording studios.

Lo-Z audio gear is generally plugged directly into the receiver, like a microphone being plugged into a mixing board.

Hi-Z audio gear lacks that third wire and only has two. The most common Hi-Z gear is guitars and other amplified instruments. 

To connect a high impedance (Hi-Z) source such as an electric guitar to a low impedance receiver like an audio mixer, you need a device called a “Direct Insertion Box or DI box.”

The DI box takes an unbalanced, high impedance signal and converts it to a low impedance, balanced audio signal. This helps a lot in reducing picked up noise in long-run cables.

We have a full article explaining everything you need to know about the DI box; click the link if you’d like to read more.


Decibels and Watts

One of the most confusing aspects of buying any kind of amplified pro audio gear is translating the watts printed on the box to the actual volume it can produce in real life. 

Many PA and instrument speakers will proudly boast statements like 1000 watts, which seems like a lot to a casual shopper. But if you look closely at the box, there is often an asterisk, noting that this is “peak” handling. 

Let’s break it down: watts are how much “work” the speaker can do. Air is much harder to move than a liquid or solid, so even the best speakers are inefficient. 

Speakers with a higher SPL rating or sensitivity (measured in decibels) will more efficiently handle the wattage from an amplifier and put out more volume. 

The 1000 watts rating at “peak” handling just means that it can briefly put out its maximum SPL (think loud peaks in the audio). This applies to both amplifiers and speakers. 

The rest of the time, it will be operating at RMS or program power. This is the “actual” power the speaker can handle and the amplifier can deliver continually without getting damaged. 

So when you’re shopping for audio gear and need something loud, look for speakers and amplifiers with a higher RMS and SPL, not the watts that the box boasts. And remember what measures the loudness of a speaker is its SPL rating and not the wattage.


Get Connected

If there’s one necessary evil of audio gear, its cables. Every instrument, DI box, amplifier, speaker, and interface use cables of some kind to pass signal. But not every cable is the same.

The most common cables are 1/4″ jack cables. These are mainly seen with instruments such as guitars and synthesizers, and speaker cables. 1/4″ patch cables are also used to connect different sound gear together. 

Speaker cables are specifically built to pass the signal from an amplifier to a speaker. The wiring inside is generally of larger diameter so that it can handle higher currents.

Speaker cables and instrument cables have two wires inside, one to pass signal and the other to ground. These are specified as “tip-sleeve” cables, and you can tell by looking at the jack: there will be one black line near the tip. 

Some 1/4″ cables are “tip-ring-sleeve” (or TRS). These contain a third negative wire. You might have noticed this is similar to the microphone (XLR) cables we mentioned earlier. They will have two black lines near the tip instead of one. 

This is because TRS and XLR cables are considered “balanced” due to that third negative wire inside. Balanced cables can be run for long lengths without losing signal quality. In contrast, regular tip-sleeve cables will degrade the signal. 

If you would like to know more about balanced versus unbalanced cables, check out our other handy guide. 


Audio Gear Overload?

If you have any more questions or would like more information, we have a variety of articles on quite a few pro audio gear topics. Feel free to contact us at any time if you have any questions. 

  • « Go to Previous Page
  • Page 1
  • Interim pages omitted …
  • Page 5
  • Page 6
  • Page 7
  • Page 8
  • Page 9
  • Interim pages omitted …
  • Page 12
  • Go to Next Page »

Primary Sidebar

Search

Guides & Tutorials

  • Choosing a Portable PA System
  • How to Be a Better Singer
  • Build a Budget Live Streaming System Using PTZ Cameras
  • How to Get the Best Audio Quality on YouYube
  • Setting Up Stage Monitors
  • Mixing Console Basics
  • How to Position PA Speakers
  • Stage Sound System Set-Up
  • How to EQ Live Vocals
  • How to EQ Live Sound
  • Daisy Chain Active Speakers
  • Zoom Audio Settings for Music
  • How to Livestream a Wedding
  • Improve Your Livestream Audio Quality
  • Microphone Preamp Buying Guide

Featured Posts

Treblab X9 Pro: Tough Earbuds, Big Performance

Escape the Noise: Best Affordable Noise-Canceling Headphones

How to Combine Passive and Powered Mixers

What is a Ground Loop? – 5 Simple Ways to Fix the Buzz and Hum

Disclaimer

VirtuosoCentral.com is a participant in the Amazon Services LLC Associates Program, an affiliate advertising program designed to provide a means for sites to earn advertising fees by advertising and linking to Amazon.com.

Home  About  Contact  Disclaimer  Privacy

Copyright © 2019-2025 Virtuoso Central. All Rights Reserved.