This website uses cookies to improve and personalize your visit. Learn more about cookies. Got It

  • Skip to primary navigation
  • Skip to main content
  • Skip to primary sidebar

Virtuoso Central

  • About Us
  • Contact
  • Privacy

Informational

Tips On How to Be a Better Singer

Some of us are born with naturally beautiful voices. Even the most talented singers, however, work to develop their voices. They must practice, strengthen, and maintain their voices throughout their singing careers.

Even if you’re not one of these natural talents, remember that singing is a skill. Any skill is learned. You can learn to sing and improve your voice through practice and technique.

There are hundreds of methods, tools, and other exercises you can do to become a better singer, whether you wish to sing professionally or recreationally. These methods are comprehensive, meaning they include everything from professional training to simple exercises for proper posture and breathing.

Don’t forget your physical well-being. Singing involves more than just your vocal cords. A healthy body, heart, and lungs support your voice as well.

Next are some tips on how to be a better singer, along with some simple exercises and lifestyle habits that can help you reach your singing goals.


Tips on How to Be a Better Singer

Here are some simple tips for becoming a better singer. Some focus on your voice and breathing. Others take your emotional and physical well-being into consideration.

Warm Up the Body

We have all heard about warming up your vocal cords before singing. What about the rest of your body? Doing some aerobic exercise warms up your body before you sing. An energized body responds faster because your heart and lungs are ready to go.

Other exercises, such as stretching or yoga, relax your muscles and releases tension. Letting go of physical tension improves your vocal performance. As you stretch, gently exhale deeper each time.

Your mouth and jaw should be relaxed, opening and closing easily. The same goes for the muscles in your face, tongue, neck, and even your shoulders.

Avoid Taking Deliberate Breaths When Singing

Think about how we speak. We don’t run out of breath when telling a story. Nor do we pause in the middle of a sentence to draw a large breath. Our bodies naturally know how much air we need and adjust automatically.

The same applies to singing. You don’t need to take unnatural breaths. Doing so only causes tension in your shoulders, chest, and neck. Concentrate on the lyrics and let your body do the rest.

Likewise, don’t hold your breath before beginning to sing. You wouldn’t do that before reading a sentence out loud, right? Remember that the same applies to singing.

Correct Mouth Position

If you’re don’t hold your breath, you will feel the connection between your breathing and your abdominal muscles moving in and out.

If this feeling is similar to what happens when you yawn, then your mouth is open wide enough. Think of it this way: You should be able to place two fingers between your teeth when singing. You should keep your jaw slack as well so that your mouth, jaw, lips, and neck remain relaxed.

Speak and Sing On Pitch

As we have discussed, singing should feel the same way as speaking. This applies to pitch as well. For example, place your fingertips on your Adam’s apple (If you are a woman, then place them where the man’s Adam’s apple would be). This is the larynx, which of course, contains the vocal cords. Swallow to feel it move up. Pretend to yawn to feel it come down.

Next, speak normally. Everything stays in place, even when you vary your pitch. The same should happen when you sing. If it doesn’t, then take time to relax your larynx, keeping it steady as you sing.

Care About the Lyrics

Whatever you are singing must have more than just meaning. It must be meaningful to you. Take time to understand the lyrics and connect with them in a personal way. Doing so makes your performance authentic and believable. It also helps you relax your voice so that you can better convey the emotion behind the song.

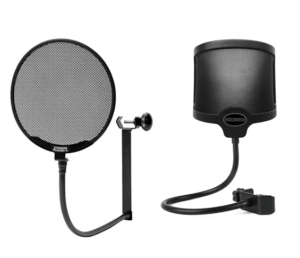
Correct Microphone Placement

Another important tip that helps you become a better singer in live performance is to correctly hold the microphone. Whether you are using a condenser or dynamic microphone placing it correctly while you sing makes a huge difference in your performance.

To correctly place the microphone, hold it with the hand you are going to use and bring it close to your mouth. Place the index and middle fingers on your lower lip and bring the mic closer so that it touches your fingers. Two fingers away from your mouth is the right distance from your mouth

Then slightly tilt the angle of the microphone down so that the audience can see your expression while singing.   

Remember that Singers are Athletes

Singing is physical, which is why you warm-up before practicing or performing. In addition, you express yourself on stage using your entire body.

When you perform, remember to bend your knees and use your thigh muscles when needed to move about the stage. At the same time, keep your upper body relaxed and free.

After singing, remember to warm down. Athletes often complete a second set of stretching after an event to protect the body from sore muscles and cramping.

After a performance, try humming low pitches or sliding from higher to lower notes. These kinds of warm down exercises re-lubricate your vocal folds and calm your vocal cords.


Daily Exercises to Help Develop Your Voice

One of the most important aspects of singing is breath control. Even though your audience doesn’t (and shouldn’t) hear your breath, it is the foundation of your sound. Proper breath control enables you to hit your notes correctly and hold them. The following are some breath control exercises and breathing techniques that help strengthen your voice.

Breath Control Exercise

When you sing, be sure your shoulders are not rising. If they are, your breathing is too shallow. Shallow breathing means you get an initial burst of volume, but you’ll run out of breath too fast. To correct that, practice breathing through your nose and exhaling through your mouth.

Your breathing should begin down in your stomach, with your diaphragm muscles expanding. If you draw your abdomen in when you breathe, then you’re doing it backward.

To strengthen and correct your breathing, lie on the floor. Relax and breathe normally. As you breathe in, be sure your stomach and ribs rise (or inflate). As you breathe out, they should fall or deflate. You will be able to take in more air than you think!

Mini Laughs

This exercise is essentially practicing your breathing with a short “Ha” added in between breaths. As you do this, be sure your stomach is going in as you exhale. Practice this slowly to develop better control. This also serves as an excellent warmup exercise.

The Lip Bubble

This one is an exercise to do while you’re alone, as it looks a bit silly. To perform it, use your fingers to support your jaw. Squish your lips together in a pucker and blow a gentle “buh” sound through your lips. You should feel your lips vibrate.

Next, do the same thing, this time using scales, slides, and even a melody. You should you’re your lips tingling once you’re done.

Humming

When you make an “mmm” sound with your spoken voice, you should feel the vibration in your lips and throat. Do this a few times, then hum your way through some scales, then with broken-up notes. Give one “mmmmm” per note, then a long one across the notes. Since this is simple humming, it’s an exercise you can do on the go.

ING

The “ING” exercise is a wonderful way to work your voice safely. Begin with the word “sing” and sustain the -ing part of the word. This may feel nasal, but that’s quite alright because the point of this exercise is to bring your voice into your hard palate.

Next, slide through scales from low to high, then back down. Do the same around the melody of any songs you are practicing. Don’t overuse your breath, and be sure to keep your tongue flat and relaxed. This is another shorter exercise that you can do daily, even in the shower.

Perfect Your Vowels

Vowels play a significant role in any vocal performance. They are the sustained sounds that show off any unique aspects to your tone. Thus, you need to control them well.

Many singers modify the sound and shape of their vowels so they can better reach specific notes. Other times, they alter the vowel sounds to imitate another singer’s style. The sound EE is known to be difficult, so many singers convert the sound to AH, for example.

So, practicing common vowel sounds helps you maintain a consistent mouth shape so that you produce them naturally rather than trying to recreate them each time you sing. An excellent place to start is with the O sound, forming your mouth into a narrow O shape.

From there, you can go with EE as in the word See, and on to OO (like soon), EH (Stare), OH (snow), I (sky), and AH (far). For each sound, use one sustained note, and then four or five-note scales up and then down. Take care not to add an H sounds to leverage the vowels. As always, keep your jaw and tongue relaxed.

Diction Exercises

Your audience must understand you when you’re singing. Both you and your audience need to connect with the lyrics. So, you can’t afford to be lazy with your enunciation. Also, your pronunciation varies from other singers due to regional differences in your accent. Nonetheless, you can improve your diction regardless of your natural accent.

In addition to your vowel exercises, do some consonant exercises as well. Both serve to sharpen your diction. Because you will create stops in your airflow at different points during the exercises, these exercises also aid in breath control.

The easiest way to work consonant exercises is to add B, C, D, F, G, M, N into your vowel exercises. Add one consonant to the beginning of each vowel exercise. Whichever consonant sound you find most difficult is the one to work on the most.

Another way to improve diction is “speak-singing,” which involves working on difficult parts of your song by speaking them through the melody, then transitioning to regular singing. It sounds clunky at first, but it will help you sustain notes better as well as develop your singing style.

In this case, speak-singing is an artistic tool, as well as a warmup exercise. If you happen to be a rap artist, then you know how critical your diction and speech abilities are for both your vocal workouts as well as performances.


Supplemental Voice Exercises

The warmup exercises we discussed above are ones that all singers should practice every day. They are more common and proven techniques. Of course, you can vary them and alter them as needed to strengthen your voice and breath volume. You can even record yourself so that you can play it back and critique yourself.

Next are some supplemental exercises to develop your voice further.

The Lip Buzz

The lip buzz is similar to the lip bubble. This time, however, you’re going to vibrate your lips together more, so they make a buzzing sound. Do this a few times, alternating the pitch for several seconds each time. Go higher and then lower.

Solfege

For this one, go up and then down the scales in the standard Do Re Mi Fa Sol La Ti Do pattern. You’ve probably seen this one demonstrated in classes or even in the movies where the characters are seen backstage warming up before a performance.

The Fire Engine

This exercise is exactly as the name implies. To do it, make a fire engine sound. Start at the lower notes and work your way up to the highs. Yes, you may feel a bit silly trying this one. Though, it is an effective vocal workout.

Singing Every Day for Beginners and Seasoned Singers

Singing every day helps you become a better singer, whether you are a novice or a seasoned, professional singer. Working daily singing exercises into your practice routine is critical for success. Exercises allow you to vocalize sounds and notes that don’t often appear in melodies and song lyrics. Exercises also allow you to stretch your voice beyond your voice’s normal range.

If you a beginning singer, take your time. Singing too much too soon can damage your vocal cords, which are muscles. You must build your vocal muscles slowly and over time. You should practice about 20 minutes each day for a while. As your voice strengthens, you can extend your practice time.

If you are a more experienced singer, then you can spend more time practicing, from about 30 to forty minutes each day. You can graduate from exercises to singing songs in your setlist to measure how effective your exercises are. You are still building your voice over time with a combination of vocal exercises and song practice.

Good Health Habits that Help Your Voice

Lifestyle choices and your overall health have an impact on your singing and voice quality. Voice tone is influenced by health and lifestyle as well. Author and communication specialist Preston Ni lists some practical, essential health habits that improve the voice. While his book is for public speakers, the same habits support one’s singing voice in the same way they do one’s speaking voice.

Drink Plenty of Water

Hydration is vital for overall health. Drinking plenty of room temperature water also keeps your throat moist, which produces a higher quality sound when you sing. The water should be room temperature or warm, but not hot. Room temperature water is best for your throat.

This is especially critical if you live in a dry or desert climate or at a higher elevation. Both conditions can be tough on your voice. Always keep hydrated, not only during practice or performance times.

Before a performance, drink your water with honey. If your performance will last more than 30 minutes, then mix your water with pure honey (rather than artificial honey or honey with additives). Adding the honey smooths out your throat. Don’t make it too thick, though, as you don’t want to coat your throat, as that would detract from your performance.

Get Enough Sleep

Everyone should sleep at least eight hours a day. If needed, take a short, 20 to 30-minute nap in the afternoon if you can. Fatigue shows in your voice. It also makes it easier for you to damage your vocal cords, especially if you are overusing your voice. Remember that we use our voices throughout the day for speaking as well as during practice and singing performances.

Lower Your Stress

Stress also contributes to many health conditions. For singers, stress can lend itself to vocal fatigue, which increases your chances of damaging your voice. Also, if you are under a great deal of stress, your voice will sound weaker and higher than usual. The same applies when you are nervous or anxious about something.

One way to reduce stress is through regular diaphragmatic deep breathing techniques. Other stress relievers are mediation and regular exercise. To avoid overusing your voice, take short breaks after every thirty minutes or so of signing.

Eat a Balance Voice Diet

The term “voice diet” sounds funny, mainly because the guidelines are the same for a general healthy eating regimen. Be sure you are eating fresh produce as well as fresh seafood and white meat like turkey and chicken. In addition to improving overall health and lowering risk factors for diabetes, heart disease, and other conditions, a healthy diet supports vocal strength.

Avoid Smoking and Second-hand Smoke

We all know that smoking is terrible for just about anything health-related. Smoking will immediately irritate the throat. And, sustained exposure to smoke will permanently damage your throat and lungs over time.

One thing to keep in mind is that second-hand smoke is just as detrimental to your health as smoking yourself. If you live with a smoker or spend a lot of time in places where smoking is still allowed, you are at risk.

Avoid Heavy Alcohol Use

Heavy drinking causes scores of health and interpersonal problems. It can also cause non-reversible damage to your voice.


Conclusion

The above tips on how to be a better singer are ones that singers have used for decades. Remember that singing is a skill that anyone can learn. Developing any skill comes with patience and hard work. Adding in some of these vocal exercises as well as practical guidelines will help you achieve your performance goals.

How Do Clip-On Tuners Work

Clip-on tuners are very convenient electronic devices because they help keep musical instruments in tune. Some people have questioned the accuracy of these devices because depending on the type of sensor it comes with, it could be less sensitive in detecting low rage pitch notes.

If you want the quick answer on how clip-on tuners work here, it is: They sense the vibrations from the instrument to detect the pitch. Then it compares the pitch of the string that is being tuned to the internal notes stored in memory and lets you know if you are in tune or if you need to adjust.

In this post, I explain how do clip-on tuners work, how accurate they are, and present the different types of tuners available.


How Do Clip-On Tuners Work

To understand how a clip-on tuner works, we first need to understand what pitch is. In music, pitch defines how hi or low a note is, and it’s measured in Hertz (Hz). For example, the standard frequency of the note “A” is 440 Hz. It means that “A” has 440 vibrations per second.

A clip-on tuner does not hear the note; all it does is sense the vibrations coming from the string to detect the pitch.

Affordable clip-on tuners use a piezoelectric transducer to detect vibrations and convert them into an electrical signal. The electrical signal is then amplified so that the microprocessor can use it.

Depending on the type of tuner and brand, it uses different methods to determine the pitch. Such a method is the Fast Fourier Transform (FFT), which converts pitch to frequency.

I am not going to explain in detail what an FFT is because it is way beyond the scope of this article. Still, all you need to know is that FFT is a complicated mathematical method used for transforming a function of time into a function of frequency. The FFT algorithm is widely used in many applications for science, music, and engineering, etc.

After the microprocessor has detected the frequency, it compares the generated frequency with a stored value that serves as a reference value.

If the frequency is low or high when compared to the reference value, the microprocessor sends a signal usually to a LED or LCD screen that lets you know if you need to tighten or loosen the string until the frequency generated from the vibrations matches the reference value.

For example, let’s say you are trying to tune the second string “B” in your guitar. The frequency of this note is 246.94 Hz. If the tuner detects 300 vibrations, it will show on the screen that your “B” note is high. As you loosen the string, the tension will be less, thus vibrate slower, and as you hit 246.9 +/- 1%, the tuner will show that the note Is tuned.


Are Clip-on Tuners Accurate?

For the most part, clip-on tuners are accurate. Some models are more reliable than others, but in general, they are.

Accuracy in instrument tuners is also called tolerance and is measured in “cent.” As defined by Wikipedia, a musical cent is a logarithmic unit of measure used for musical intervals. In one musical scale, there are 12 semitones or five tones and two semitones. Each tone has 200 cents, and a semitone has 100 cents.

When shopping for clip-on digital tuners, you will see that the tolerances range from +/- 0.3 cents to +/- 5 cents. The most common is +/-1 cent. What this means is that the error tolerance of a clip-on tuner is 1/100 per semitone.

The accuracy of these tuners is adequate between 27.5 Hz (A0) and 4186 Hz (C8) for chromatic tuners. There could be some small differences between different brands and models. Check the specs for the one you want to buy.


Types of Digital Tuners

There are several types of digital tuners, and each provides different characteristics. All work in almost the same way but with clear differences. Let’s explore each model.

Handheld Tuners

These are the oldest type, and they were first introduced back in the 1930s. The commercial units were more affordable and available in the ’60s and ’70s. Nowadays, they are still used, and the most common of this type is the KORG CA30.

Modern handheld Tuners use a small microphone to detect the sound. They also provide a direct input to connect any pluggable instruments such as guitars, bass, or any miked instrument.

This type of tuner is not as practical as other types, but are still used by many musicians around the world.

Clip-on Tuners.

Clip-on Tuners are small and very convenient because they are accurate, can be easily attached to your instrument, and be ready for use without connecting the instrument to it. It can tune the instrument even in a noisy environment.

Most of the clip-on tuners available in the market use a piezoelectric transducer sensor, which is accurate for frequencies as low as 27.5 Hz.

The small LCD screen and LEDs easily let the user know if the tuning is off and visually helps to get the instrument tuned in a short time.

Pedal Tuners

Guitar pedals are mainly used for effects, but some digital multi-effects have tuners. If you don’t use digital multi-effects, there are standalone pedals that are tuners. Examples of pedal tuners are the Boss TU3, TC Electronic Polytune 3 Mini, and the Korg Pitchblack.

Pedal tuners are excellent because they can be online with other pedals. Whenever you need to check your tuning, all you do is activate it by pressing the footswitch. It will disconnect your guitar from the pedal chain so that you can tune in silence.

They are very accurate, and most of the time, they are chromatic, meaning that you can use them with any instrument that can be plugged.

Polyphonic Pedal Tuners

TC Electronics first introduced polyphonic tuners in 2010. This type of tuner revolutionized the industry because they have the capability of tuning all six strings of a guitar simultaneously. 

The advantage over the other types of tuners is that you can quickly check the tuning of all strings at the same time. This feature helps professional guitarist save time while in live performance or in the recording studio.

Polyphonic tuners have advanced algorithms that can detect the right pitch of each string as if you were doing one by one. They are very accurate, offering an accuracy of 0.5 cent, which is very good.

App Tuners   

With high-performance processors in modern-day smartphones and easy access to an extensive app library, you can have at your fingertips a digital tuner for any instrument.

App-based tuners use the phone’s microphone to sense the note and use software-based conversion methods to detect the pitch.

Although app tuners can help you check the tuning of instruments, depending on how the app is coded, and the resolution of the analog to digital converter in the phone, they could be less accurate than hardware tuners.

Hardware-based units are designed for a specific task and are very good at that particular task.

On the other hand, newer smartphones have lots of processing power. They include high-resolution A/D converters that are beyond what is needed for an instrument tuner. In such a case, the app tuner could be as good as a hardware tuner. 

Just check the specs of the app tuner to find out the accuracy. If it is 5 cents or less, it is probably good.


Final Thoughts

Clip-on tuners are great for keeping your instrument in tune. They are affordable, offer excellent accuracy, and are very convenient.

In this post, I have answered the question of how do clip tuners work and also talked about their accuracy and the different types of tuners.

If you have any questions, please write it in the comments or send it by email. Thank you for reading my blog.

What Causes Microphone Feedback and How to Stop It

A microphone’s feedback is a very annoying and unpleasant high pitch noise that can happen in any situation where there are a speaker and a mic. Understanding what causes feedback is the first step in knowing how to stop it.

Audio feedback happens when a sound coming out of a loudspeaker is picked up by the microphone reentering the sound system again and again in an always increasing loop. The result is a loud rumble or a high pitch ringing noise.

In this post, I will explain several factors that can cause a microphone to feedback so that you can avoid these situations and significantly reduce the occurrence of feedback in your gigs and events. Plus I have included some tips and solutions that will help you stop microphone feedback


Main Causes of Microphone Feedback

Mic Placement in the Stage

One of the main reasons for audio feedback is because microphones are placed in front or too close to a loudspeaker. If loudspeakers are placed behind the microphone, feedback is almost guaranteed because whatever sound comes out of the speaker will be captured by the mic, and the loop will cause feedback.

Placing a mic to the side of a loudspeaker is another potential reason for feedback because sound can bounce back and forth until it reenters the sound system through a microphone.

The Solution

To help reduce the occurrence of feedback, place all open microphones behind the loudspeakers, making sure that there is enough distance between the mic and the speakers.

A rule of thumb commonly used by sound engineers is, if you double the distance between a microphone and the speaker, the volume for that channel can be increased by 6dB, providing you more volume headroom before feedback on that channel.

When setting up your mics, make sure you allow enough time to try different positions until you get the best results. With time and practice, it will become easier because you will understand the behavior of your sound equipment. 


Loudspeaker and Monitor Placement

Another reason that causes feedback is the placement of speakers and monitors. The dispersion angles for a loudspeaker varies, but typical angles of dispersion are 90 degrees horizontally and 60 degrees vertically.

Any microphone located in that dispersion area has the potential for feedback. When setting up a sound system, you want to cover as much space as possible so that your audience can hear everything.

This is where it is crucial to place loudspeakers correctly so that they can cover as much area as possible, but staying clear of the pickup pattern of the mic. When setting up microphones on stage, make sure to keep clear of the dispersion area of the speakers.

The Solution

Place the main loudspeakers as close to the audience as possible. That way, you can decrease the volume in the mixer.

Place the monitors exactly behind the mics on stage, especially if you are using cardioid or super-cardioid mics.

A rule of thumb when placing speakers is if the distance between the audience and the main speakers is halved, by keeping the volume constant, the sensed volume by the audience will increase by 6dB. In other words, halving the distance between speakers and the audience increases the sound volume by 6dB.

If you are in a situation where mics can feedback but still don’t have the volume you need, try moving the speaker towards the audience. That way, the sensed sound volume increases without actually increasing it on your mixer.

Another solution is to use in-ear monitoring systems; that way, stage monitors can be removed entirely, significantly reducing the occurrence of feedback. The only disadvantage is that in-ear monitoring systems tend to be expensive, but if you can afford them, I highly recommend it. 

Allow enough time when setting up everything so that each mic is tested with the main speakers and monitors as well.

Simulate a situation so that you know what is your volume headroom before feedback. In other words, slowly increase the volume of all microphones and generate a sound to see how the equipment behaves at higher volumes.

If you still see that you don’t have enough volume for your mix, try moving the speakers to the left, right, and front until you find a sweet spot.


The Type of Microphone Used

Feedback can be caused by the type of microphone you use. There are different types of microphones for live performance, namely dynamic, condenser, ribbon, etc. Each one has its sonic characteristics, and some are more sensitive than others.

For example, using condenser microphones for live vocal performance is the right choice because they provide studio-quality sound, but are way more sensitive to sound. Placement with this type of mic is a crucial factor in reducing feedback due to their sensitivity.

The Solution

Keep to a minimum the number of sensitive microphones such as condensers on stage, use them only for lead vocals and backup singers. For instruments, try to use dynamic mics if possible. 

If acoustic guitars need to be miked, place the microphone as close as possible to the guitar. That way, it picks up more of the sound from the guitar and less from the environment.

If possible, use electro-acoustic guitars that come already with installed piezoelectric microphones. That way, you use less open to air microphones for acoustic instruments.


Polar Pattern of the Mic

Choosing a microphone with the wrong polar pattern could be another reason for feedback. The polar pattern of a microphone is a visual representation of how well your microphone picks up sound from different angles. To learn about polar patterns, read this post.

For live performance, the recommended polar patterns are cardioid, super-cardioid, and hyper-cardioid. The reason is that these mics pick up most of the sound at the front and less in the back and sides, significantly reducing the sensitivity to feedback.

The solution

Make sure that whatever microphones you use on stage are one of the mentioned polar patterns. I recommend using cardioid and super-cardioid, especially for condenser microphones.


Equalization of the Microphone

Feedback happens at different frequencies, depending on the volume of the microphone. If the feedback is a low rumble or a high pith noise, you can easily detect the offending frequency. Usually, the offending frequencies can be found between 250Hz and 2kHz and between 2kHz – 8kHz. It’s rarely found above 8kHz.

This is where correctly equalizing each microphone comes handy. By doing a few sound tests, you can ring out offending frequencies. Sound engineers use the term “ringing out” as the process of detecting resonant frequencies that can cause feedback.

The Solution

To maximize volume before feedback occurs, ring out offending frequencies. To do this process, you need a graphic equalizer. The process is simple. After mics are placed in the stage, slowly start bringing the volume up until you start hearing feedback.

If the feedback noise you hear is a low rumble, try reducing frequencies between 250kHz and 1kHz. If the feedback sounds like a high pitch screech, try changing frequencies between 2kHz and 8kHz.

You may want to run this test several times until you can bring all your system up to the volume you want without any feedback.

This process requires that your ears are trained to identify which frequency is creating the problem. There is equipment you can get that would do this automatically without the need of a graphic equalizer. They are called automatic feedback reducers.

These systems use a microprocessor that can identify offending frequencies and automatically reduce them before feedback even happens. They are convenient if you run many microphones on stage, and you don’t want to deal with checking offending frequencies, or if your ears are not trained to identify problematic frequencies quickly.

Even though an automatic feedback reducer can be very helpful in getting rid of feedback, you can still get it if you use the wrong type of microphone, have speakers in the wrong place, and use an event hall with bad acoustics.

No matter how good of an audio engineer you are, even if you have feedback reducers, there are some places where the acoustics are just terrible, and there is not much you can do about it.

In such cases where the acoustics are awful, you need to be like a hawk watching your mixer to catch feedback while the event is happening, this is not ideal, it’s stressful, and is just frustrating.


Number of Open Microphones

As more microphones are open (On), the possibility of feedback increases exponentially. This is because more sound can be picked up and reenter the system, creating a feedback loop.

The Solution

Try to keep only the required mics ON; just use the mute button in your mixer, but make sure you are paying attention so that when someone needs to use the mic, you turn it on.


The Acoustics of the Room

Another factor that affects feedback from microphones is the acoustics of the room or event hall. Sound from the loudspeaker can bounce back and hit the microphone’s membrane even if you have followed all the suggestions in this post.

The acoustics of the room is the only thing you have no control over, so you would have to pay lots of attention to your EQ and volume levels.

The Solution

In situations like this, an automatic feedback reducer can be very helpful because the system can be faster in detecting offending frequencies before they get out of control.

In case you don’t have a feedback reducer, try placing the main speakers closer to the audience and all microphones as far as possible from the speakers. Keep the volume in check and be on the watch to make sure you can catch possible feedback.

Turn off any mic that is not needed and make sure to use either cardioid or super-cardioid mics.

Perform several tests before the even until you have a clear understanding of what is your maximum volume headroom and don’t go over it.


Stopping Feedback – Summary


Conclusion

In this post, I have presented what causes microphone feedback and how to stop it. I have included solutions for each case, but remember, you must practice putting yourself in different feedback situations so that your ear is trained until you can automatically adjust. Plus, explore different setup configurations until you get comfortable.

If you are a sound tech person that does it for a living by renting your equipment for parties and events, or if you are the sound tech in a church or any other venue, training yourself in avoiding and controlling feedback is a must. Remember, there is no substitute for practice when it comes to sound.

I hope this post helped you in some way to understand what causes microphone feedback and how to stop it. If you have questions, please leave it in the comments sections, I will respond within a few days. Thank you for reading my blog.  

How Does a Wireless Microphone Work

Wireless microphones are remarkable pieces of technology. They provide lots of freedom in the stage because there is no cable between the mic and the mixer. As with everything, they have their advantages and disadvantages.

How does a wireless microphone work? In simple terms, a wireless mic is almost the same as wired ones in the sense that it has the same components to pick up sound, but instead of having a wire going from the mic to the PA system, it uses radio waves to send the signal through the air to a receiver. Then the receiver extracts the audio signal to be amplified.

The explanation above is a straightforward one. In this post, I will go a bit deeper to explain each step in more detail so that you have a better understanding of how it works.


Parts that Make Up a Wireless Microphone

Any wireless microphone, regardless of the brand or model, is composed of three main parts: the transducer, also called a capsule or diaphragm, the transmitter, and the receiver. Let’s explore each one in more detail.

The Transducer or Capsule of the Microphone Section

Image Courtesy of Neumann

The transducer or capsule is what converts sound into electrical signals. There are different types of microphone capsules, but the most common are dynamic, condenser, ribbon, and piezoelectric. Each one works somewhat differently, but the principle is the same.

For example, a dynamic capsule uses a very sensitive membrane material that is attached to a coil. The coil is carefully placed inside a magnet, usually a neodymium magnet. When sound hits the membrane, it vibrates.

The movement of the membrane also moves the coil. As the coil moves inside the magnet, a small current is created, which produces an electrical signal that contains the sound.

The electrical signal produced by the capsule then goes to a circuit that conditions the signal so that the transmitter can change it into radio waves to be broadcasted across the room to the receiver.

The Microphone’s Transmitter

After the electric signal is generated by the microphone’s capsule, and the signal is amplified to a point where the transmitter can use it, it goes to the next circuit, which is the transmitter.

Most modern wireless microphones use wideband FM modulation transmitters. More advanced or professional units use digital modulation so that the signal is secured from unauthorized reception.

In simple words, as explained in the website, searchnetworking.techtarget.com modulation is the process of converting any signal into radio waves, by adding the source signal to a carrier signal.

To achieve this, the carrier waveform must be a steady waveform, meaning that is has a constant frequency. The information, in our case, the electrical signal generated by the capsule, can be added to the carrier by varying the frequency of the carrier.

Wireless microphone transmitters are usually VHF (Very High Frequency) or UHF (Ultra High Frequency). And the frequencies of operation are 900MHz, 2.4GHz, and 6GHz.

The transmitter uses an antenna that can be seen on the outside of the microphones, at the bottom, or it could be inside. Most newer models have the antenna inside, so that is not seen.

For a transmitter to work, it needs electrical energy. The electrical power is supplied by the batteries that the user installs.

Professional wireless microphones have several channels or frequencies to choose from in case there is interference. Some models automatically scan the frequency spectrum to find available frequencies so that there is no interference from other wireless devices.

The Microphone’s Receiver

As the signal is modulated and converted to radio waves, it propagates in the atmosphere. The receiver has antennas that pick up the radio waves and, through electronic processes, demodulates the radio frequency to extract the original or source signal produced by the mic’s capsule.

In this post, I will not explain the demodulation process in detail because it’s beyond the scope of this article. But to explain it in simple words, the receiver is tuned to the same frequency as the carrier signal, and by using specially designed filters, the original signal is extracted, amplified, and sent to the output of the receiver.

The output of the receiver is then connected to a mixer or powered speaker, and that’s how a wireless microphone works.


Advantages of Wireless Microphones

  • They don’t use wires, which means more freedom to move around in stage.
  • By having fewer wires on stage, the number of trip hazards in significantly reduced.
  • Using wireless mics eliminates hum noises called ground loops that can happen between wired microphones and instruments on stage.

Disadvantages of Wireless Microphones

  • Wireless mics need batteries to work, and in some cases, they don’t last too long. Modern, professional wireless mics can work from 6 to 10 hours per battery change.
  • There could be interference from other wireless equipment in the area.
  • There could be some dead spots where the signal is lost, and thus the audio signal is lost as well. This is why it is essential to have a True Diversity Receiver System.
  • Professional wireless microphone systems tend to be expensive. They can run in the hundreds or even thousands of dollars.

Things to Look for When Buying a Wireless Microphone System

I highly recommend buying a system that is UHF. The reason is that there are some VHF frequencies that the FCC is repurposing. By July of 2020, all systems using those frequencies must cease operations.

Buying a system on the UHF spectrum will save you from having the problem of your system becoming useless. To learn all about the frequency changes, read this post about what wireless microphone frequencies are legal.

Another recommendation is to buy a True Diversity Wireless Microphone System. A true diversity system has a receiver that uses two separate antennas located at opposite sides connected to two different receivers.

Internally a processor checks to see which antenna has the stronger signal, and depending on the signal strength, it switches back and forth between the two antennas. This method significantly reduces signal dropout.

Make sure to buy a wireless microphone system that offers the longest time between battery changes or charges. I recommend getting a battery charger and enough rechargeable batteries because the cost of buying regular alkaline batteries will add up.

If possible, stick with well-known brands such as Shure, Sennheiser, AKG, Audio Technica, Rode, etc. because their products will be of high quality and reliable. And believe me, you don’t want to buy a cheap wireless mic system, they are just not worth the trouble, I tell you this from experience.


Final Thoughts

I hope that this article helped you better understand how does a wireless microphone work. In case you are looking to buy a wireless mic system, follow the recommendations explained in this post, it will help you make a better choice.

For questions about this or any other post in this blog, please leave a comment or use the contact us form and I will get back to you within a few days. Thank you for reading my blog.   

Home Recording Studio for Beginners – The Ultimate Guide

There’s a reason you’re investing your precious time reading this home recording studio for beginners guide. You want to understand all the home recording studio essentials for beginners. You wish to learn how you can successfully plan a functioning home studio without breaking the bank. 

Good news! building a home studio on a budget is possible. However, there are a couple of things you must grasp. You should know precisely what home studio equipment you need for a successful home studio setup. Here, you’ll learn all these things plus a ton more. 

Why Do You Need a Home Recording Studio in the First Place?

The recording industry has been seeing ever-evolving technological advances over the years. Today, aspiring musicians can practice and record their music at home. No longer do they have to hand over their life savings to obscenely expensive recording studios just for a few sessions. 

With the right equipment, an enabling recording environment, and the necessary skills, pretty much anyone can produce radio-worthy tracks. If you have your studio, you can practice all you want and perfect your craft. And you can save tons of money over the long term.

But all that won’t happen unless you take action. Nothing will happen until you start building the studio you’ve craved since forever. And there’s no better time to start than today.

Now, let’s jump right in and discuss what you need to set up a fully functional home recording studio. 

How Much Will a Budget Home Studio Cost? 

There’s no fixed number for the total cost, of course. Everyone’s situation is different. The fewer stuff you have to buy, the cheaper it’ll be for you. 

That being said, it’s unlikely you can build anything worth having with a $500 budget. In most cases, you’re looking at $1,000 or more. 

The trick is to buy only what’s absolutely necessary for now. I mean, you can always upgrade down the road. 

Here’s another idea to keep in mind. It’s all about the skills you have rather than the stuff you can cram into your home studio. 

12 Things You Need to Set Up a Home Studio

Here is the list of everything you need to set up a recording studio at home:

  1. A Computer
  2. Digital Audio Workstation (DAW)
  3. Audio interface
  4. Microphone
  5. XLR microphone cables 
  6. Microphone stand
  7. Pop Filter
  8. Studio monitors
  9. Headphones
  10. Acoustic treatment
  11. A recording desk
  12. A recording chair

Let’s dive right in. 

1. A Computer for Recording

You’re about to embark on your recording journey, and you need a laptop or desktop computer at this point. A computer plays a critically important role. It’s probably the most important tool for the project you’re launching. 

The best computers for recording music don’t come cheap, but you’re just starting, and the worst thing you can do now is to throw money at the project. Instead, move slowly. Allow the project to evolve and develop gradually. And remember: the most crucial element of a truly successful home recording studio is the musician’s skills. 

Use what you have. Focus on the specs as opposed to any other consideration. Also, understand that a Mac, Windows, laptop or desktop computer isn’t necessarily better or worse. 

When it comes to the specs of a computer to use, these are my recommendations:

  • PROCESSOR: you’ll want the fastest processor you can afford, the minimum I recommend is the Intel i5 processor.
  • RAM MEMORY: no less than 8GB, the more the better.
  • STORAGE: a solid-state drive (SSD) no less than 250GB. If you can afford to buy or upgrade to NVME M.2 SSD, I highly recommend it because it will run smooth and lightning fast, especially when editing. 
  • OPERATING SYSTEM: I highly recommend a 64-bit OS. Most digital audio workstation software runs on 64-bit operating systems.
  • PORTS: you’ll need to make sure that the computer you chose has enough ports as well as the type of ports you’ll need. It needs to have a minimum of two USB ports, if it has more, it’s better that way you have more flexibility. If possible, a Thunderbolt connector is a great idea in case you decide to upgrade later on.

If you have an older computer with a dual-core processor with 8GB of RAM, check your specs against the minimum required to run the Digital Audio Work Station (DAW) of your choice to make sure that it will work.

If your computer doesn’t have an SSD but instead it has an electro-mechanical hard drive, it doesn’t mean that you can’t use it for your home studio setup. Just keep in mind that electro-mechanical HDDs are slower to work with, especially when editing large files but they can work. 

Now, here’s the thing. Stop overanalyzing stuff at this point. If you already own a laptop or PC purchased within the last three years, the computer would likely work.

If you don’t own a computer and need to buy one for your home studio project and have the funds to invest in a new system, these are a few examples of computers that are recommended:

  • Apple MacBook Pro
  • HP Envy
  • Lenovo Yoga 730
  • LG Gram
  • Acer Aspire 5
  • Acer Spin 3

2. Digital Audio Work Station (DAW)

What’s DAW in music production? The term digital audio workstation may sound fancy and probably complicated. But it’s just the software you use to record and edit audio. 

Beginners and pros rely on this piece of technology to edit and mix their creations. I can’t say that the DAW is the single most essential component for a recording studio, but it sure plays an enormous role. It is a must-have for every recording enthusiast. 

The recording market offers a variety of DAWs software, and each comes with various strengths and limitations. But no matter what DAW you choose, it should enable you to mix — on a time-based grid — different sound sources. 

So, how do you choose a DAW? What’s the best and easiest DAW for a complete beginner or hobbyist? There’s a ton of confusion and controversy surrounding this issue. And it’s easy to immerse yourself in the vast sea of varying opinions. I’m here to help you decide what DAW works best for a beginner so you can get started as soon as possible. 

Listen, stop wasting time debating what DAW is best for you. Any DAW can do the job when you are building a home studio on a budget. At the beginner stage, I don’t recommend getting expensive software because you will be overwhelmed with the many options and functions it comes with and get discouraged, just keep it simple.

Actually, there’s very little difference between DAWs in relation to sound quality. 

Have a Mac? Lucky you! Every Mac comes equipped with a FREE DAW, GarageBand. It’s a clean, simple interface. And everyone with a smattering recording knowledge knows GarageBand is one of the best FREE DAW out there. 

Some people feel the GarageBand is too limited, though, but it sure does the job. That’s why most musicians go with the venerated Logic pro — Apple’s flagship DAW. Logic Pro offers amazing MIDI editing capabilities.

I believe it’s only rivaled by Ableton Live and Cubase. Why not go with GarageBand for now? As you learn how to leverage every capability the platform offers, you can upgrade to Logic Pro. 

Another free Windows-based DAW software that is an excellent option for a beginner’s home studio setup is the PreSonus Studio One 4 Prime. It can be downloaded for free from the PreSonus website.

For a more complete version of this software, I recommend Studio One 4 Artist from the same company.

Oh, I almost forgot about this, most audio interfaces come bundled with a free version of a DAW software, which is what we are discussing in the next section. But just a heads up, you can get a free copy of the Studio One 4 Artist Digital Audio Workstation software if you purchase any of the following audio interfaces:

PreSonus AudioBox USB 2×2

PreSonus Studio 24c 2×2

PreSonus Audiobox 44VSL.

Another advise, stop fretting over plugins, and don’t spend a penny at this point on any of those expensive options. What your DAW offers will suffice — at least for now. 


3. Audio Interface

You need a way to get sound in your computer so you can process and edit audio. A soundcard or audio interface enables you to effortlessly convert sound from different sources into digital signals. It also helps you to turn those digital signals back into sound after you’ve worked on them. 

A few years back, you needed to have a professional soundcard in your computer to do the job and that could cost thousands of dollars. But technological advancements have been happening all along, and nowadays, you can perform high-quality recording with the use of audio interfaces. 

So, is a soundcard the same as an audio interface? Basically, yes — either will do the job. 

An audio interface is technically an external soundcard. It works supremely well for laptops and a growing number of people are using it on their desktop as well. 

I have written a post dedicated only to reviewing the best audio interfaces for beginners who are on a tight budget. The reviewed interfaces give you the best value for your money.

An audio interface looks like a box with a face featuring several inputs for instruments and mics. It also comes with outputs for headphones and speakers.

What’s the best or most popular audio interface for home recording? There are many brands and options when choosing an audio interface. Depending on how many inputs/outputs you need, the type of preamp topology used and other variables the prices can range from less than $100 to thousands of dollars. Still, for beginners, I would recommend the 3rd Gen Focusrite Scarlet Solo. Its sibling, the Focusrite Scarlet 2i2 (3rd Gen) is also a great pick.

Both of these options come bundled with Pro Tools, First Focusrite Creative Pack, Ableton Live Lite, Softube Time and Tone Bundle, Focusrite’s Red Plug-in Suite.

Another audio interface I recommend for a beginner’s in-home studio is the Behringer U-Phoria UMC202HD. This is a very easy to use interface that will have you recording your tracks in no time. It comes bundled with a copy of Tracktion that is one of the world’s fastest and easiest to use Digital Audio Workstations (DAW) for composing, recording, editing, and mixing.

The UMC202HD is also compatible with most of the popular recording software including Avid Pro Tools, Ableton Live, Steinberg Cubase, and others.

Many beginners often ask: Do I need to shell out for an interface when I can use a USB mic? No, you don’t have to buy it. You can use a USB mic, instead if you are recording vocals only or using the mic for picking up the sound of an acoustic instrument. But there’s a reason many people invest in a good audio interface. 

By having an audio interface, you can also connect instruments such as guitar, keyboards, etc. and record more than one channel at the same time.

If you have a band with five instruments and vocals, for example, it would make sense to use an audio interface with multiple inputs so that the session can be recorded at once, otherwise, you would have to record each instrument separately and then mix it in the DAW software.


4. Studio monitors

What’s a studio monitor, and what is it used for? Anyone who strives toward perfection in home audio reproduction uses the best studio monitors their budget allows. These are special loudspeakers designed to reproduce sound as natural as possible so that when a recording is mixed and later edited it provides a sound as accurate as possible.

So, what’s the difference between studio monitors and regular speakers? Studio monitors are designed with an ultra-flat frequency response for professional-level listening.

Near field studio monitors are supposed to sound with a tight bottom, focusing on the mid frequencies, and providing detailed highs. In your in-home studio, you need them for mixing, editing, and mastering. 

I can’t overemphasize the following. Consumer speakers aren’t designed to be used in recording studios. The sound that comes out of them is not accurate enough for mixing, editing or mastering.

For example, you won’t like the mixes you get if you use such speakers. They tend to be too heavy on the lower frequencies or exaggerated on the highs, making the mix inaccurate. That is why I strongly recommend getting a pair of decent studio-grade monitors for your home studio to produce a studio-quality mix.  

You can use either active monitors or passive monitors, but active monitors are better. Active monitors use built-in amps while passive ones rely on external amps. 

So, why active and not passive monitors? Because active monitors use specially designed amplifiers and speakers that are perfectly matched to provide a more accurate sound.

A standard studio monitor consists of a woofer, a tweeter, an amp, and the control panel. The best home studio monitor should offer an ultra-flat frequency response with very low total harmonic distortion.

The following are great examples of monitors depending on your budget for a beginner’s studio:

Mackie Creative Reference (CR4)

Presonus Eris E3.5

KRK RP6G3-NA Rokit 6

Yamaha Hs5 Powered Studio Monitor

I have written a post dedicated only to reviewing the best affordable studio monitors, each one of the reviewed monitors gives you the best sound possible at an affordable price.


5. Microphones

Your home studio needs at least one or two mics. I know you’d love to add the best of the best vocal mics to this growing list of equipment. But a professional top of the line studio microphone can set you back as much as $10,000! And you’d not want to spend that much money on a mere mic, would you? It’s just not a very good idea for a beginner. 

Not all microphones are created equal, each one is designed with a frequency response that is tailored for a specific purpose. Similarly, there are different pickup patterns depending for what is going to be used for.

If you’re looking for an insanely effective mic at a reasonable price, go for an all-round option. Large diagram Condensers are great all-round choices. You can accomplish just about anything with them. 

With condensers, the frequency response you get is incredibly articulate. If you’re a vocalist, grab a condenser. The Rode NT1 is an awesome and affordable choice. 

Condenser microphones are also a great choice for performing live. Check out the best condenser microphones for live vocals article.

Another great choice for vocalists is the Audio-Technica AT2035. With this large-diaphragm condenser mic you will get smooth, natural sound and very low noise.

For Acoustic Instruments, these are my recommendations:

If you’re a guitarist and need amplifier miking, it’s better to go with a dynamic microphone. Dynamic mics take high-volume sounds pretty well. The SM57 is a great dynamic mic to start you off.

For miking acoustic guitars, pianos, and cymbals, my recommendation is the AKG Perception 170. This small-diaphragm condenser microphone is ideal for high SPL applications up to 155 dB. Making it a perfect choice for budget recording of overheads, percussions, acoustic guitars and other stringed instruments.

For miking drums a good option is:

Samson DK707 7-Piece Drum Microphone Kit

For bass drum and bass guitar these two options work perfectly well:

Shure PGA52-XLR

AKG D112 MkII 


6. XLR Microphone Cables

Selecting XLR mic cables for your studio may not be exactly a glamorous phase of the home studio setup. But you sure need good cables in your range. 

When it comes to designing a home recording studio for beginners, people often ask the following question. How much do decent XLR cables cost? 

Pro musicians often say “it doesn’t matter what cable you use.” But have you seen their assortment of mic cables? Lots of these folks spend a small fortune on cables. Yet they keep saying “it doesn’t matter.” 

But it matters, you know. I’ve seen dirt-cheap Chinese cables that don’t work at all. And others that work for a week or two before they break. And don’t attempt to return them — you’ll hate the awfully stressful return process. 

I’ve also seen premium mic cables that deliver laudable performance but leave you wondering whether it’s not a full-blown rip-off. 

Honestly, most premium cables work better than the cheapest options I’ve encountered. They offer better lay, shielding, strand count, and impact absorption. They also provide better connector conductivity. 

If you can afford them, choose cables with a shorter lay. The lay refers to the distance between twists in a cable. Premium cables typically pack more wire, and they’re more (relatively) expensive. In addition, they’re more flexible and offer much better noise cancellation. 

Premium cables usually use braided shielding. And they’re super strong and last long. Braided shields also offer better conductivity than either serve or foil shielding. Serve shields are often used in mid-range cables while most budget cables have foil shields. And serve shields offer better flexibility than braided ones. 

Impact absorption may not be very important for cables for a home studio.

Silver is a better conductor than gold, but it needs frequent cleaning to keep tarnishing at bay. That’s likely why many people prefer gold-coated connectors even if they’re more expensive. 

Finally, we have quad cabling, a relatively recent engineering technology. This factor dramatically reduces electromagnetic interference emanating from nearby equipment. This aspect also ensures that cables see reduced intermodulation distortion (IMD). Plus, you’ll get much better sound quality.

IMD is the accidental creation of ghost signals (not part of the original signal). These ghost signals show up when the original signal(s) pass-through devices that aren’t linear. 

The average musician may not notice the difference in performance between cables of different quality levels. That doesn’t mean no difference exists, though. 

You don’t want to spend a boat-load of cash on cables. So, go for more affordable options that deliver great performance. While you can use the best budget cables, I’d recommend that you go with mid-range options. You can get good mid-range cables whose prices hover between $30 and $60. When it comes to cables for a beginner’s studio these are good options, click the links to see the price on Amazon.

Mogami Gold Studio-10 XLR

Hosa HMIC-010

Mogami GOLD TRS-XLRM-10

Just choose the length that works for you.


7. Microphone stand

Needless to say, you need a good microphone stand or several. A good mic stand ensures your mics stay where they should be at all times. Imagine trying to grab a falling high-end mic during a performance so it doesn’t crash into the ground. See, you need a top-quality mic stand. However, buying a good one shouldn’t wipe out your entire savings. 

Now, there are good cheap mic stands and expensive nightmares. So, don’t buy before devouring a couple of home studio mic stand reviews.  

The best mic stands cost over $100, and you can shell out for 1 or 2 if you can afford it. But you should easily find a budget mic stand that works perfectly. 

Whether it’s a tripod, tripod boom, overhead, round-base, or low-profile stand, ensure you’re getting the best bang your buck.

Note: when it comes to the best mic stand for home recording, don’t always go for the lowest-priced option. The vast majority of those ones don’t do the job. Be ready to spend more so you can get much better results. 

The following are the microphone stands that would be perfect in a home studio setup, some of them I have personally used and are of good build quality.

Pyle Heavy Duty Microphone Stand

The Samson MK-10

Gator Frameworks Tripod Mic Stand

LyxPro Professional Microphone Stand


8. The Pop Filter

Popping sounds aren’t uncommon while recording. But that’s where the best pop filter for home studio comes into play. These sounds occur naturally when you’re singing or speaking out letters such as b or p. They’re called plosive sounds, and they don’t do any good for your music. 

You also don’t want your recordings to contain those unpleasant hissing S-sounds. These sounds are technically referred to as sibilance. You produce these undesirable noises when saying words such as ship, sip, and zip.

As you speak, your tongue naturally forces a whole stream of air toward your teeth. What you get is a high-pitched, high-amplitude sound that may lower the overall quality of your audio. 

The right pop filter helps keep these unwanted sounds acceptably low so you can have the finest sound possible. They also prevent moisture (from your mouth) from entering the mic. And that adds longevity to your mics. 

When shopping for a pop filter, pick the right size, shape, and mount. Choose a filter whose diameter suits your recording style and your mic’s size. 

Grab a flat filter if you’re trying to save every buck you can. But this option requires the user to speak from a particular angle.

The best flat pop filters are:

Auphonix Microphone Pop Filter (MPF-1)

Stedman Proscreen XL Pop Filter

I believe curved pop filters are the best bet. Why? Because you can speak or sing from any angle. If you move a lot while recording, choose a curved filter with a larger diameter. That’s the surest bet. 

The best-curved pop filters are:

Zingyou PF-101

PEMOTech Pop Filter


9. Headphones

First off, you just can’t use the earbuds that came with your smartphone. In fact, you should stay away from consumer headphones. Why? They’re created to ramp up different frequencies such as bass or treble.

If you use them, you won’t hear your recording as it actually sounds. That being said, there are in-ear headphones purposely designed for use in home studio situations. 

So, get the best home studio headphones within your budget. You’ll find that the level of accuracy they deliver is matchless. They let you perceive your production as it really sounds so you can make the necessary edits. 

But don’t throw away those Apple earbuds. Instead, use them to listen to how your audio will sound to those who’ll enjoy your music. 

It’s best to use closed-back home recording headphones. They feature snugly sealed earcups. You won’t have noise leaking into your mic, especially when you’re recording vocals. 

Closed-back headphones are also great for when you’re practicing or performing with others. They help you to focus on your performance without distractions. 

These are few examples of closed-back headphones that can be used for a home recording studio, to find out the latest price click the link, it will take you to Amazon.com:

AKG Pro Audio AKG K72

Sennheiser HD280PRO

Audio-Technica ATH-M50x

Beyerdynamic DT 770 PRO

Shure SRH1540

You can also use open-back headphones. What’s the difference between closed-back and open-back headphones? The earcups for the latter let air pass through unhindered. And that results in a more spacious sound. 

Open-back options are also great at helping you find specific instruments in your mixes. Plus, they sound more natural — even more accurate — than closed-back options. And most people find they’re a better bet for mixing and mastering. 

These are great examples of high-quality open-back headphones that you can use in a home studio setup, the link will take to amazon to check the latest price:

Sennheiser HD 599 SE

Beyerdynamic DT 990

Sennheiser HD 650

You can also find composite options that offer the best of each type of headphones. Consider picking semi-open headphones. These ones don’t let excess noise in or out. Plus, they deliver more open, spacious sound. 

I recommend the following semi-open headphones, click the link to check the price on Amazon.

Samson SR850

AKG K240STUDIO

Beyerdynamic DT 880


10. Acoustic Treatment 

Don’t be like most beginners. I mean, don’t underestimate the importance of your home studio’s acoustics. 

I get it — you’ve invested in great condenser mics and studio monitors. It’s easy to think that just because you’ve taken care of these items, you’ll get great sound without doing anything else. Well, you’re wrong. You must do more if you want audio that sounds professionally produced. 

You MUST give enough attention to your recording room’s acoustics. If there’s one factor that has an enormous effect on how your tracks sound in the end, it’s acoustics. Part of why world-class recording studios charge obscenely expensive rates is they’ve spared no expense on acoustic treatment. Such studios have some of the smartest acoustical engineers on the planet handling this aspect. 

Stop fretting about this, my friend. No one said you should be a highly competent acoustic engineer to enhance your space’s acoustics. But you sure need to have a firm grasp of the basics.

Stop worrying about direct sound as it travels from the source toward your mic. Its tone, for the most part, stays the same, and its frequency remains intact. That’s because it doesn’t come into contact with walls, the floor, and other surfaces. 

But you must take care when it comes to reflected sound. Some of the sound that leaves your guitar, piano or whatever doesn’t travel to the mic expressly. It briefly interacts with different surfaces in the room before reaching the mic.

In the process, small changes — good or bad — may happen to the sound. How the ears perceive the sound that eventually reaches the mic depends largely on the size of your studio.

Sound quality is also a function of how many reflective surfaces the room has, and the nature of those surfaces. 

To create a room with amazing acoustics, you need 2 things: space and money. Larger rooms have better acoustics than smaller ones, everything else being equal.

If you’ve ever been to any well-designed cathedral, you know that every sound feels fantastic. That’s because cathedrals are often large, and they’re designed to sound fabulous. 

Money is the other critical essential to creating a recording studio that sounds terrific. Let’s be honest here: you need tons of cash if you desire a studio that delivers to-die-for sound. But you’re a beginner, and you may not have set aside much money for this. Or you just don’t want to spend every dollar you have at once. 

So how will you circumvent these two problems, money and space? Here’s the trick — find a way of introducing fake reverb into the room. But how do I add fake reverb to my home studio? 

Here’s how…

How to Create Fake Reverb for a Home Recording Studio

You want more direct sound and less of reflected sound. So, filter out reflected sound while leaving behind the direct sound. Luckily, there’s a solution called acoustic absorption. It works, but to get excellent results, use acoustic absorption alongside sound diffusion. 

Unfortunately, when you eliminate reflected sound completely, the studio feels sort of like dead. And that doesn’t feel so great. To avoid this scenario, it’s advisable not to remove every trace of reflected sound. And that’s where diffusers come in. With diffusion, it’s pretty easy to achieve a natural balance in sound frequency. 

So, what are the elements of successful acoustic treatment? You need bass traps, acoustic panels, and diffusers. 

· Bass Traps

If you have a small room, you’ll likely have issues with bass frequencies. To absorb those low frequencies, use bass traps. But how will I take care of mid/high frequencies? Well, you can still use bass traps for these frequencies. Actually, you can use bass traps exclusively. The best bass traps are porous and filter out mid/high frequencies satisfactorily. 

Where do you install bass traps? Position them in the corners of your studio. You can’t choose not to use bass traps. They’re critical to the success of your home studio setup. 

· Acoustic Panels

Acoustic panels absorb mid/high frequencies. But they do pretty much nothing for low frequencies. Evidently, you can’t rely on them alone. They’re normally thinner than bass traps, and each unit covers a larger wall area.

But why use acoustic panels at all when you can just use bass traps and save money? It’s because they enable you to solve a problem that bass traps won’t help you address. They help deal with any sound waves occurring between opposite, parallel walls. 

· Diffusers

Finally, we have diffusers. They help you handle any remaining sound frequencies in the studio. Not everyone uses diffusers, though. Folks that don’t use them argue that they (diffusers) don’t enhance small rooms in any noticeable way. In addition, they’re expensive. I’d say use diffusers for when you want professional-quality recordings. 

Buying each of the 3 solutions described above can be expensive. Luckily, the market also offers all 3 of them together in affordable packages. I recommend 3-in-1 packages from either Auralex or Primacoustic.

A good option for a vocal booth or small room studio is the Auralex Acoustics D36-DST. It will cover a total of 36 square feet. If the space you are trying to cover is bigger, the acoustic panels can be placed in different parts of the room to reduce unwanted slap and flutter echo, and other sound problems, in your recording space.

Another great option is the Auralex D108LCHA/BUR D108L. It’s an excellent choice for small to medium-sized home studios, live rooms, and rehearsal spaces. It can give you good acoustic results, and it provides an elegant look that will impress.

The Primacoustic London 8, 10, or 12 are three different kits that you can choose depending on the size of the room that needs the acoustic treatment. 

Don’t confuse acoustic treatment with soundproofing, though. They’re not the same thing. And they don’t serve the same purpose. 

Difference between Acoustic Treatment and Soundproofing

Soundproofing is what you do when you want to keep peace with your family and neighbors. It seals out the noise so you can practice as hard and as long as you want without disturbing others. 

While soundproofing may help with a room’s acoustics, there’s a whole world of difference between the two. You may not always need soundproofing, but acoustic treatment is a must-do. Let’s just say soundproofing enhances a room’s acoustics but isn’t absolutely necessary. It’s something you do for others (especially neighbors) rather than for yourself. 

Using a Microphone Isolation Shield for Acoustic Treatment

If you are a vocalist and have a tight budget to get an acoustic treatment kit, you can use a microphone isolation shield. This is an affordable option, that delivers excellent results.

The best microphone isolation shields are:

Monoprice Microphone Isolation Shield

LyxPro VRI-20 Absorbing Shield

Neewer Microphone Isolation Shield

Neewer Tabletop Compact Mic Isolation Shield


11. A Recording Desk                    

I understand. You spent all the time shopping for everything else and forgot you need a place to place your recording equipment. 

You need a desk that looks great. Preferably one that blends well with the overall décor of the room. The desk should offer adequate surface area, enough to accommodate all the equipment you have. 

Most important, the desk should be sturdy. No one wants a wobbly desk. So, spend enough time researching the best studio desks for home recording. Here’s one more thing. Pick a choice you can move around with ease.

Here are some suggestions for a recording desk:

On-Stage WS7500

Studio Trends 46 by GloryBear

Z-Line Designs Cyrus Workstation

Studio RTA Producer Station Maple

Any of these options are desks with a sleek, modern look. They are attractive, sturdy, and have a large-surface-area. Click the links to check the latest price on Amazon.

Finally, you need…


12. A Comfortable Chair

It’s easy to overlook stuff that has little to do with the actual recording. Stuff like a comfortable home studio chair. Obviously, you need to have in that music room the best comfortable, ergonomic chair you can afford. You’ll likely be spending tons of hours sitting, after all. And that can end up hurting your health. 

Back pain is common among folks who sit for hours at a time. While chiropractic care can help resolve back pain, it can be quite expensive. 

It’s best to stand and walk around every 30 or so minutes. And having a comfy chair makes a whole world of difference. Not only will you enjoy doing your thing more, but you’ll also experience much less fatigue.

The best ergonomic chairs for your home recording studio are:

Hbada Computer Chair

HEALGEN Ergonomic Chair


Home Recording Studio for Beginners: Final Thoughts

In this home recording studio for beginners guide, you’ve learned a ton (hopefully). You now know what you need to create a successful home studio. You crave a home studio setup that works, but one that won’t drain your finances. That’s why this guide offers several budget and mid-range recommendations. 

As you’ve seen, setting up a home recording studio involves quite a lot. But it’s certainly something you can handle. This guide started you off, and that’s good. But you should probably read more on how to handle the actual setup.

What Wireless Microphone Frequencies are Legal

Just about every industry uses wireless audio solutions in some capacity, whether it’s for conferences, performances, or studio recording. That means that the current changes in the bandwidth available to wireless microphones have a wide-reaching impact across industries.

Wireless microphones work on either a licensed or an unlicensed basis. Most of the time, wireless microphones use frequencies that fall under the TV band. In 2017, though, countries began limiting the frequencies that wireless microphone users could use.

Which wireless microphone frequencies are legal? What does this mean for the future? Those answers require more than a list of legal wireless microphone frequencies. The more complete answer is that wireless microphones cannot use the 600 MHz band, albeit with a few exceptions.

Those exceptions permit some people to use wireless microphones on select frequencies and if it’s secondary use. Also, additional bands will be made available as the 600 MHz band is transitioned over to mobile broadband and emergency services.

Let’s break it down a bit more.

600 MHz Band and Wireless Microphones

A wireless microphone transmits sound without a cable. Broadcasters, news crews, stage performers, churches, and conference centers are just a few of the venues that rely on these microphones. The quality ranges according to the intended use.

Consumer wireless microphones have short-range applications, usually more than 100 meters. These microphones are license-exempt frequency bands like VHF and UHF. The ranges are 902-928 MHz, They also span 2.4 GHz, along with 5.8 GHz.

Why Is the ISED and the FCC Repurposing the 600 MHz Band?

Beginning in 2014, international discussion began about repurposing the 600 MHz band. Why is this happening? It’s because the band is now reserved for wireless services as well as public safety use. Mobile broadband includes bandwidth for smartphones.

Interference with Wireless Services

Wireless microphones that use the 600 MHz band interfere with these newly-repurposed licenses. Thus, wireless microphones must cease operation. Production of microphones in the 600 MHz band reduced as a result.

Joint Decision by ISED and the FCC

In 2015, ISED Canada and the United States’ FCC issued a joint decision to repurpose the 600 MHz band. This decision impacted wireless microphones that operated within that frequency range.

Both the US and Canada adopted a plan to transition devices like wireless microphones off the 600 MHz band. They did so because wireless microphones will interfere with mobile broadband systems when both are within the same frequency range. Thus, wireless microphones must move to other frequencies.

Transitioning Wireless Microphones

Beginning in 2017, the amount of band spectrum that can be available to microphones started to decrease. Frequencies between 614-698 MHz were repurposed for wireless services. Wireless microphones can no longer access these frequencies.

By July 13, 2020, all wireless microphones that operate between the 617-652 MHz/663-698 MHz frequencies will cease. Wireless microphone use will be available at frequencies below 608 MHz. They will also be available between 614-616 MHz, as well as the 653-663 MHz frequencies.

The following list is a few examples of popular wireless microphone systems by brand that are within the legal frequency band:

  • Shure BLX24/PG58
  • Shure BLX24/SM58
  • Shure GLXD24/B87A
  • Shure BLX1288/ Dual CVL/PG58
  • Audio-Technica System 10 ATW-1102
  • Audio-Technica System 10 ATW-1101/L
  • TONOR UHF Wireless Microphone TW-820

US Authorized Frequencies

In the US, the FCC permits wireless microphones to be used in two ways, as licensed as well as unlicensed. Though, it depends on the frequency band. Most wireless microphones sold in the US use a spectrum in the UHF and VHF bands, or channels 2-51, with the exception of channel 37.

Unlicensed Operations

One can also operate a wireless microphone as a co-primary with one or more broadcasting auxiliary services, as long as it’s between 944-952 MHz. And, it must be limited to broadcast networks.

Licensed Operations

After July 13, 2020, you cannot operate a wireless microphone if it’s in the 600 MHz band, except within the ranges previously listed. The FCC made additional spectrum available for licensed wireless operations. These include the 169-172 range. It also includes part of the 900 band, 1435-1525 band. And, it includes the 6875-7125 band.

Secondary Operations

The FCC permits wireless microphones between 941.5-952 MHz, 952.85-956.25 MHz, and 956.45-959.85 MHz. It also permits it between 6875-6900 and 7100-7125 MHz bands. Though, this is only available to broadcasters, movie and television productions, and sound companies. Further, microphone use must be secondary. And, they cannot interfere with primary users.

Canadian Authorized Frequencies

In Canada, wireless microphones with the 26.10-26.48 MHz bands, 88-107.5, 150-174, 450-451, and the 455-456 MHz bands are stable. ISED states that these do not cause interference issues.

License-Exempt Use

License-exempt use of the bands that fall between 902-928, 2400-2483.5, and 5725-5850 MHz is permitted. It includes common consumer applications like RLAN. Wi‑Fi, Bluetooth, for example, fall under the RLAN category. Operation within these bands does not generate interference with other devices.

If license-exempt wireless microphones operate in UHF, they can operate on unused TV channels. Though, they will not be protected from interference. Users can obtain a license in order to receive some interference protection.

Licensed Wireless Microphones

There are about 75 people in Canada who hold 450 wireless microphone licenses. These licenses are for microphones that work in the VHF/UHF broadcasting bands. Canadians register about 100 wireless microphones every year. Most of these are short‑term, not lasting more than a few weeks. The majority of the wireless microphones are license‑exempt

Impacts of Repurposing the 600 MHz Band

Due to the repurposing the 600 MHz band, people who use wireless microphones will be impacted as the transition reduced the spectrum that will be available. Further, existing TV stations will have to move from above 614 MHz to below 608 MHz.

On top of that, the band 608-614 MHz is dedicated to radio astronomy services, so it is unavailable. As broadcasting stations make the transition to the lower frequencies, less spectrum is open for wireless microphone users.

New Frequencies for Future Generations of Wireless Microphones

The FCC and ISED are considering making new spectrum available to wireless microphones. The range is between 941-960, 6930-6955, and 7100-7125 MHz frequency bands. This spectrum is for secondary microphone use only. These will be the newest legal wireless microphone frequencies.

Further, the two countries are doing so in partnership with the United Kingdom and other countries to create a common industry standard.

Canada and the US have similar incumbent services that can operate within these frequency bands. These are compatible with the frequencies and wireless microphones manufactured in other countries. Thus, there are many possibilities for wireless microphone development and operation in the future. (Those opportunities will be for secondary use.)

6 Tips for Choosing the Best Portable PA System for Live Music

As a DJ or performing musician, you need a PA system that can capture, mix, and amplify your performance to deliver to your audience your sound as natural and clear as possible.

Nowadays there are so many different PA systems tailored to all kinds of live performances making it difficult to choose the right PA system for live music.

You need something that is easy to setup yet delivers high quality audio. For a performing musician, live band, or DJ having the right PA system makes all the difference because what comes out of the speakers is what the audience is going to hear.

This article is a simple buyer’s guide aimed to help live music performers understand the characteristics and specifications that need to be considered when selecting the best PA system for live music.

I will walk you through some considerations to help you find the best PA system for you, giving you some tips from my own experience with some of these systems that I own or have used in the past.


How to Choose the Best Portable PA System for Live Music

When choosing a PA system there are some variables that need to be considered to make the right choice. For example, you’ll need to know the answer to the following questions:

  1. The size of your audience and noise level
  2. Do you need your PA system to be portable?
  3. Do you need your PA system to be Battery powered?
  4. How many input channels do you need?
  5. What sound quality do you want?
  6. How much money do you want to invest?

By answering these questions, it will be easier to choose the right PA system for your needs.


The Size of Your Audience and Noise Level

This is the first step we need to consider because it will be the starting point to choosing the right system.As the size of the audience and event venue increases so does the amount of power (measured in Watts) and SPL (measured in Decibels) that would be needed for your sound reinforcement system.

Just to clarify, SPL stands for Sound Pressure Level and it is a measure of how loud a PA system is. For example, by doubling the power of your system that doesn’t mean that you are doubling the loudness, by doubling the power you only increase the loudness by 3dB. It would take approximately 10 times the amount of power in watts to perceive twice the loudness.

Therefore, the SPL measure of the loudness of a speaker system is a very important specification to consider when choosing the right PA system for live music.

One thing to keep in mind is that as more loudness (SPL) is needed, the price of the speaker system increases as well.

In addition to the size of your audience, you must considerer if the PA system is going to be used indoors, outdoors, or both. If it is used indoors, usually less power and SPL would be needed but if it is used outdoors, since sound reflections decrease so does the overall loudness of your system.

If you are a soloist singer/player or duo that uses soundtracks for singing in small cafes or in gigs for audiences between 20-50 people, a small system like the Samson Expedition XP150 would be enough, plus it is very portable. Read the full review here.

For bigger audiences between 50-100 people, a good option is the JBL EON208P. This system is very portable but also provides many features. It comes with an 8-channel powered mixing console and Bluetooth pairing capability. Read the full review here.

Video Credits: Yamaha Corporation of America

Do you Need your PA System to be Portable?

Another key factor that we need to take into consideration is the portability of the speaker system.

Conventional sound reinforcement systems are made of several separate pieces of equipment such as mixing board, speakers, monitors, effects, etc.  These traditional systems are heavy, require lots of space to transport, and take a long time to set up on stage.

If as a performing musician, you need to move your PA system to different venues and don’t have the space to transport the system, you are probably better off with a portable system. A portable PA system even though is more limited than traditional systems, they are very light and easy to transport. They easily fit even in the smallest of compact cars and can be set up in a few minutes.

If you are reading this post, probably you are a musician/singer or band that play in different events and just need a portable yet powerful system to play your gigs.

By my own experience, I can tell you that using a portable system is going to make your life much easier. I was part of a small acoustic group.  Each time there was a gig I had to move a whole bunch of equipment until I got tired of it and decided to find a portable system to fit our needs.

I bought two Bose L1 Compact speakers and connected them to a small Yamaha MG10xumixer. In less than 20 minutes everything was set up and ready to go. To learn more about this portable speaker from Bose read the full review here.

If you are a solo performer that needs to hook up a guitar and a microphone for vocal, only one Bose L1 compact will be enough for indoor venues between 100 to 120 people and for outdoors between 70 to 90 people.

If you need a system with higher SPL for outdoor events check out the Bose L1 Model 1S Single B2 Bass Speaker System. This system would be enough for audiences to up to 500 people. If you are a band, two of these systems with a bigger mixer like the 16-Channel Yamaha MGP16X would be perfect for your gigs.


Do you Need your PA System to be Battery Powered?

Nowadays there are some awesome PA systems that are battery powered that can be used for hours of uninterrupted performance time and can provide excellent sound quality.

In some venues it could be difficult to find a power outlet exactly where you want to setup your system. So, you would have to run extension cords all over the place and that would make your gig look unprofessional and disorganized.

For instances like that it would come very handy and ideal to have a PA system that would operate without having to plug it into an outlet. One of such a system that provides excellent sound quality is the Bose S1 Pro. It has a 3-channel mixer specifically designed and sonically tailored for acoustic instruments like a guitar, ukulele, violins, cello, and vocals. It can also be paired with any Bluetooth device like a phone or table to stream music from it. For a full review of this awesome system read this article.

For bigger venues or outdoor gigs, the JBL EON ONE PRO portable battery powered PA system for live music would be a perfect choice. It features a 7-Channel mixer with Hi-Z and XLR inputs, phantom power, and XLR pass-thru for expansion. It includes a rechargeable battery that delivers 6 hours of playtime.

For your backing tracks, you can pair your mobile devices via Bluetooth for streaming and use the built-in stand and USB charging port for your mobile devices. Read a more detailed review of the JBL EON ONE PRO here.


How Many Input Channels do you Need?

This is another important factor you need to know. If you need a PA system for just one instrument and one microphone, then you would need at least a 2-input channel system. Most portable PA systems have between 2 and 4 channels. The bigger portable system can go up to 8 or 12 input channels.

Most systems mentioned in this article are between 2 and 7 input systems. In case you have a 2-input channel system such as the Bose L1 Compact and need more channels, the best portable way is to get a small mixing console and your problem would be solved.

For increasing the input channel capabilities of your portable PA system, I highly recommend the Yamaha mg10xu mixer and the Mackie PROFX8V2 mixing console. This two units will meet or exceed your expectations I have personally used both and they have great preamps, good audio effects, and an unbeatable price.


Sound Quality

The sound quality of a PA system can be measured by how close to the original sound can a system reproduce. It is basically an assessment of the accuracy of the audio that the system outputs.

I have found out that as less equipment is in the audio chain the better the sound. I am not saying that the different audio equipment that are available are not necessary in some cases, all I am saying is that for a performing artist that need a PA system for live music it is better to use a system that can reproduce the sound as accurately as possible of whatever is being played.

For a system to be able to reproduce a sound as close as possible to the original it must be able to reproduce all the frequencies between 20Hz to 20kHz. Therefore, most systems have tweeters that reproduce the high frequencies and a woofer that reproduce the middle and low frequencies.

I don’t like the idea of splitting high and low frequencies using a passive frequency crossover in the speaker cabinet, because as this is done some middle frequencies are lost. Also, some of the tweeters can add so much hiss to the sound that makes it sound artificial and unnatural.

I prefer a PA system that has drivers that reproduce high and mid frequencies together without splitting them and only splits the low frequencies (filler frequencies). The reason is because if a speaker can reproduce high and mid frequencies without splitting them the sound would be more accurate and natural.  

This is the result that we want, a sound that is as close as possible to the original source from where is being generated, namely a voice, instrument or recording.

Video Credits: voicecouncil

How Much Money do you Want to Invest?

You can invest as few as $200 to get a decent system or could spend thousands. Depending on the budget you have is the type of speaker you’ll get. Keep in mind that as prices increase so does the quality and power of a PA system. 

When selecting a portable PA system for a band or for a solo artist first address your audio needs before committing to buy a system. If you have a big budget it doesn’t mean that by buying an expensive system, it would fulfill your audio needs. First asses all your needs by answering the six questions that we mentioned at the beginning of the article and then decide what would fit your needs.


Final Thoughts

In this article, we are trying to provide you with enough information to make the right choice when purchasing a portable PA system. To help you with your decision I have mentioned some of the best portable PA systems for live music that are available in the market today. These systems have been tested and are being used by many professional musicians and performers around the world delivering the best results.

We have also included links for you to read detailed reviews of the mentioned systems. All of these systems are of high quality and each one of them will meet or exceed your expectations.

  • « Go to Previous Page
  • Page 1
  • Interim pages omitted …
  • Page 10
  • Page 11
  • Page 12

Primary Sidebar

Search

Guides & Tutorials

  • Choosing a Portable PA System
  • How to Be a Better Singer
  • Build a Budget Live Streaming System Using PTZ Cameras
  • How to Get the Best Audio Quality on YouYube
  • Setting Up Stage Monitors
  • Mixing Console Basics
  • How to Position PA Speakers
  • Stage Sound System Set-Up
  • How to EQ Live Vocals
  • How to EQ Live Sound
  • Daisy Chain Active Speakers
  • Zoom Audio Settings for Music
  • How to Livestream a Wedding
  • Improve Your Livestream Audio Quality
  • Microphone Preamp Buying Guide

Featured Posts

Treblab X9 Pro: Tough Earbuds, Big Performance

Escape the Noise: Best Affordable Noise-Canceling Headphones

How to Combine Passive and Powered Mixers

What is a Ground Loop? – 5 Simple Ways to Fix the Buzz and Hum

Disclaimer

VirtuosoCentral.com is a participant in the Amazon Services LLC Associates Program, an affiliate advertising program designed to provide a means for sites to earn advertising fees by advertising and linking to Amazon.com.

Home  About  Contact  Disclaimer  Privacy

Copyright © 2019-2025 Virtuoso Central. All Rights Reserved.