Are you looking at your mixer with all its knobs and sliders and wondering how to get the best sound quality out of your music? Have you spent hours trying to work it all out but aren’t getting any closer to audio that sounds professional?
It’s easy to feel overwhelmed when it comes to learning sound engineering, especially if you’re attempting to learn it all on your own.
No worries though, we’ve got you covered. Keep reading to find out our best tips for achieving the best sound quality with your audio mixer.
The Audio Mixer’s Role
You might call it a mixing board, mixing console, or even soundboard. However, it’s purpose is still the same. The purpose of an audio mixer is to take two or multiple audio signals and join them together to produce one or more output signals.
Have you ever been to a live concert and thought the sound quality was on point? Well, somewhere, there was an engineer at a mixing board, ensuring all of the individual sound sources meshed together in one harmonious end product.
The sound engineer used a mixer to filter and optimize the sound by adjusting levels and enhancing sound with equalization and effects.
Audio Mixer Basics
When you first look at mixer, it might seem like there are a thousand different things going on. When in fact, there’s actually a lot of repetition when it comes to soundboards.
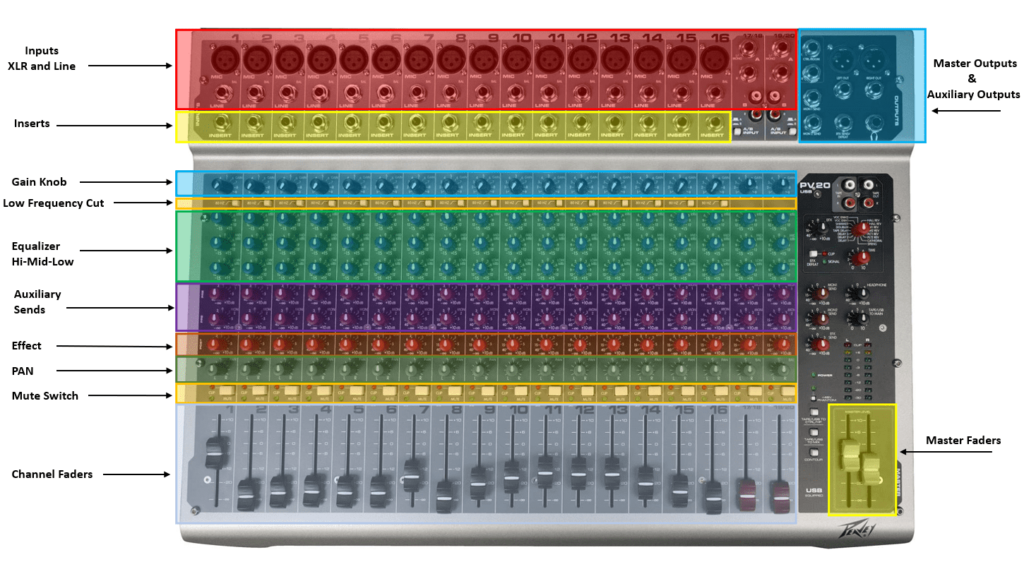
An audio mixer has multiple channel strips and is usually numbered going left to right. At the top of each channel strip is the signal input. As a live signal enter the mixing board, it travels down the strip through all the different controls and a fader at the bottom. The signal is then carried over to the master part of the board and then travels out to speakers.
All the channel strips have the same controls. No matter if you’re working with a soundboard with four channels or 100 channels, it’s all the same. Once you learn how to use one channel strip, you’ve learned how to work them all.
Learning the Soundboard
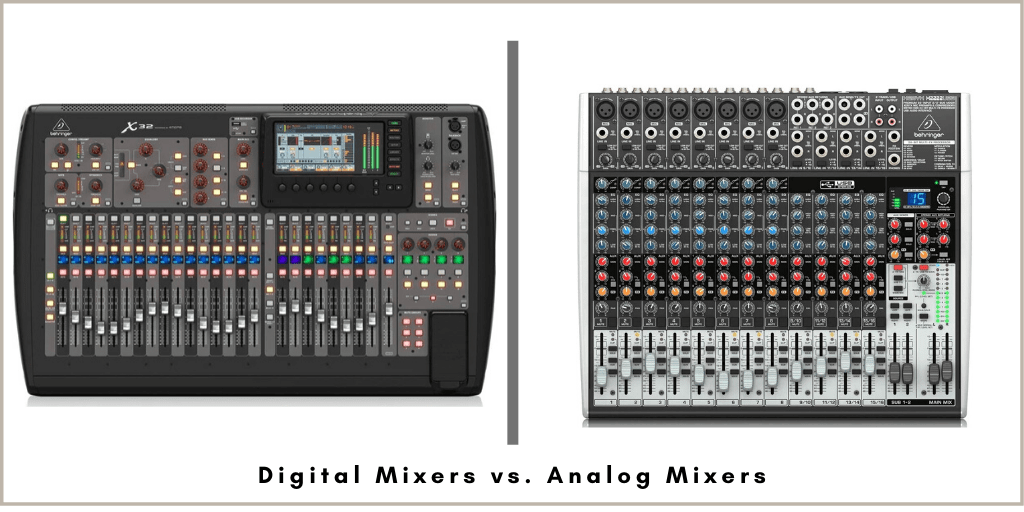
Nowadays, digital mixing boards have become very popular, albeit usually more expensive than their analog counterparts. However, regardless of whether you’re using an analog or digital mixer, they both mix sound the same.

The differences you’ll most likely see between the two are digital mixers tend to have a slightly different configuration and programming capabilities. Analog mixers tend to be easier to use and are a great place to start when first learning how to mix
At the very top, or what you might consider the “rear” of your soundboard, are your audio inputs. They’re the entry point for your live sound feed, like a guitar or microphone. Typically these audio inputs will either be XLR, 1/4″ audio jack, or an RCA.
Next, you have a gain control or sometimes called a trim control. The gain control adjusts the level for the incoming signal and activates the preamp, which turns the tiny input signal into a much larger signal.
After the gain control is the compressor. A compressor raises the volume on the quiet signal and lowers the volume on the loud signal. This allows for a smaller dynamic range and allows easier mixing.
Following the compressor’s control are the equalization controls. These allow you to adjust and control your treble, mids, and bass frequencies for each channel.
Your auxiliary channels come after and are commonly referred to as the “aux” channels. Aux channels give you the ability to send a secondary feed of the audio channel to another device. Next, you have your assigned and pan controls. This function directs specific channels to one or two of the stereo outputs.
And lastly, there is your fader slider. This control gives you the ability to lower or raise the presence of each individual channel as it goes into the final output.

Mixing Professional Sound Quality
So now you’ve got the soundboard functions down, let’s get into how to mix properly. Before you can produce a quality mix, you need to make sure that the sound source is on point. If the sound coming into the mixer is subpar, then the sound going out won’t sound good no matter what you do.
When possible, try using balanced XLR cables instead of unbalanced TR cables. This is because balanced cables help stop noise issues that can occur from external interference. These cables help transmit the audio signal from one spot to another, delivering a better quality signal.
Once you have quality signals coming in, work on getting the sound balance right. For example, it won’t matter how well you mix and eq your vocals if the guitar part is completely overpowering them. It is very important to get your sound balance right before you begin mixing anything else.
Now that you have your sound balance right work on panning and assigning sounds or signals to your outputs or speakers. This gives space to the various sounds being mixed and gives the sounds greater definition.
Tips for Equalizing Sound Like a Pro
If you wish to highlight or give a signal a little bit of sparkle, use your equalizing controls to do so. The channel’s EQ shapes the incoming signal’s frequency content to either boost wanted frequencies or decrease problematic ones.
- If the signal is not clear, you can try increasing the treble (high frequency), and your sound will get crisper and bright. If you decrease it, the sound gets more flat. Be moderate with the highs because too much emphasis in this frequency range can produce sibilance on the vocals and produce a piercing, screechy sound that can be hard on the ears.
- Increase the mids, and the core of your sound becomes more enhanced. These frequencies add fullness and warmth to the sound. Mid-range frequencies are between 250 Hz and 6000 Hz. It’s a good practice to be mindful of this range as well. If you go too heavy on these frequencies, your mix will sound harsh and uncomfortable. In other words, it will sound aggressive and abrasive with a metallic touch.
- Does your mix sound thin? To solve it, increase the low frequencies carefully, avoiding sounding boomy. Too much bass, and it will sound thick and muddy, lacking articulation and clarity. If it’s too boomy or muddy, decrease the low-frequency knob until you can clearly hear the mix with a balanced tone.
- When listening to your mix, if you notice that a signal or sound is all over the place, you can use your compressor to lower its dynamic. Just remember, too much compression will cause a sound to seem dead and takes the character out of sound.
Eliminate Background Noise
As mentioned earlier, if the sound coming into the mixer is subpar, then the sound going out will sound just as subpar. Background noise, whether it be traffic outside or echo bouncing off the walls, can really muddy up your overall sound quality.
Recording in a soundproof room with blankets on the wall or a sound booth is one way to deal with unwanted noise coming into your mixer. This is called “treating” your recording area. Other things like turning off fans or noisy electronics will help as well.
Ready to Mix
You don’t need a super fancy mixer to get a professional sound quality. Once you have a good understanding of the equipment you’re using, you can do a lot with a little. Just remember to have good quality sound coming into your audio mixer.
If you’re not sure what sound gear and set up is needed for a live band, check out our guide here.